Zones
What are Zones?
Zones are polygonal regions that can cover larger, irregular areas, such as delivery territories or service areas. They allow automatic triggering of location-based events when team members enter or leave these defined regions, and integrate seamlessly with Jobs, Forms, and Alerts.
In this guide:
-
How to Create a Zone
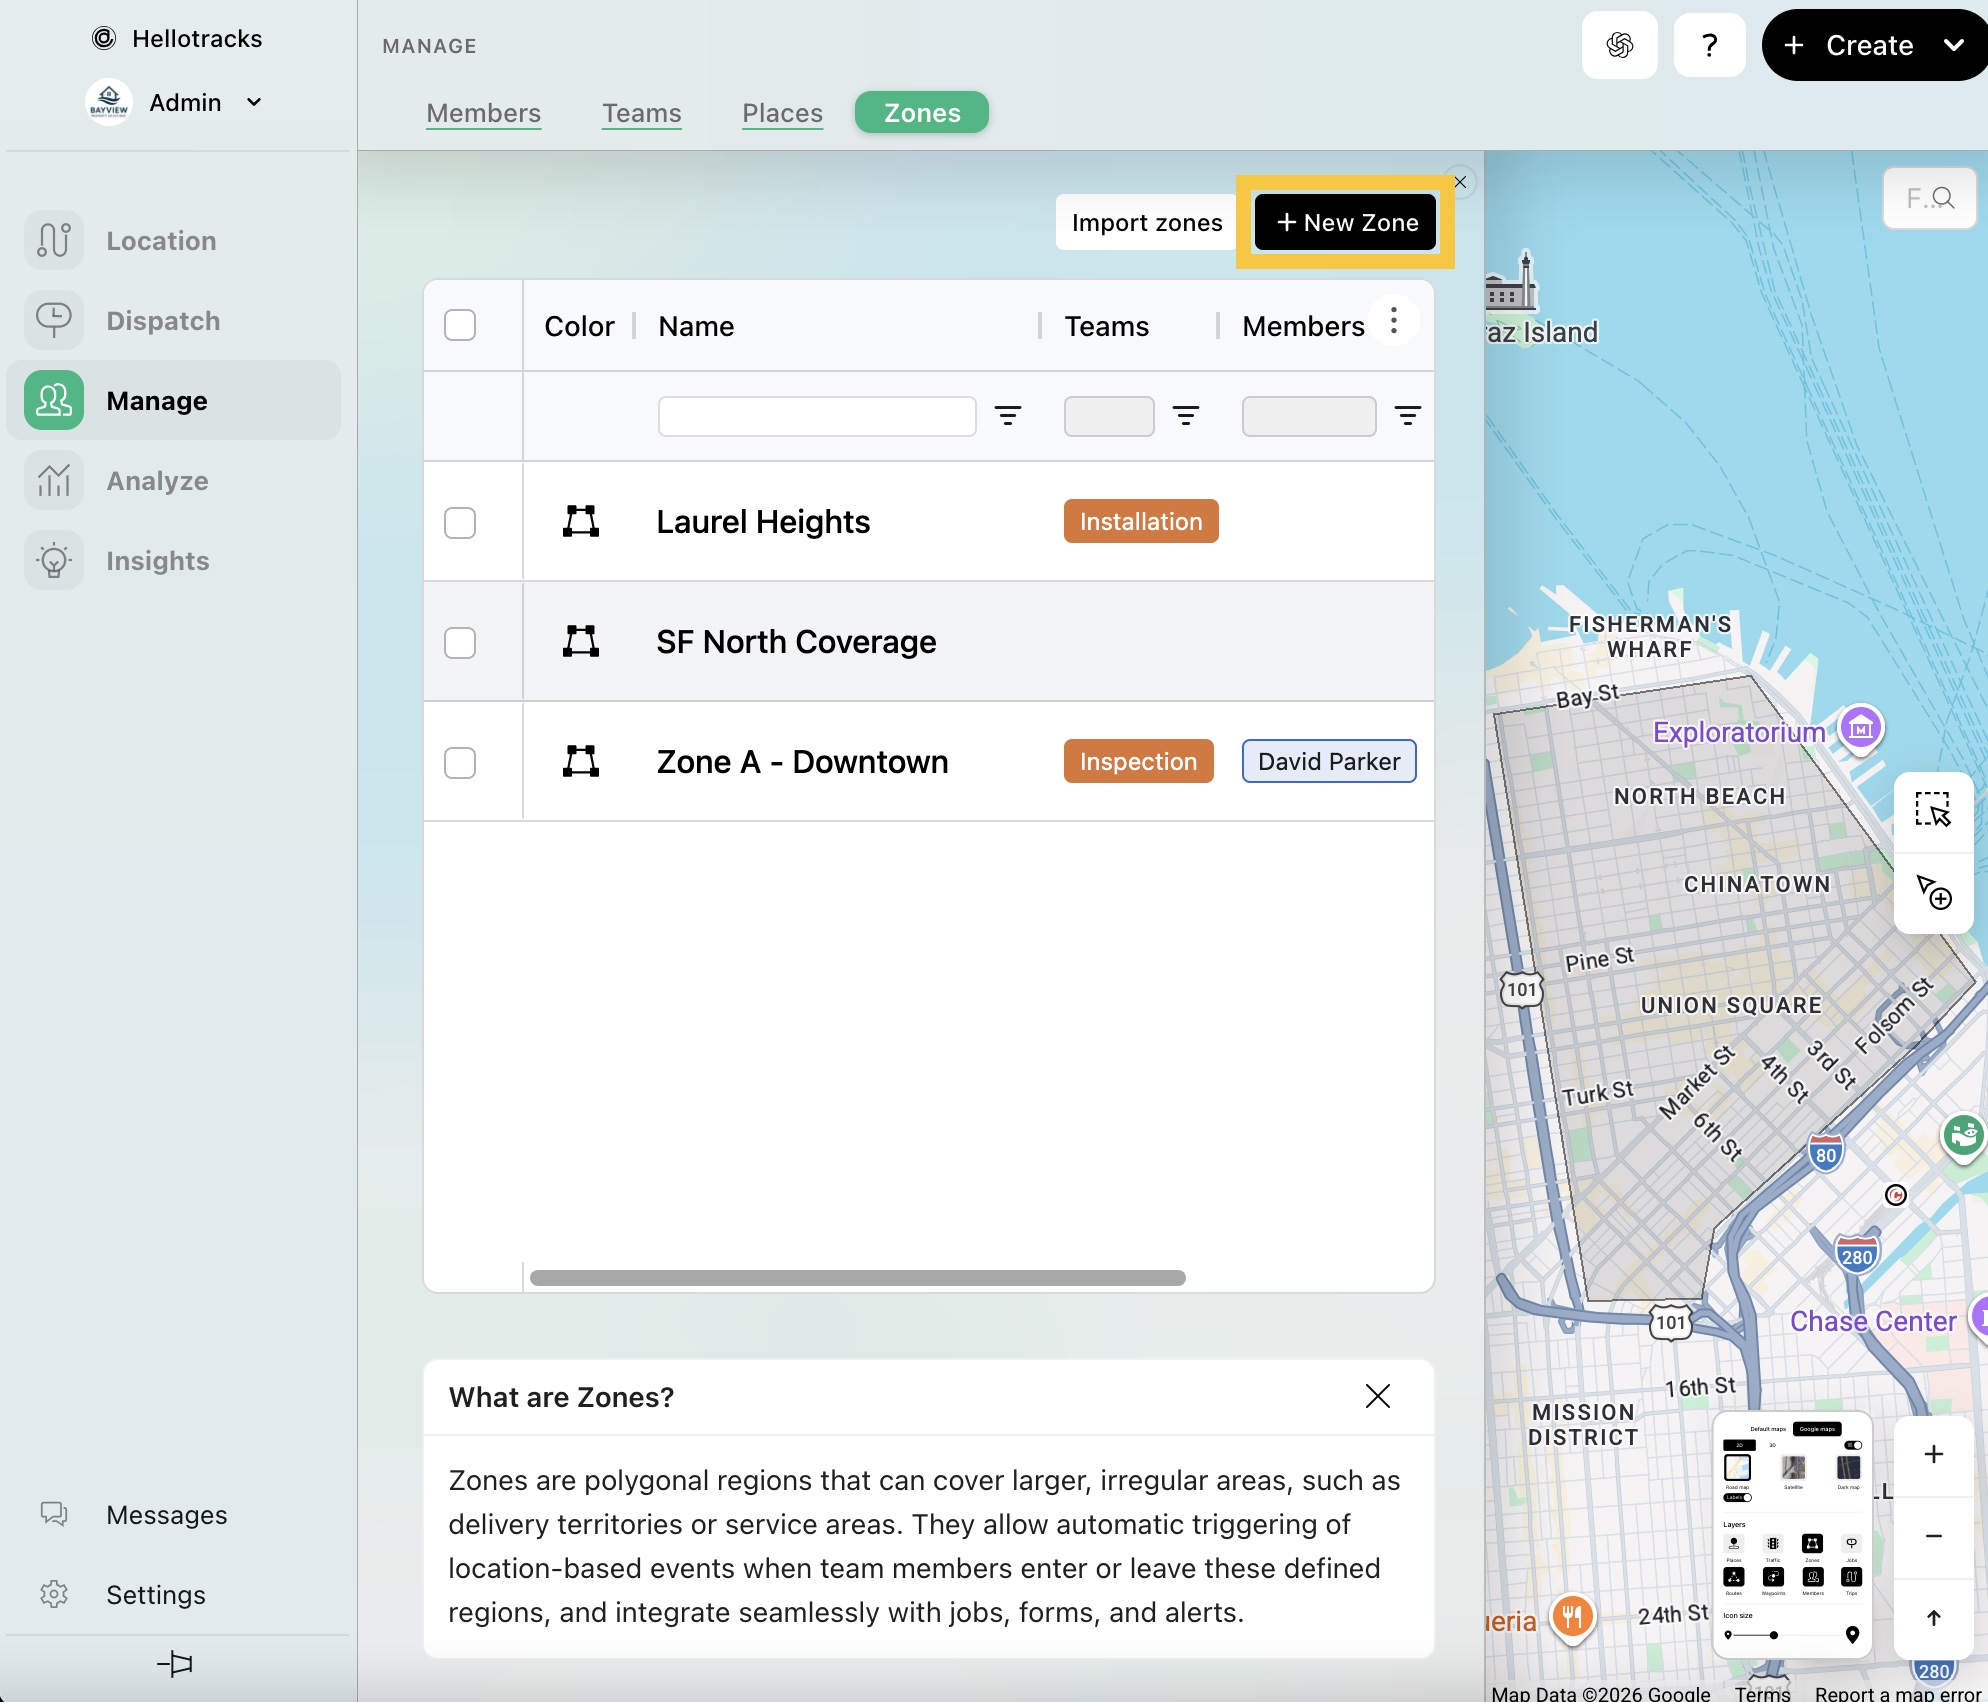
Step 1: Go to Manage from the main menu, then select Zones.

Step 2: Click + New Zone.
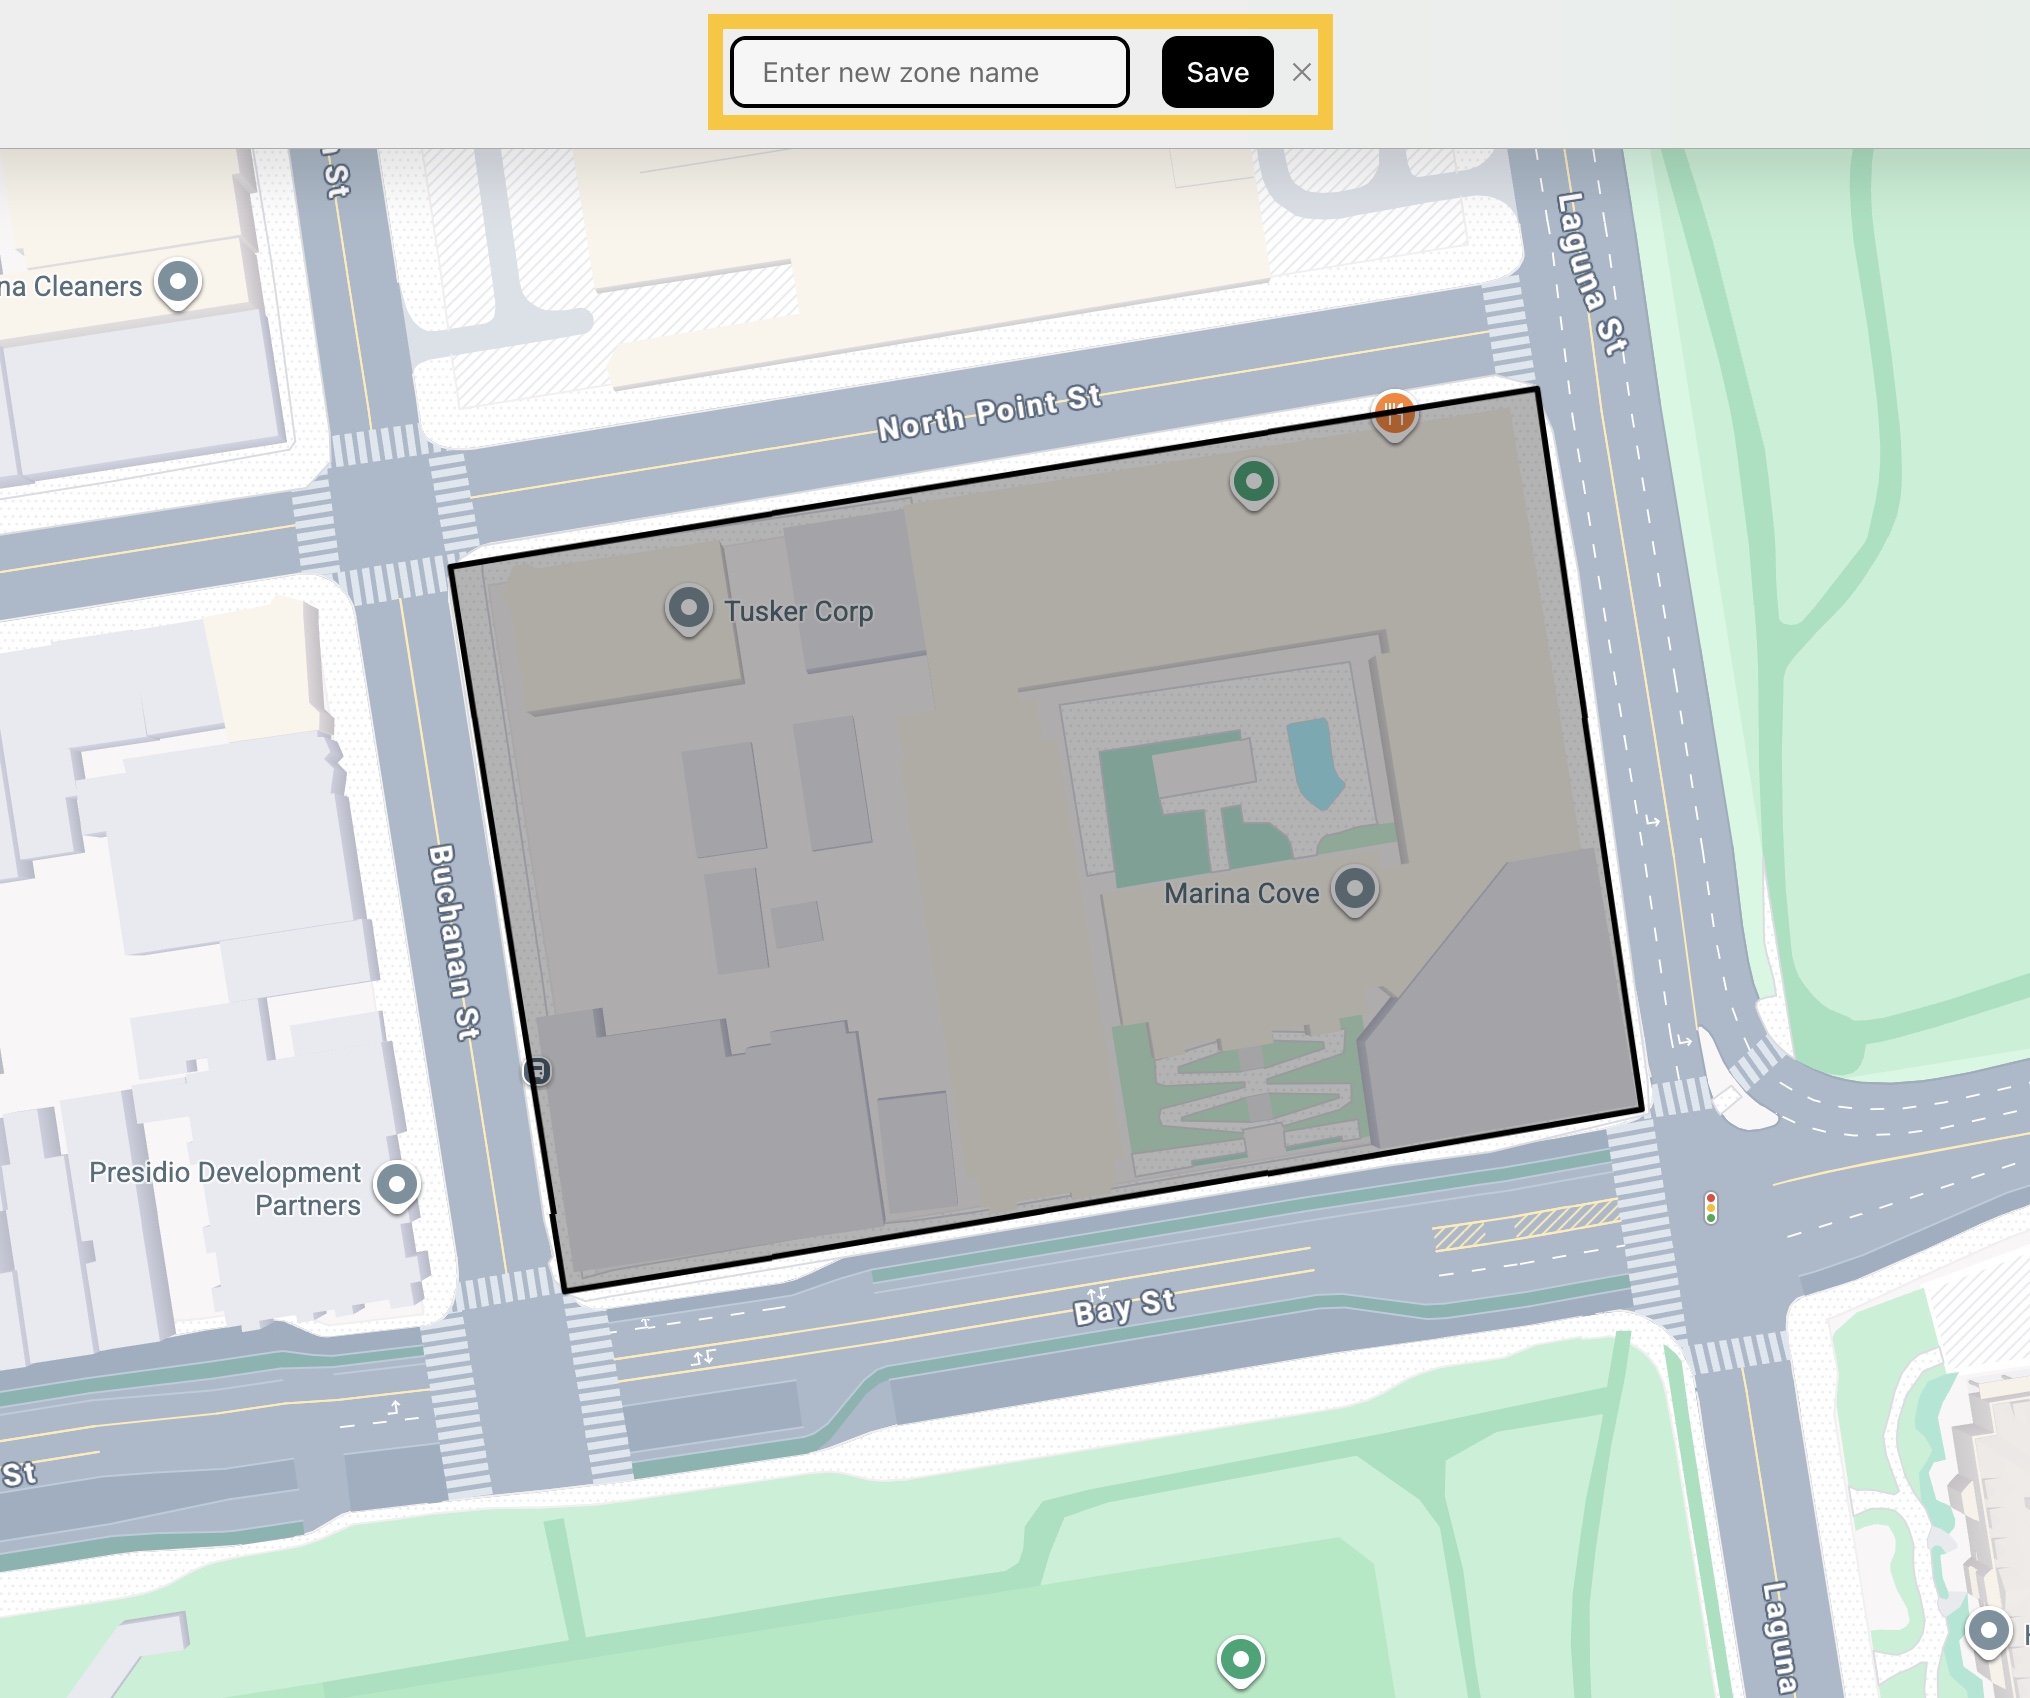
Step 3: Begin by clicking on the map to mark the first point. Then, continue outlining the area to form a polygon shape. Right-click the mouse button or click the last point to finish.

Step 4: Create a name for the Zone, then click Save.
-
How to Edit a Zone
Step 1: Go to Manage from the main menu, then select Zones.
Step 2: Click the Zone name to open its details. Update the Zone name, color, assigned teams, or assigned members as needed, then click Save.

Step 3: To edit Zone details in bulk, select one or more Zones and click Edit zones.

Step 4: Update the color, assigned teams, or assigned members as needed, then click Apply.

Step 5: Select a Zone and click Edit region to reshape its polygon on the map.

Drag any point of the Zone to adjust its shape, then click Save.

-
How to Import Zones
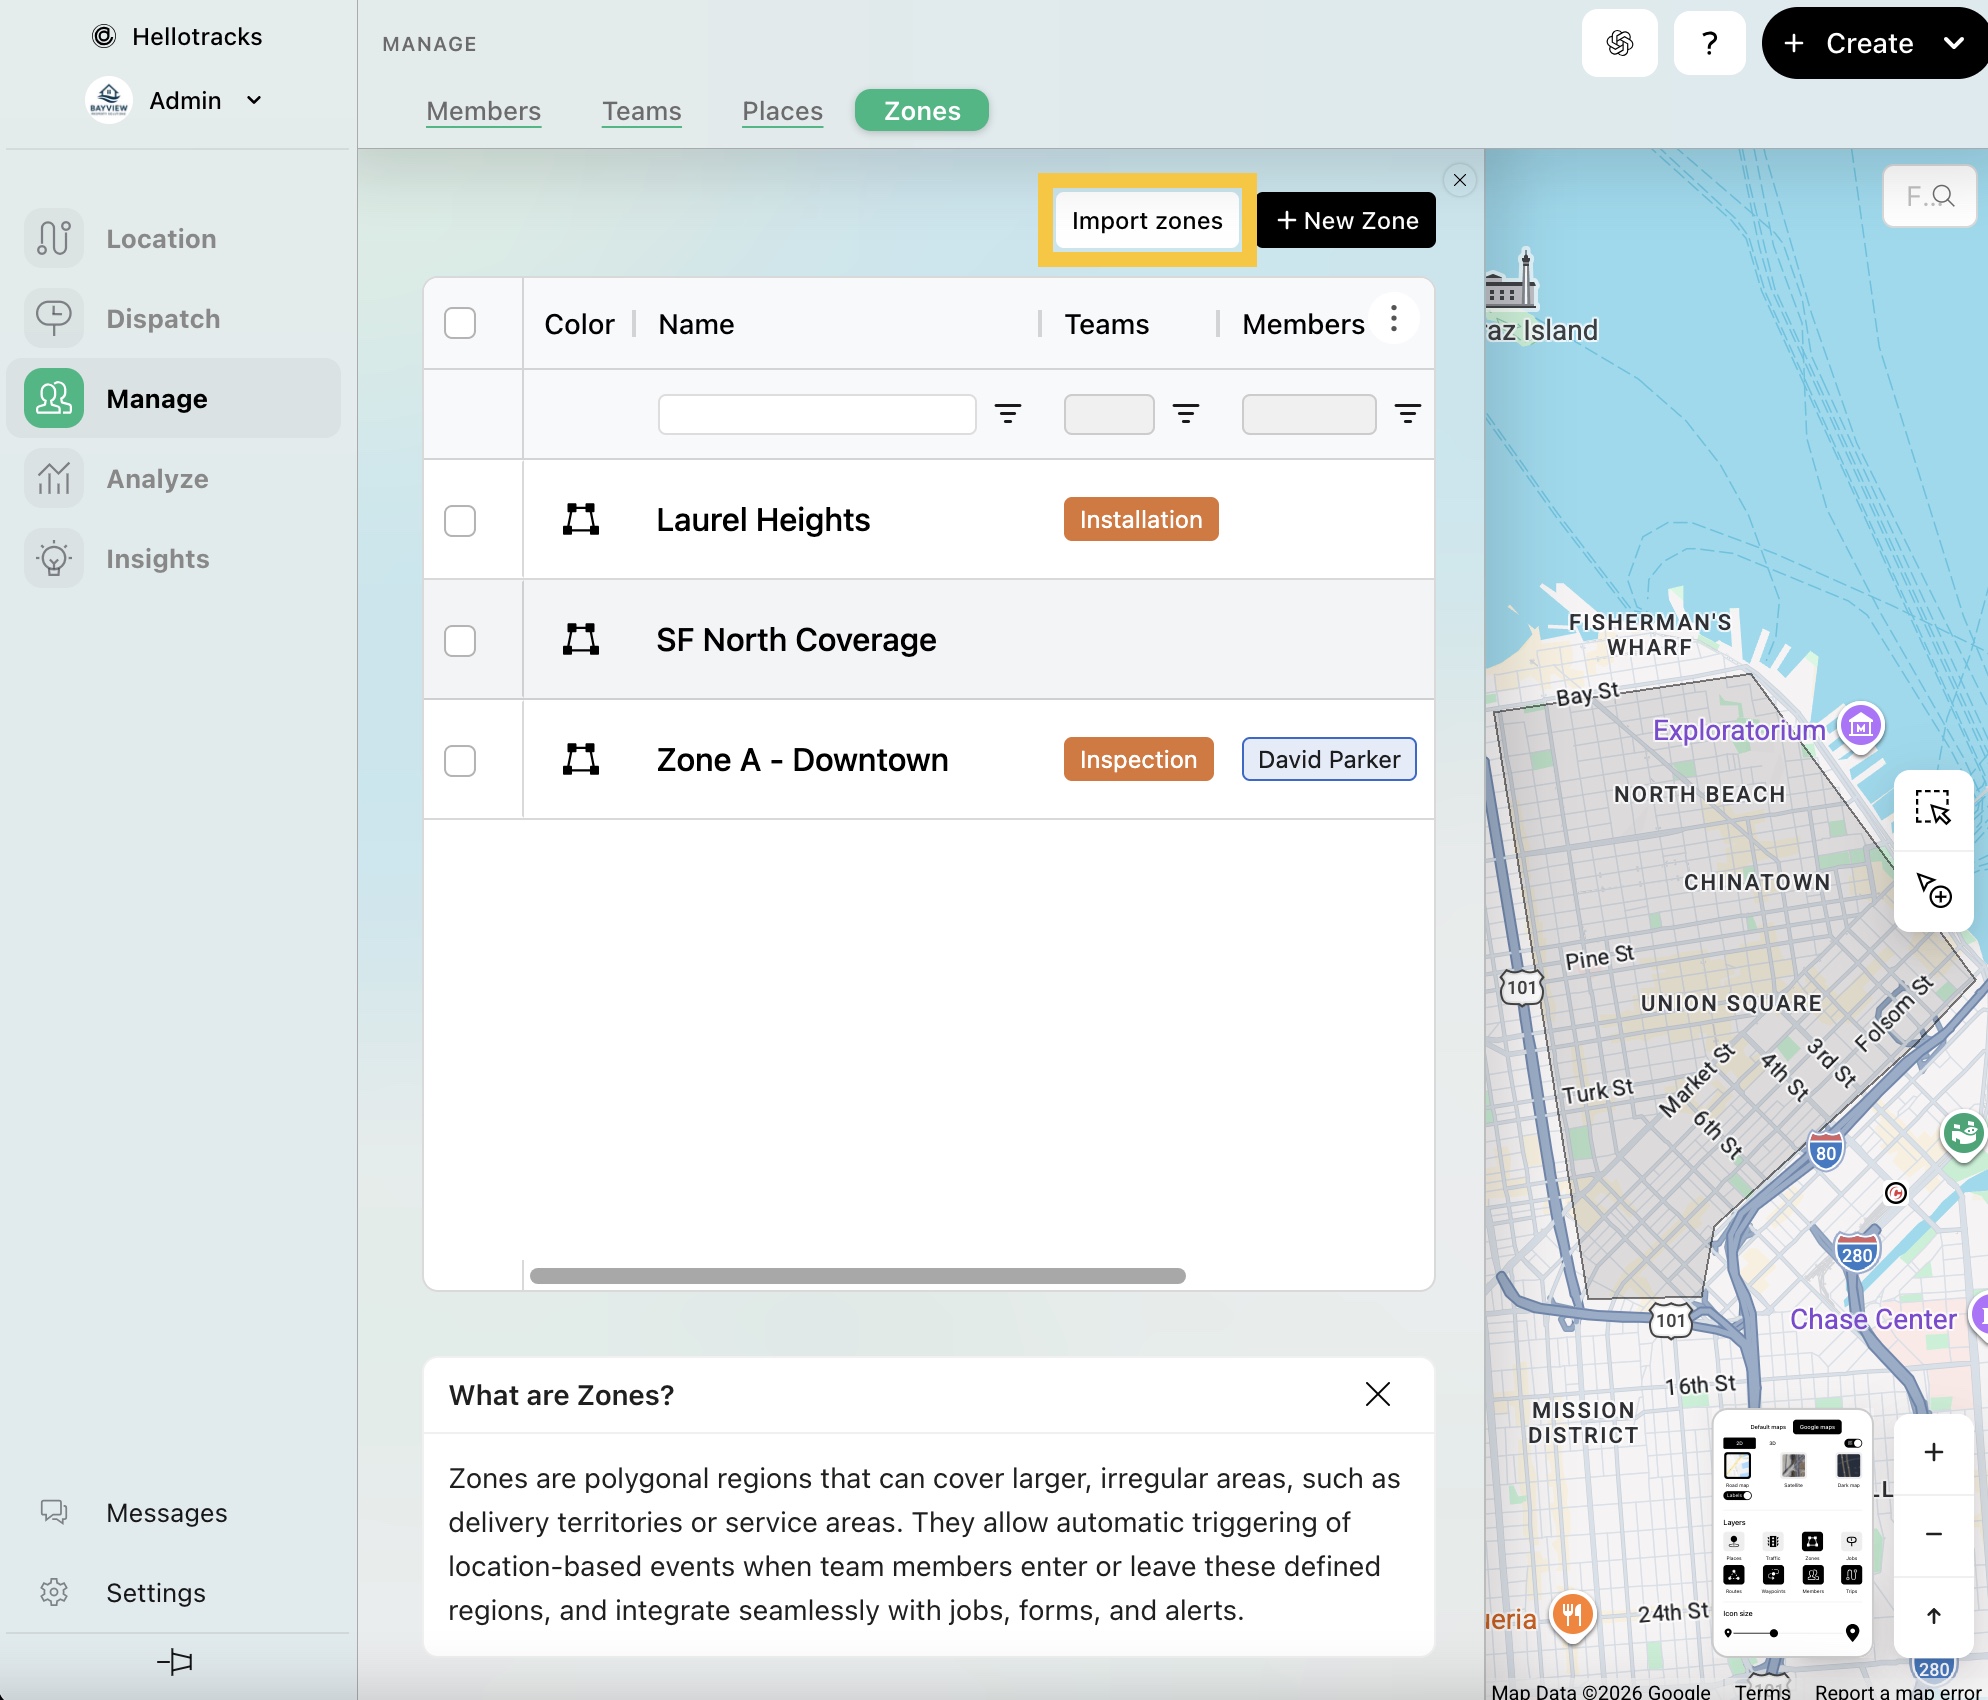
Step 1: Go to Manage from the main menu, then select Zones.
Step 2: Click Import zones.
Step 3: Import Zones by uploading a KML file containing polygons. Each polygon is imported as a new Zone.
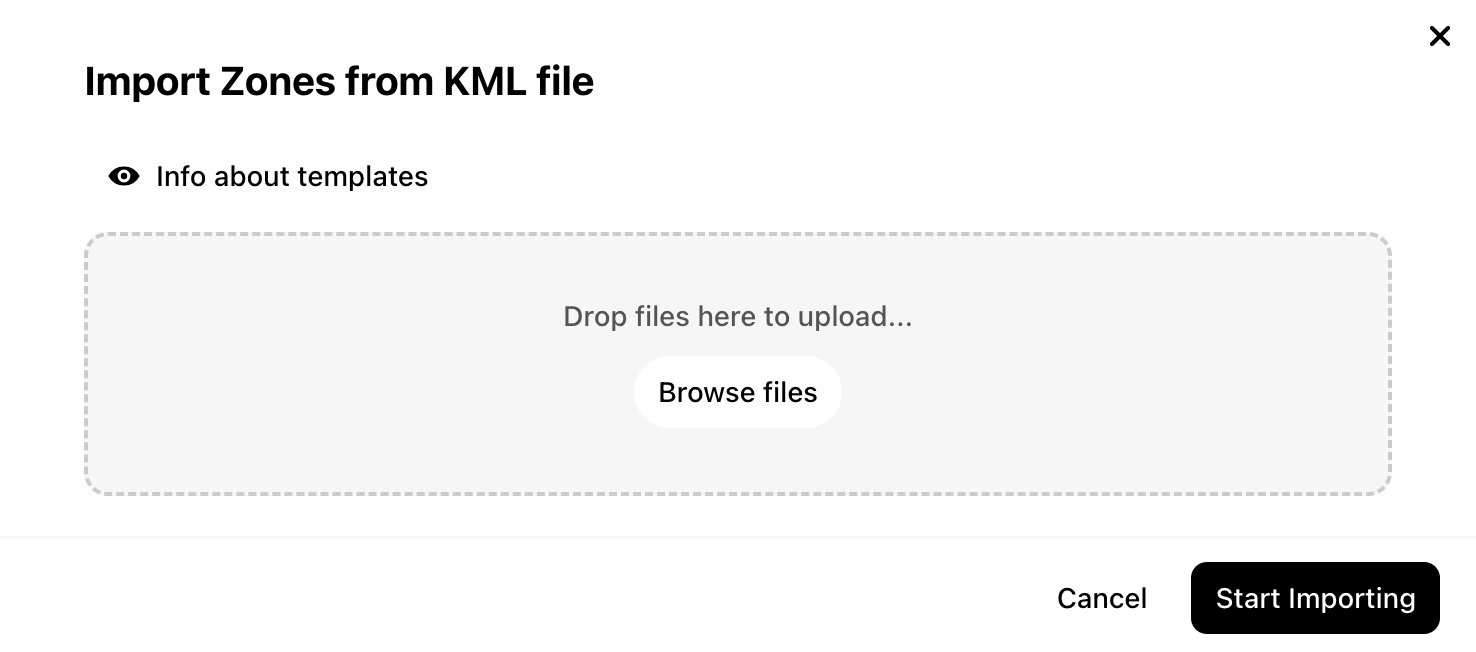
Step 4: Click Start Importing.