First Steps
This guide covers the initial setup of a Hellotracks Business account. It outlines the steps an Administrator completes during setup.
Setup takes a few minutes. Start on the web at hellotracks.com, then invite your team from inside your account. If a team member signs up in the mobile app before being invited, they create a separate personal account that won't appear in your web dashboard.
Prefer a video walkthrough? Watch our 10-minute Hellotracks Business demo for an overview of the main features and workflows.
Table of Contents
Get Started
Track in Real Time
Create Places and Jobs
See What Happened
1. The Setup Card
When your company is new, a setup card on the Live map shows you one step at a time, for example Step 1 of 4. The steps fit what your team does: Repair, Cleaning, Home care, Security, Delivery, Field sales or Other. You pick it when you set up your company, or on the card itself. Each step ticks off by itself when it happens, for example when the first phone is on the map, the first job is sent or the first visit is counted.
The first step gets your team on the map. Click Copy invite to copy a ready-made message with your invite code and send it to your team. With Track my own phone too you install the app on your own phone.

You can Skip a step and pick it up later. To open the card again, click the dropdown menu next to your profile and select Setup.

2. Download the Mobile App
You can install the mobile app on your own phone to see yourself on the Live map. We recommend trying out the mobile app to get a sense of the field staff experience.
Remember that you are an Administrator, which means that users with the role of Workers or Operators won't have access to your location.
From the Google Play Store or the App Store, search for and install the Hellotracks app.

Or click Track my own phone too on the setup card and scan the QR code with your phone.

Open the app, tap Log in and log in with your email or username and password.

The app then walks you through Set up your phone. Make sure you allow location Always or All the time, depending on your device, and keep precise location on, so tracking works even when Hellotracks runs in the background.
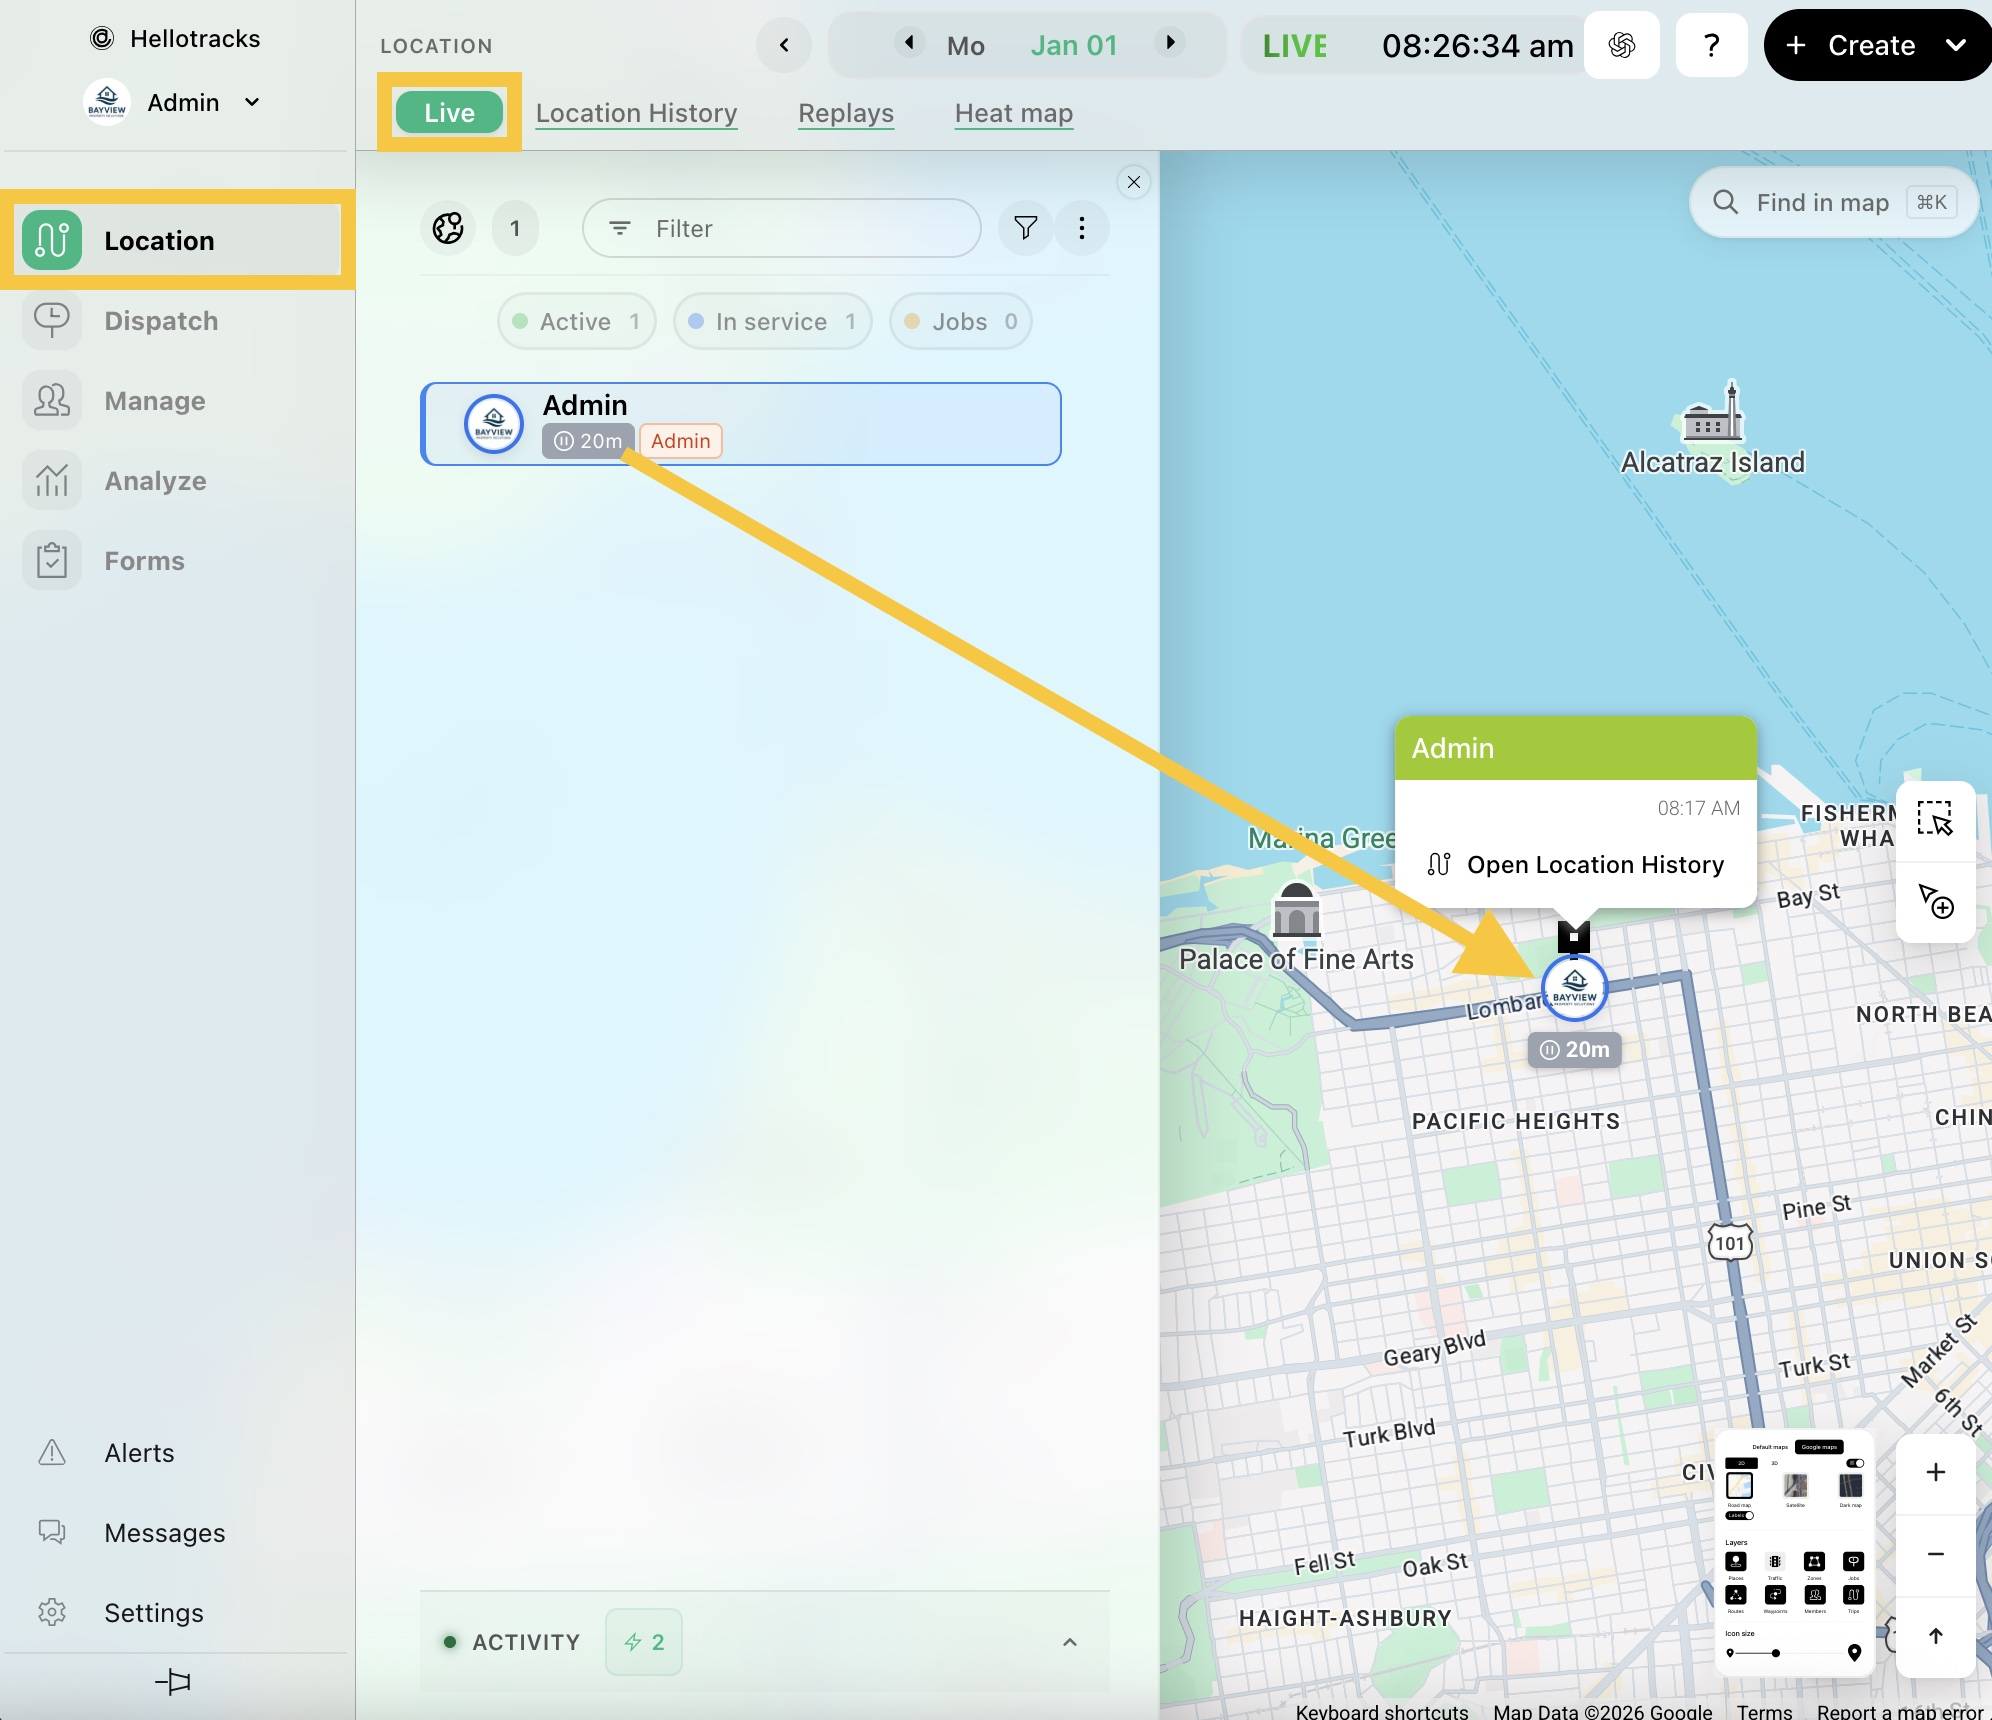
Once you are logged in, go to the web dashboard, select Location from the main menu, then click Live. Your profile icon appears on the Live map, and you can see yourself in real time with your status, such as on the way.
3. Adding Users
Go to Manage and select Members. Then click Invite people and choose Invite people.

Paste the names and emails of your team members, one person per line. Choose the Role and, if you like, a Team, then click Send invites. Each person gets an email with a link to join, and their email becomes their Hellotracks login.

Choose a role from the three options available:
- Workers only have access to the mobile app to share their live location and see their Jobs (tasks or assignments; explained later in 7. Creating Jobs).
- Operators can access both the web dashboard and the mobile app and can create, manage and dispatch Jobs.
- Administrators have the unique ability to add or delete members and manage the company account settings.
Alternatively, choose Add one person to create a member with a username and password and no email, or Import a file to add up to 200 people from a CSV or Excel file. You can also share your invite code: members who sign up in the mobile app with the invite code join with the Worker role. To learn how, click here.
All users you add need to install the Hellotracks app from the Google Play Store or the App Store and log in. Make sure they allow location Always or All the time, depending on their device.
4. User Permissions
As an Administrator, you choose what your Workers and Operators may do. For example, you decide whether Workers see the members of their own team on the map, can turn tracking off, add trips, create and edit places or message members of the same team.
Click the dropdown menu next to your profile and select Company settings.

Under Permissions, pick Workers, Operators or Administrators and turn on what they may do.

5. Live Map
All users who activate the mobile app appear on the Live map. Go to Location and click Live to follow them in real time and see each user's status, such as on the way or at a job.

6. Creating Places
Places are geofences that represent Workers' frequently visited locations such as headquarters, clients' locations or Job sites. When a Worker visits a Place, the mobile app automatically records their arrival, departure and total time on site.
From Manage, go to Places and click + New place. To add many places at once, click Import places.

Type the address or click the spot on the map, give the place a name and pick a Radius. You can also drag the pin and its ring on the map. Then click Create place.

7. Creating Jobs
Jobs are tasks or assignments that can be dispatched to Workers, typically involving activities at specific locations such as deliveries, service visits or inspections. Each Job also serves as a geofence that automatically records a Worker's arrival, departure and total time on site.
Go to Dispatch and click + (New job) next to the tabs.

Choose Where (an address or one of your places), enter What, pick Who and When, then click Create job. More details opens the new job in its sheet for everything else; nothing is saved until you click Create job. After creation, the Job appears in the mobile app for the Worker to complete in the field.

To create many Jobs at once, drop a CSV or Excel file on Dispatch, or click Import jobs next to the + button. Hellotracks checks every row before anything is saved. To learn more, click here.
Job creation and dispatch tools are only available with the Dispatch plan. These features are not included in the Location plan. To learn more, click here.
8. Check-in/out Notifications
Customize your check-in/out settings for Places and Jobs: click the dropdown menu next to your profile and select Company settings (see 4. User Permissions). Then go to Location & tracking and set Auto check-ins at places and jobs.

9. Location History (Field, Day and Trips)
Go to Location and click Location history. It opens on Field: everyone's day in one row per person, grouped by team, with a summary of who was out, jobs, time on site and kilometers driven. It also shows who needs a look, for example because of gaps, trips to review or a late start.

Click a name to open Day: that person's day from leaving home to coming back, with lettered stops (A, B, C…), the time on site at each stop and the drive in between. Each stop says whether it was a job, a place or a pause. Click Play the day to replay it on the map.

Switch to Trips for a table of all trips and stops with totals.
10. Creating Reports
Reports turn your team's recorded field activity into downloadable files for reviewing field operations and performance over time. Various report types are available depending on the information you need.
Go to Analyze and select Reports to see the available report types and create a report. To get a timesheet of your team every week, click Send me this every Monday. You can also schedule other reports to run automatically on a recurring basis.
