How to Customize Form on Job Completion
Workers fill in a form when they finish a job, along with photos and a signature. Each job has a Form section in its sheet, where you choose which form the job uses. A phone preview shows the form the way the worker sees it.
There are two types of completion form:
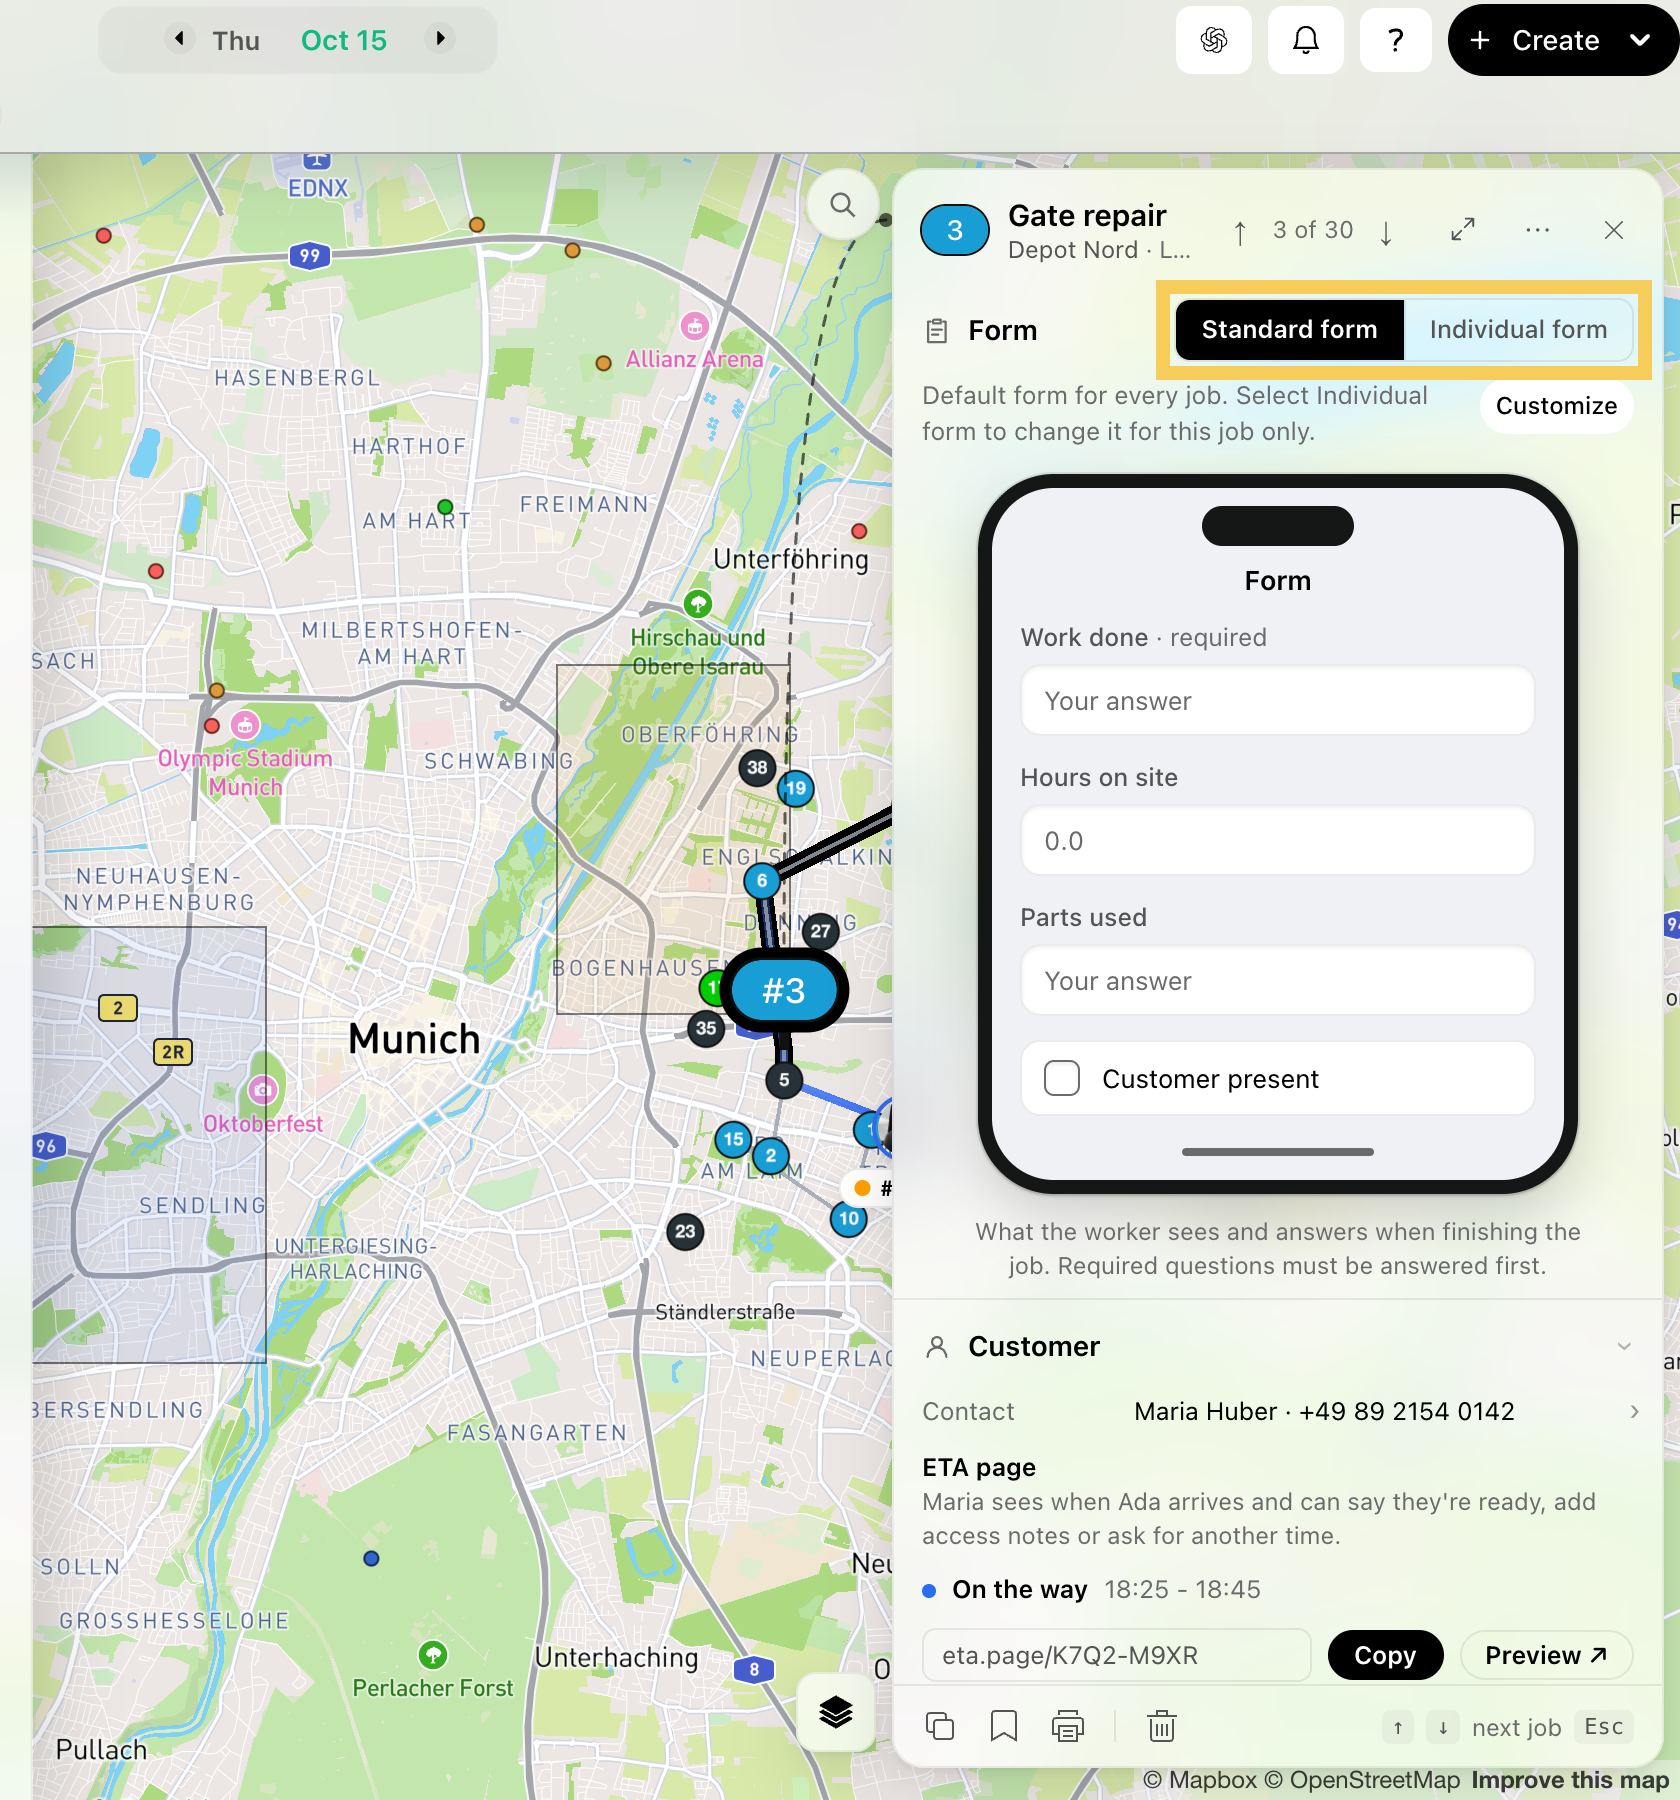
- Standard form: the default form for every job, so the same data is collected each time. Changes to the Standard form apply to all jobs that use it.
- Individual form: made for one job only. Changes to it apply to this job only.
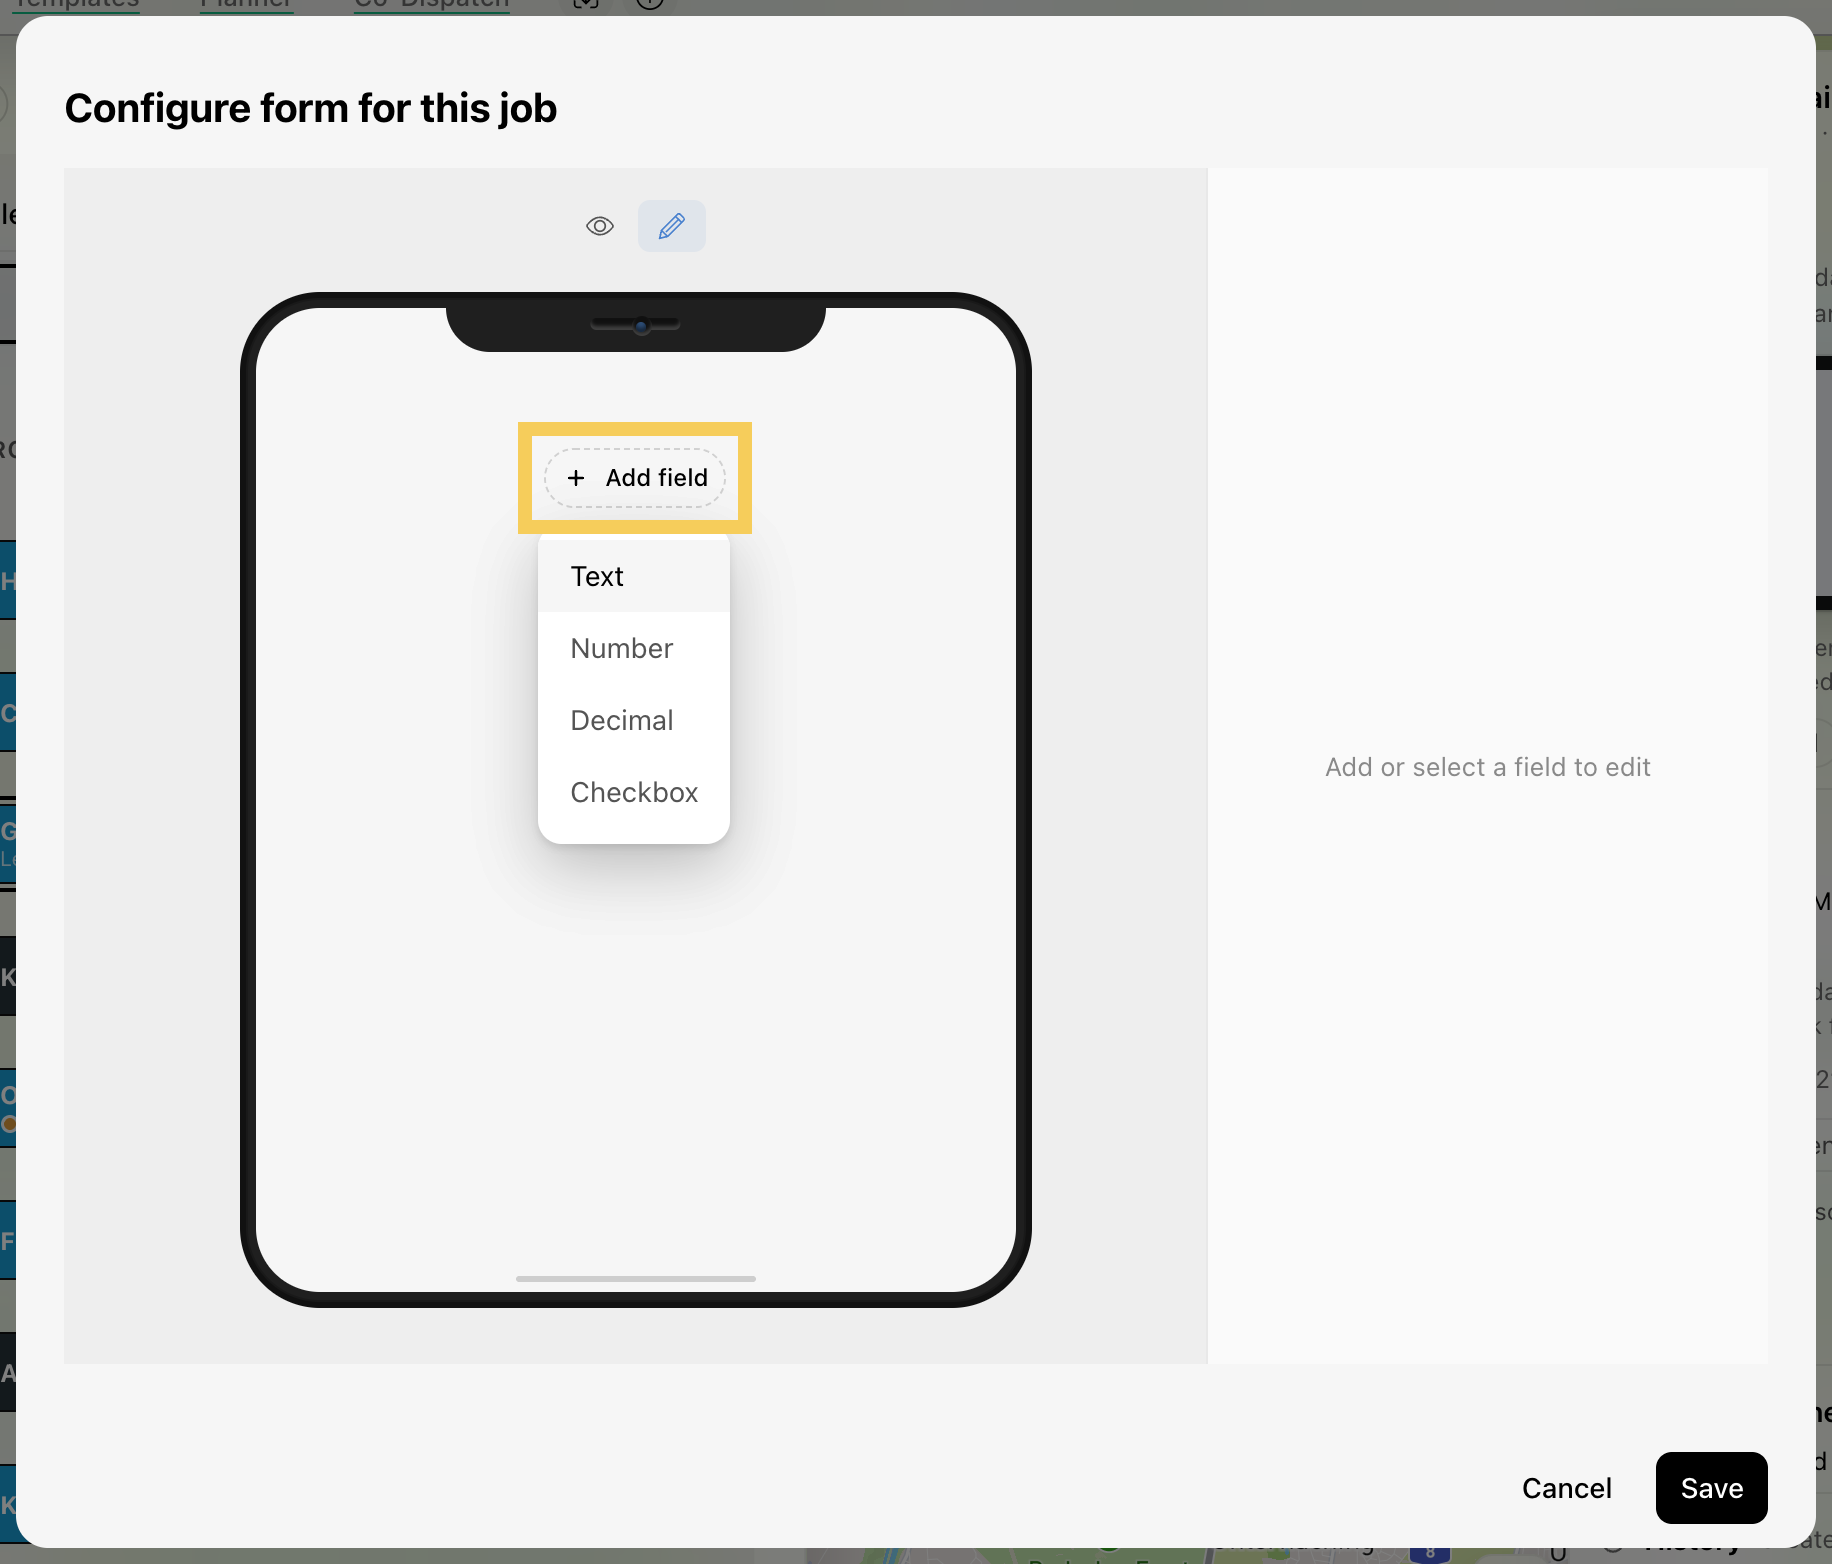
Note: A completion form can have Text, Number, Decimal and Checkbox fields. For follow-up questions (questions that show only after a certain answer), use a form built on the Forms page. There, Multiple choice and Dropdown questions can have follow-ups. Then link that form to the job. To learn how, click here.
In this guide:
-
Choose the form for a job
Step 1: Go to Dispatch and pick the day. Find the job on a person's route, or click All jobs to see every job.

Step 2: Click the job. It opens in the job sheet beside the map.

Step 3: Scroll down to Form and click it to open the section.
While it is closed, it shows which form the job uses.
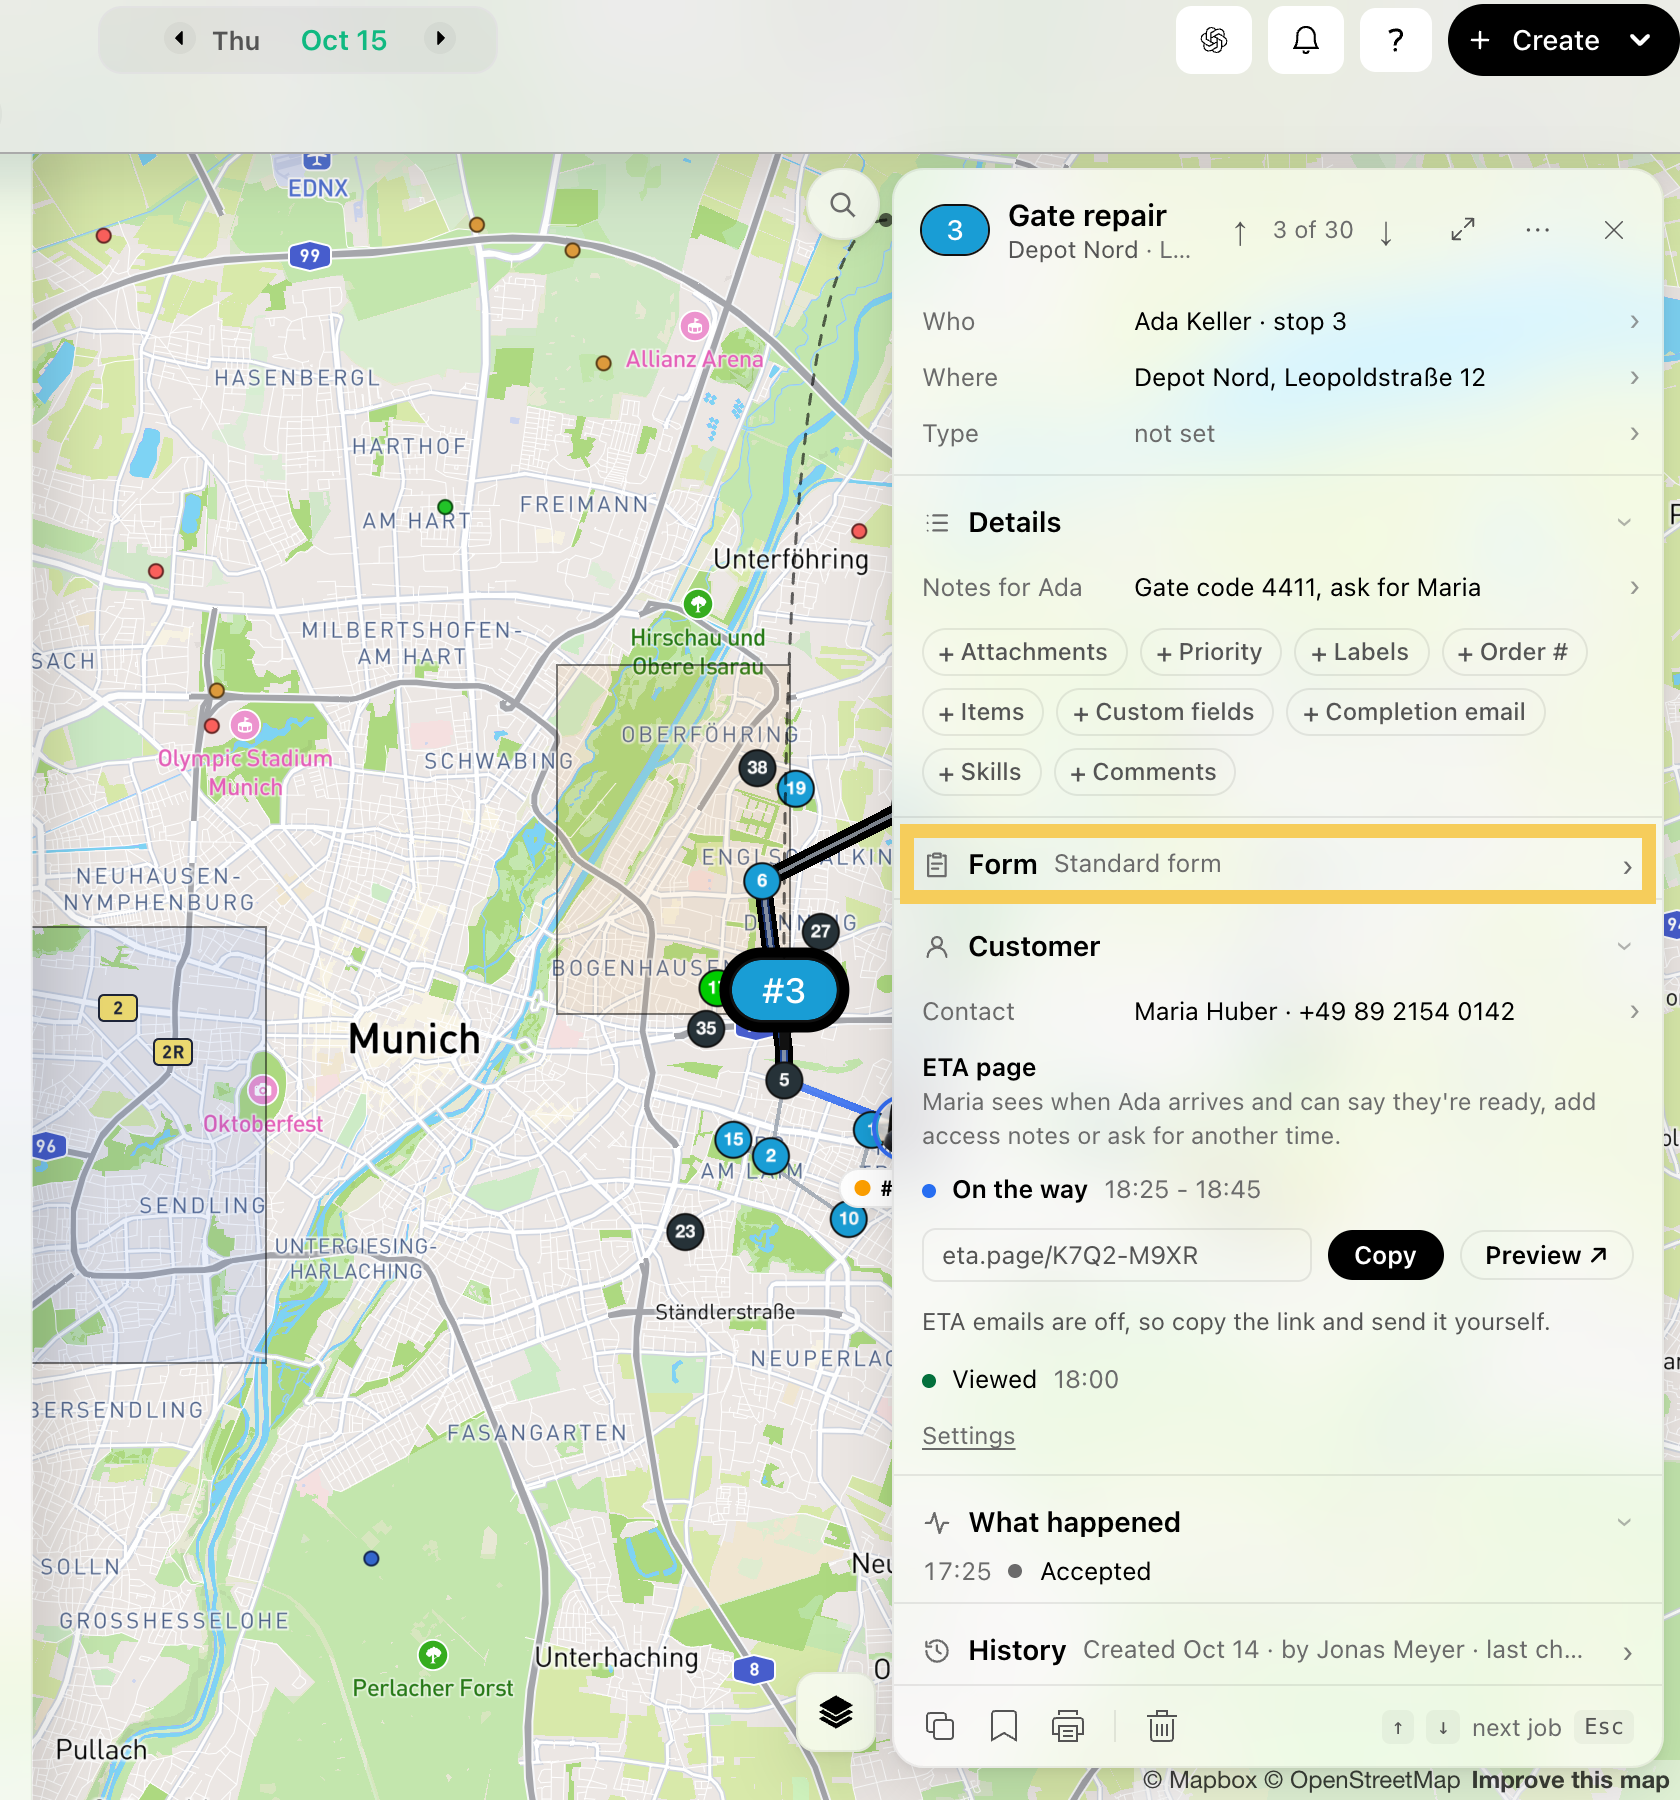
Step 4: Choose Standard form or Individual form. The phone below shows the questions the worker answers when finishing the job.
-
Customizing the standard form
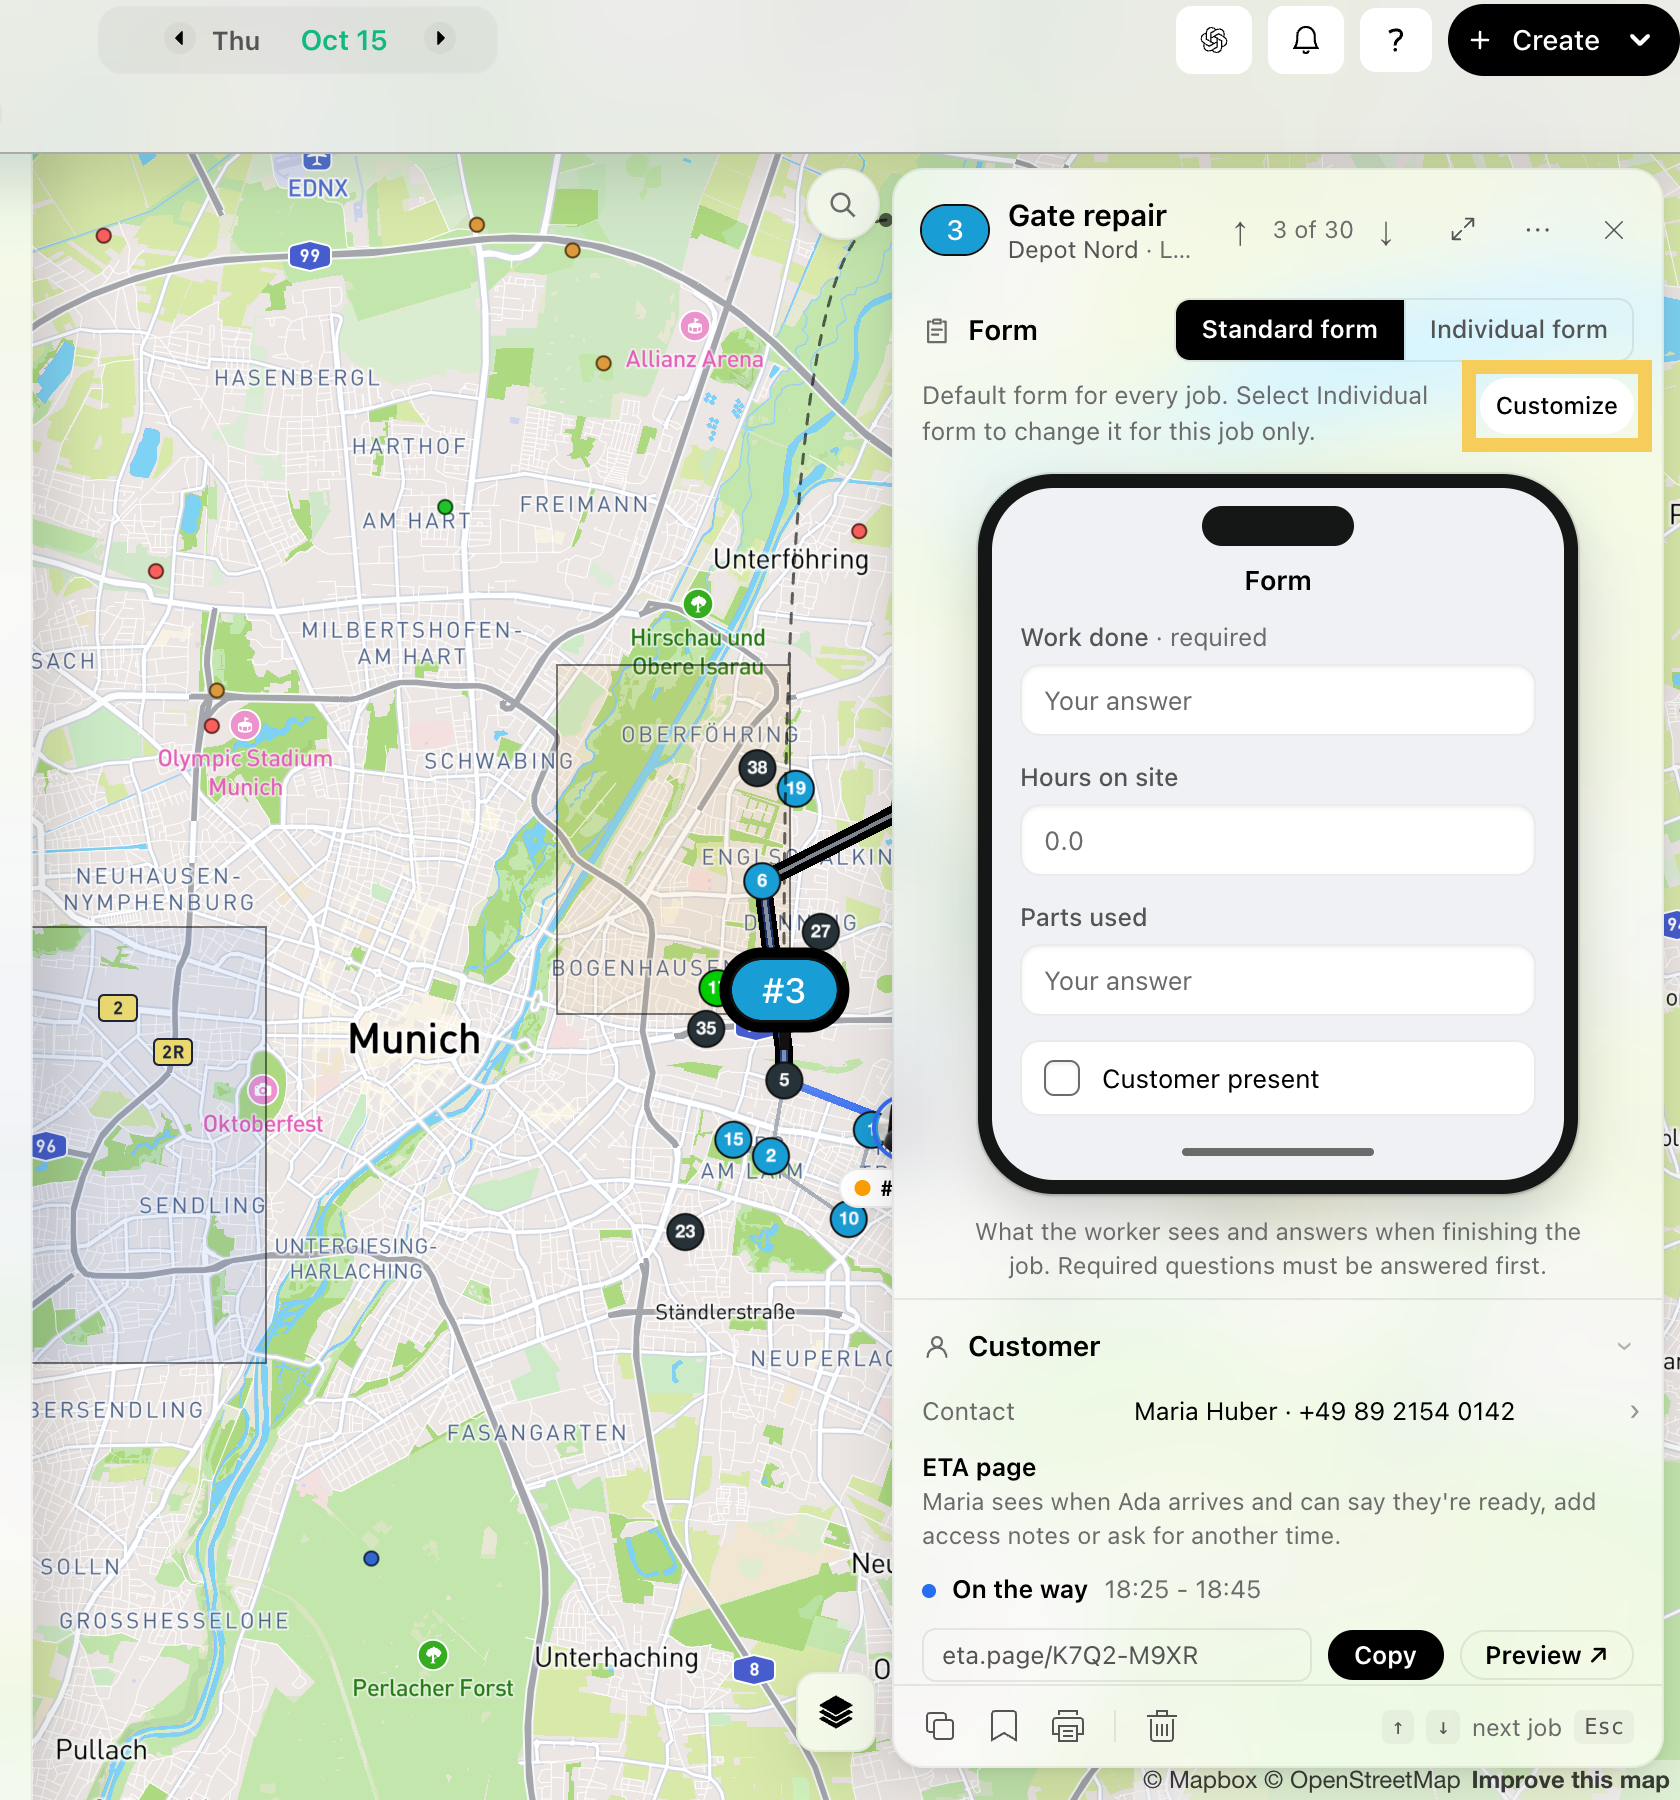
Step 1: With Standard form selected, click Customize above the phone.
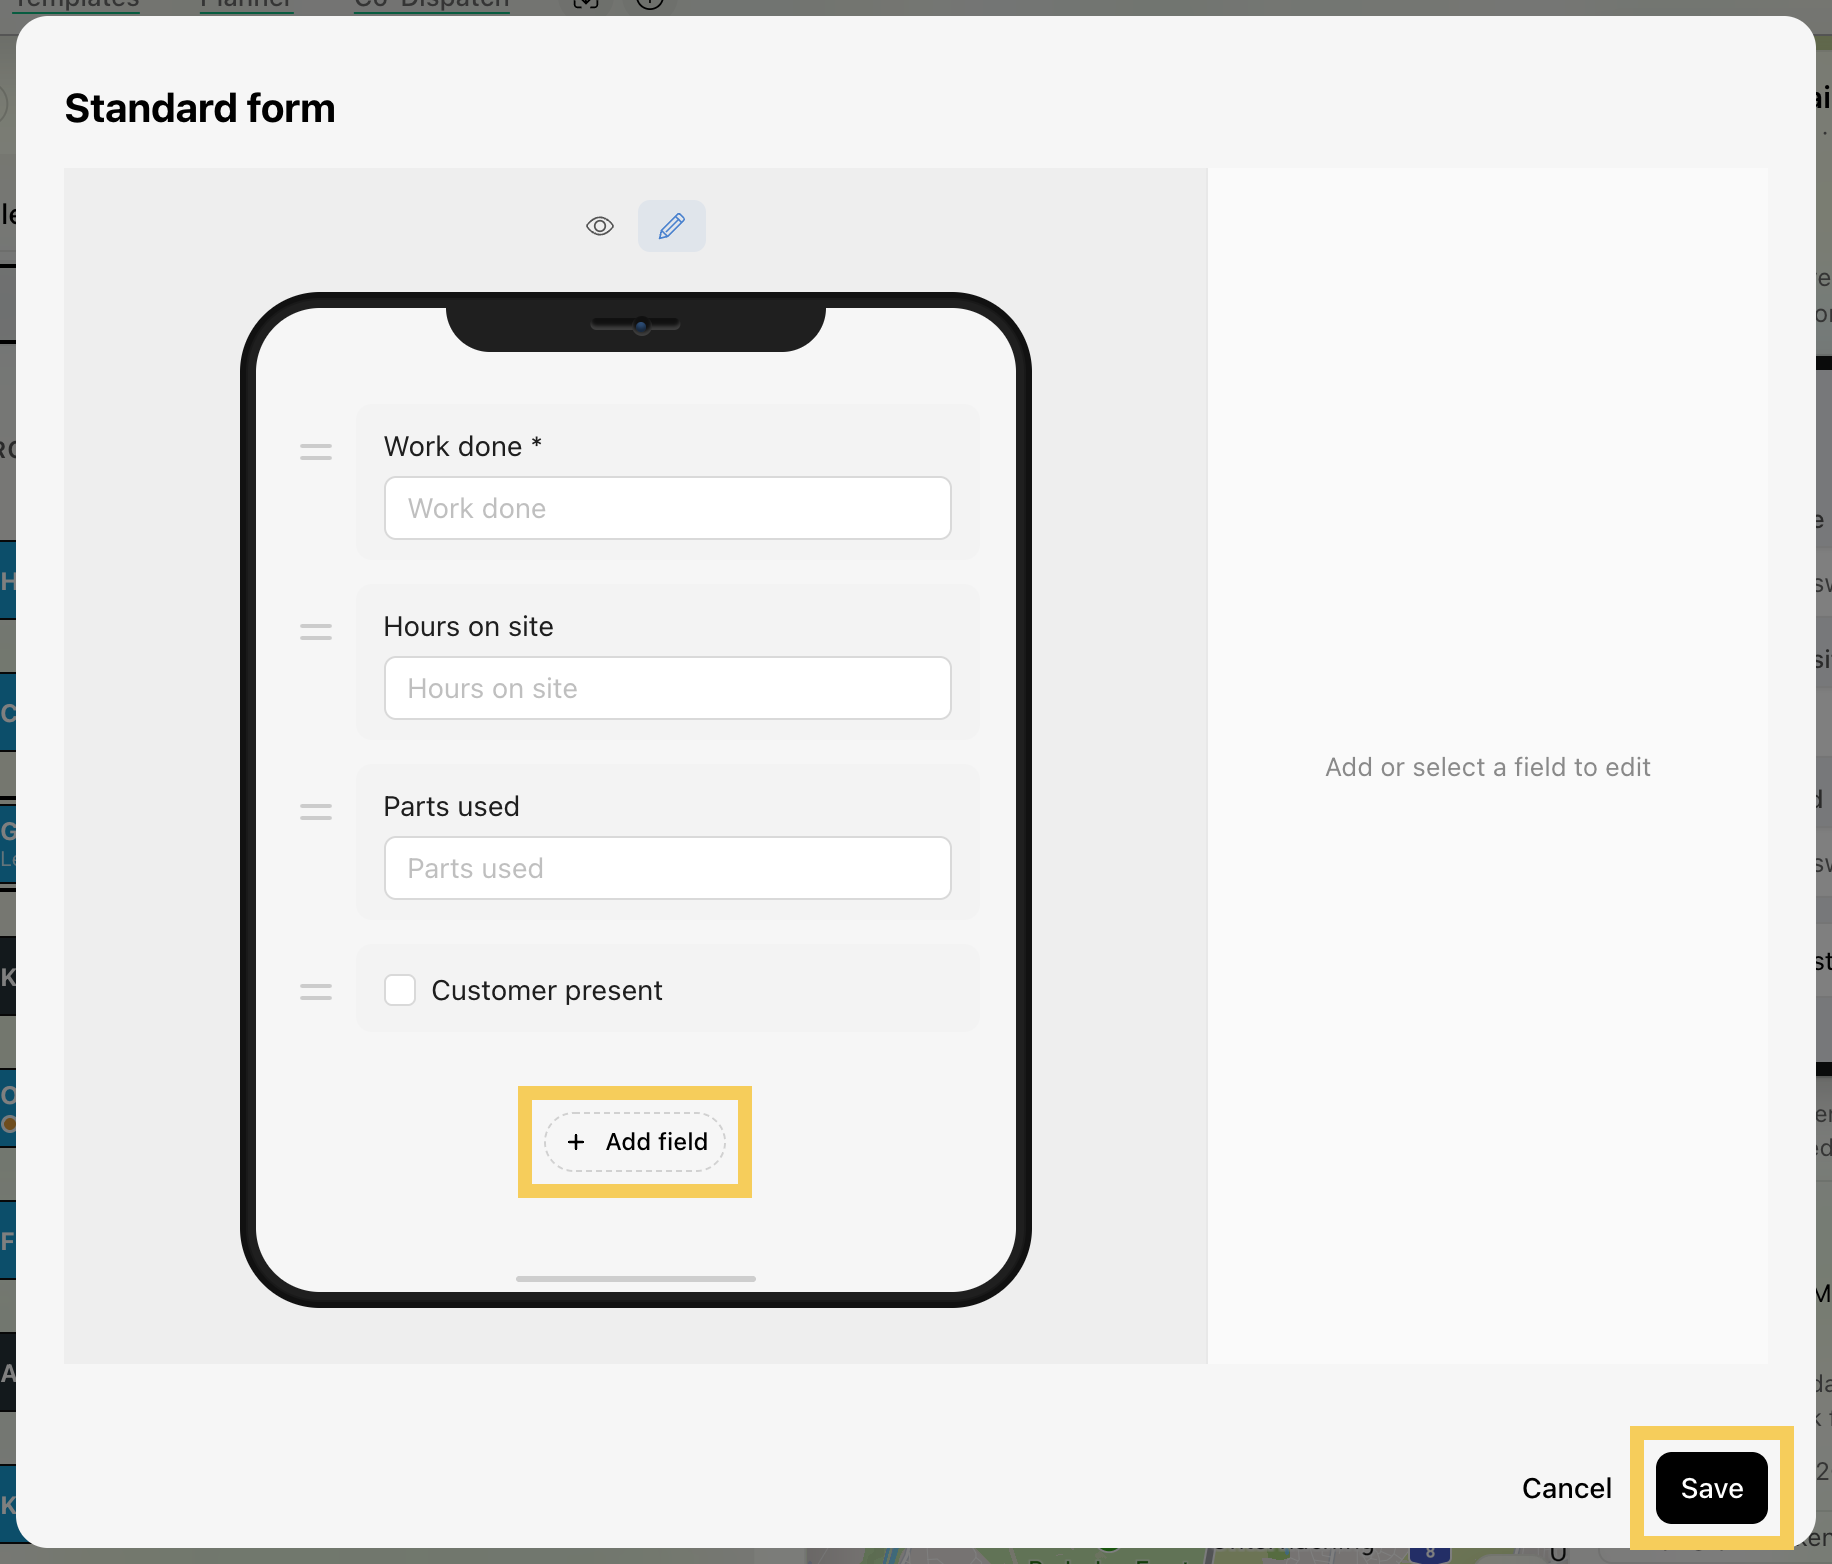
Step 2: Change the fields or click Add field to add new ones. Then click Save. The changes apply to every job that uses the standard form.
Note: You can also change the standard form in Company settings > Jobs with Customize the standard completion form.
-
Customizing an individual form for this job
Step 1: Click Individual form.
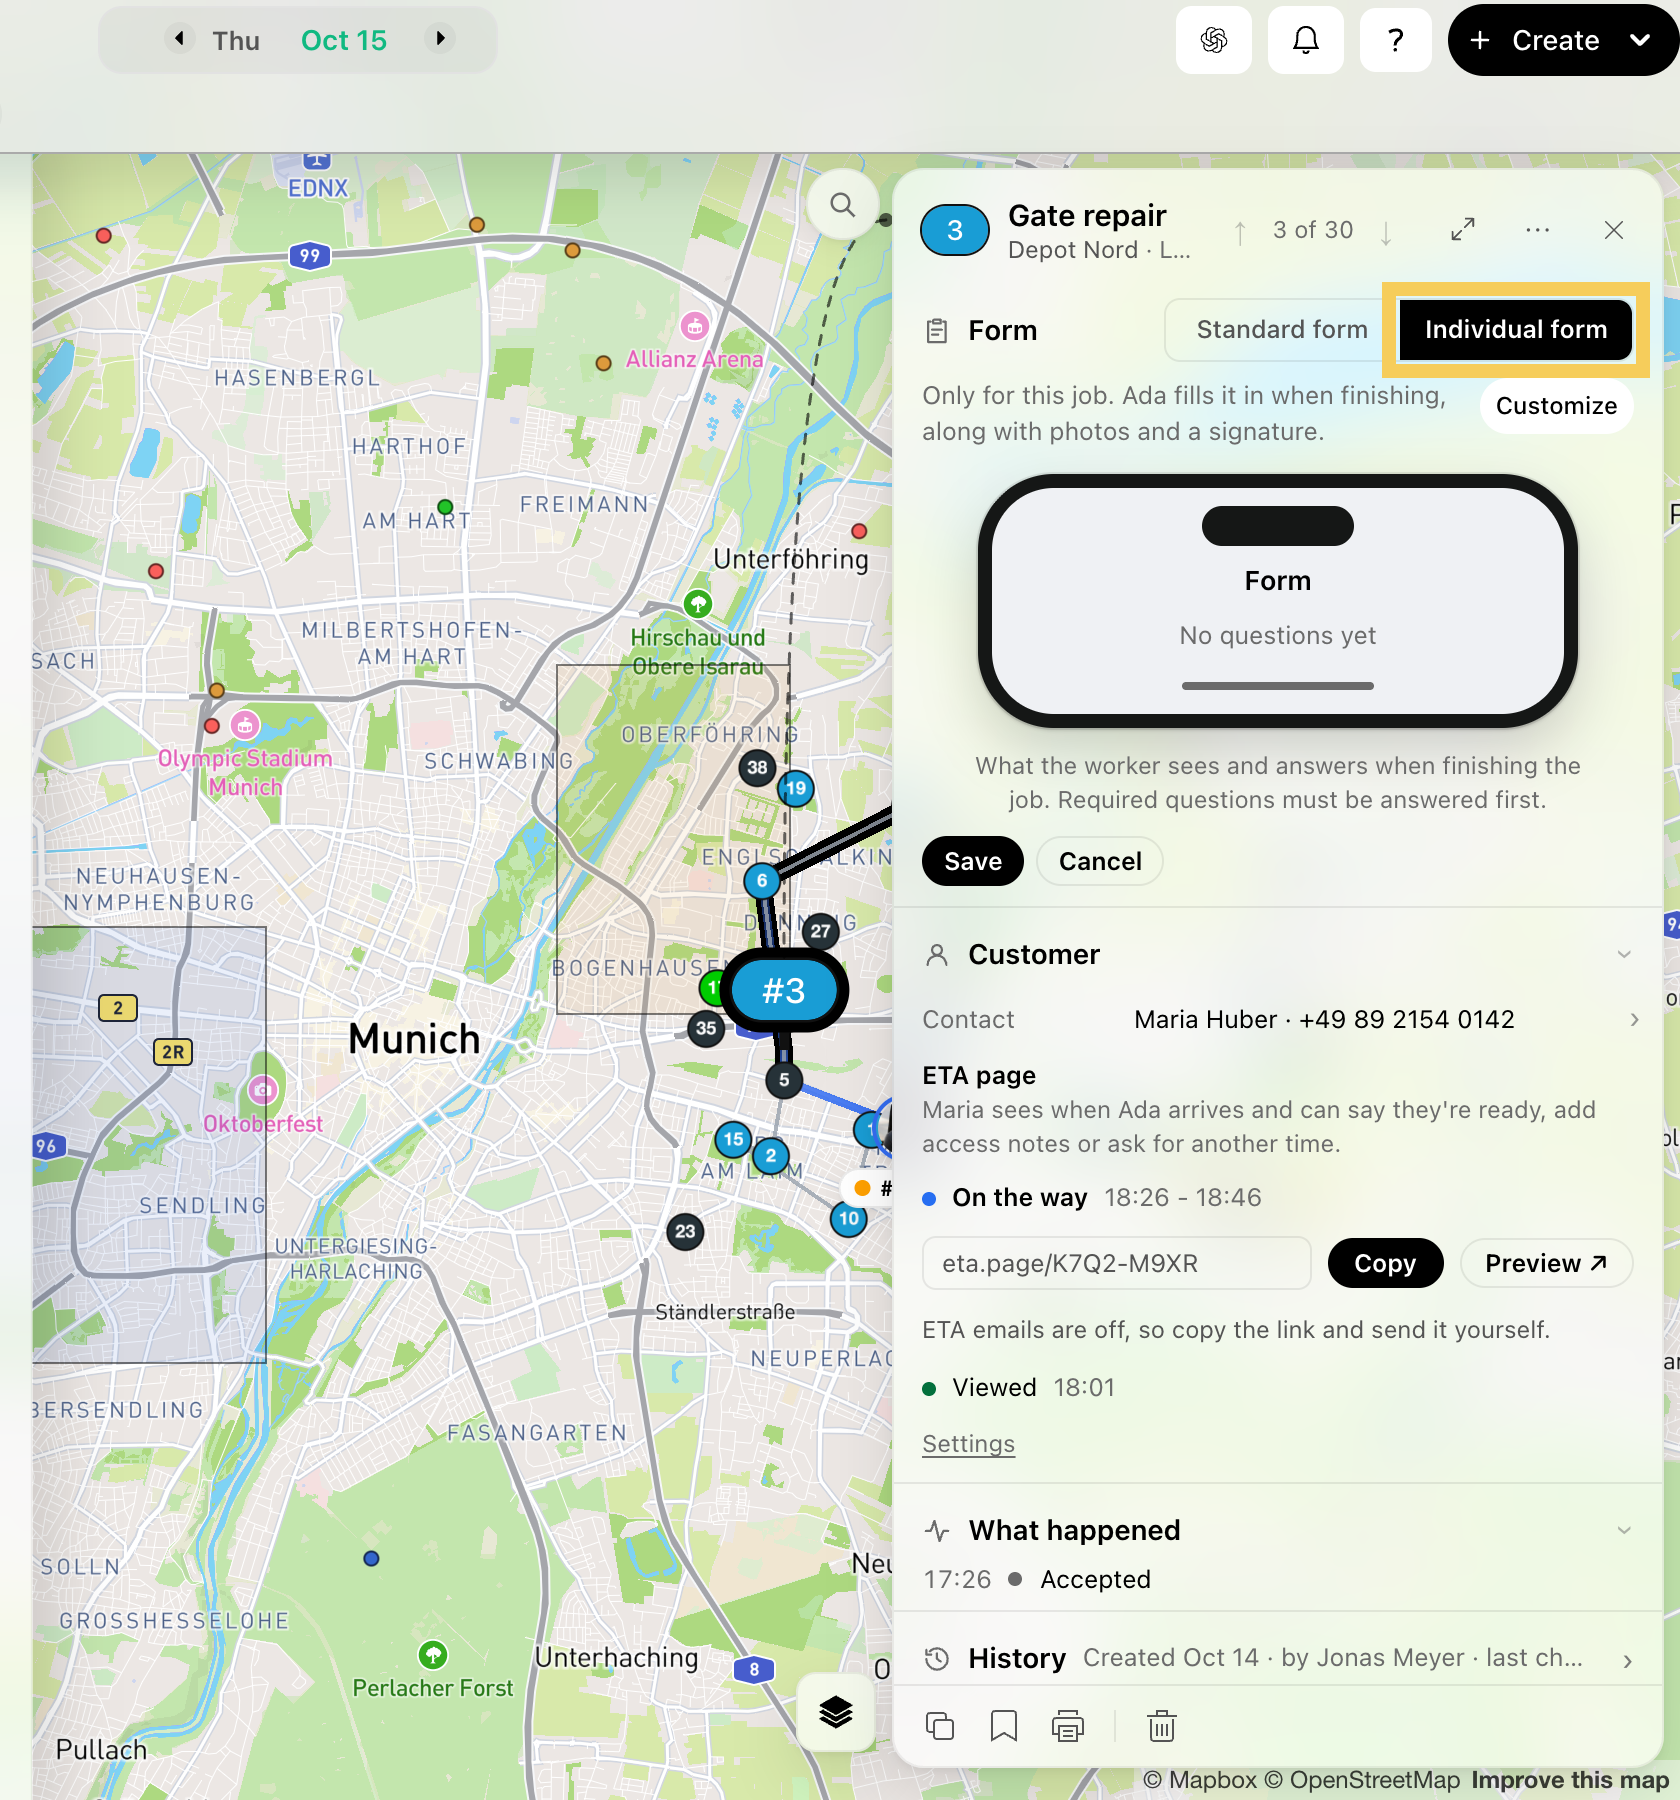
Step 2: Click Customize above the phone.
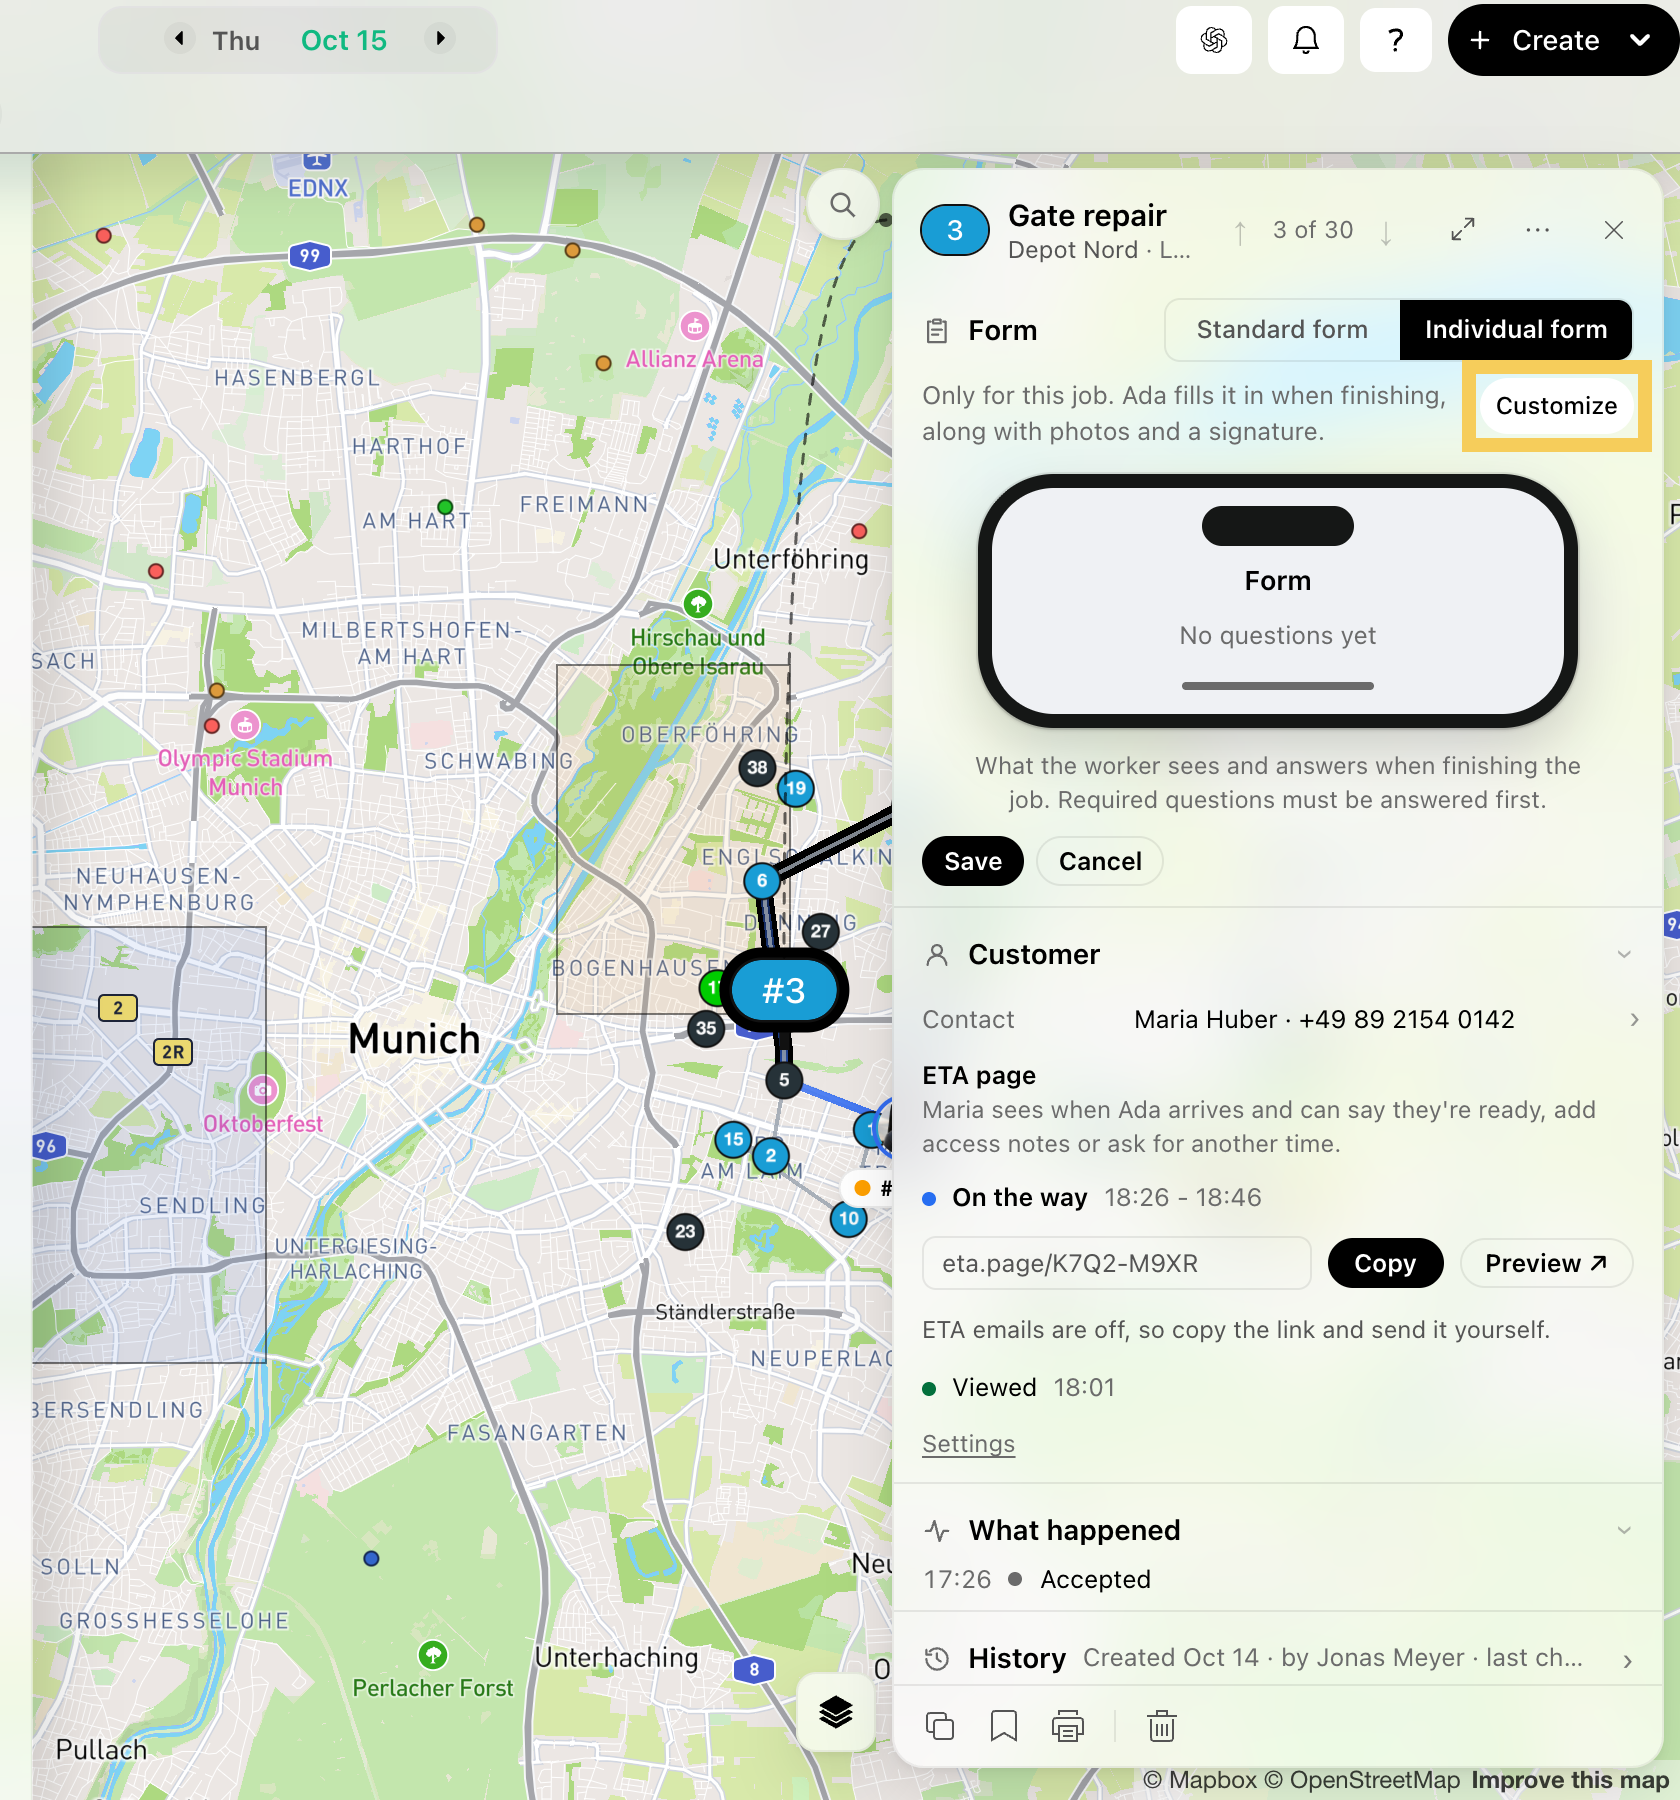
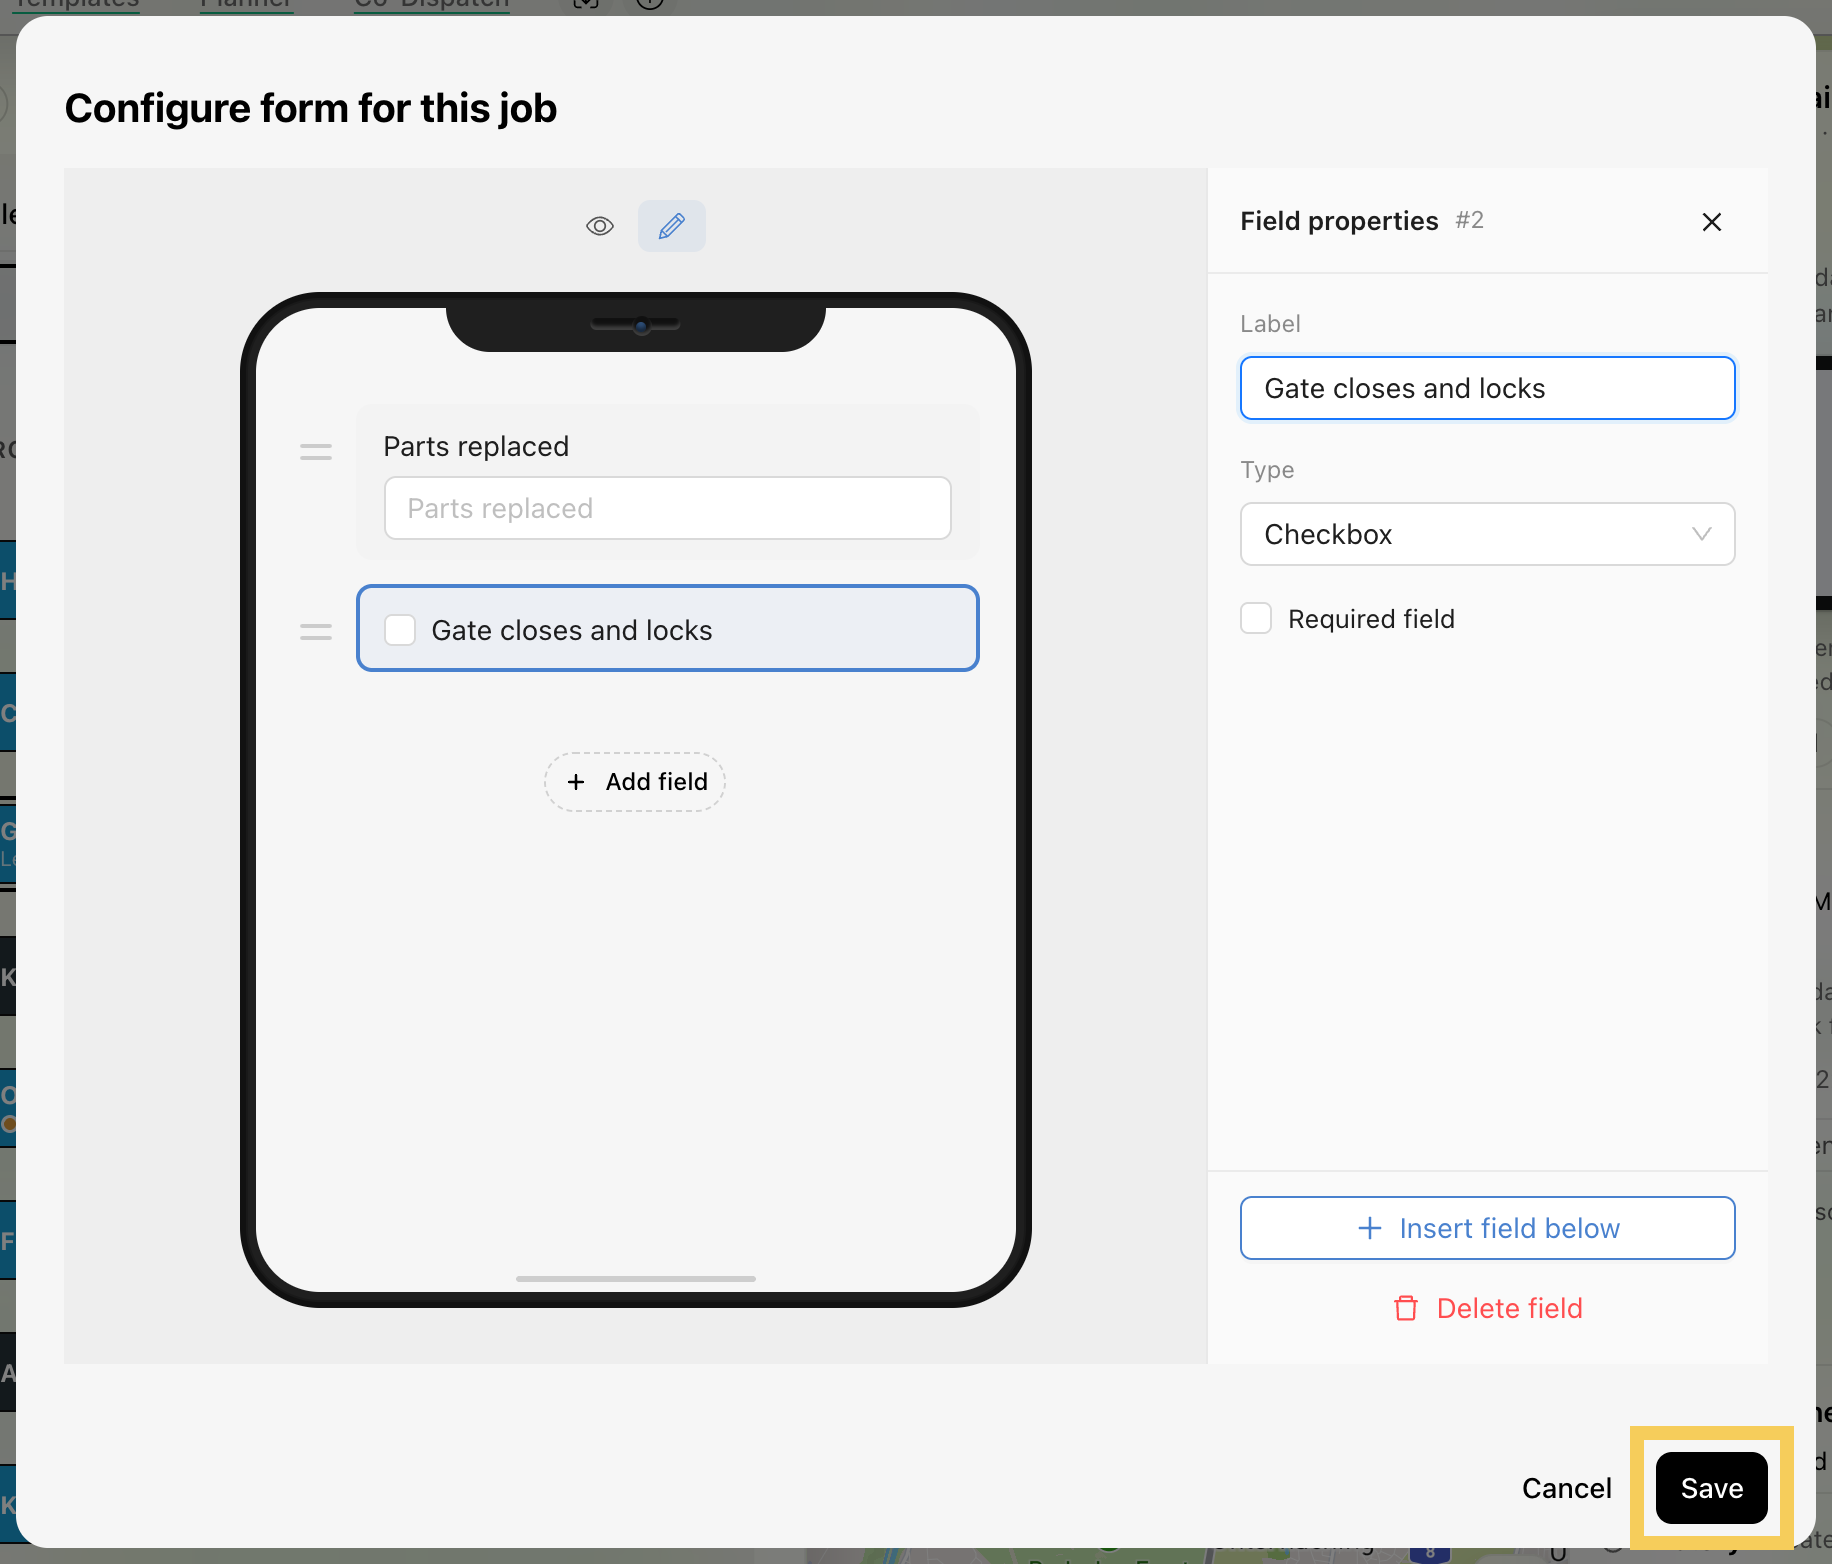
Step 3: In Configure form for this job, click Add field and pick the field type.
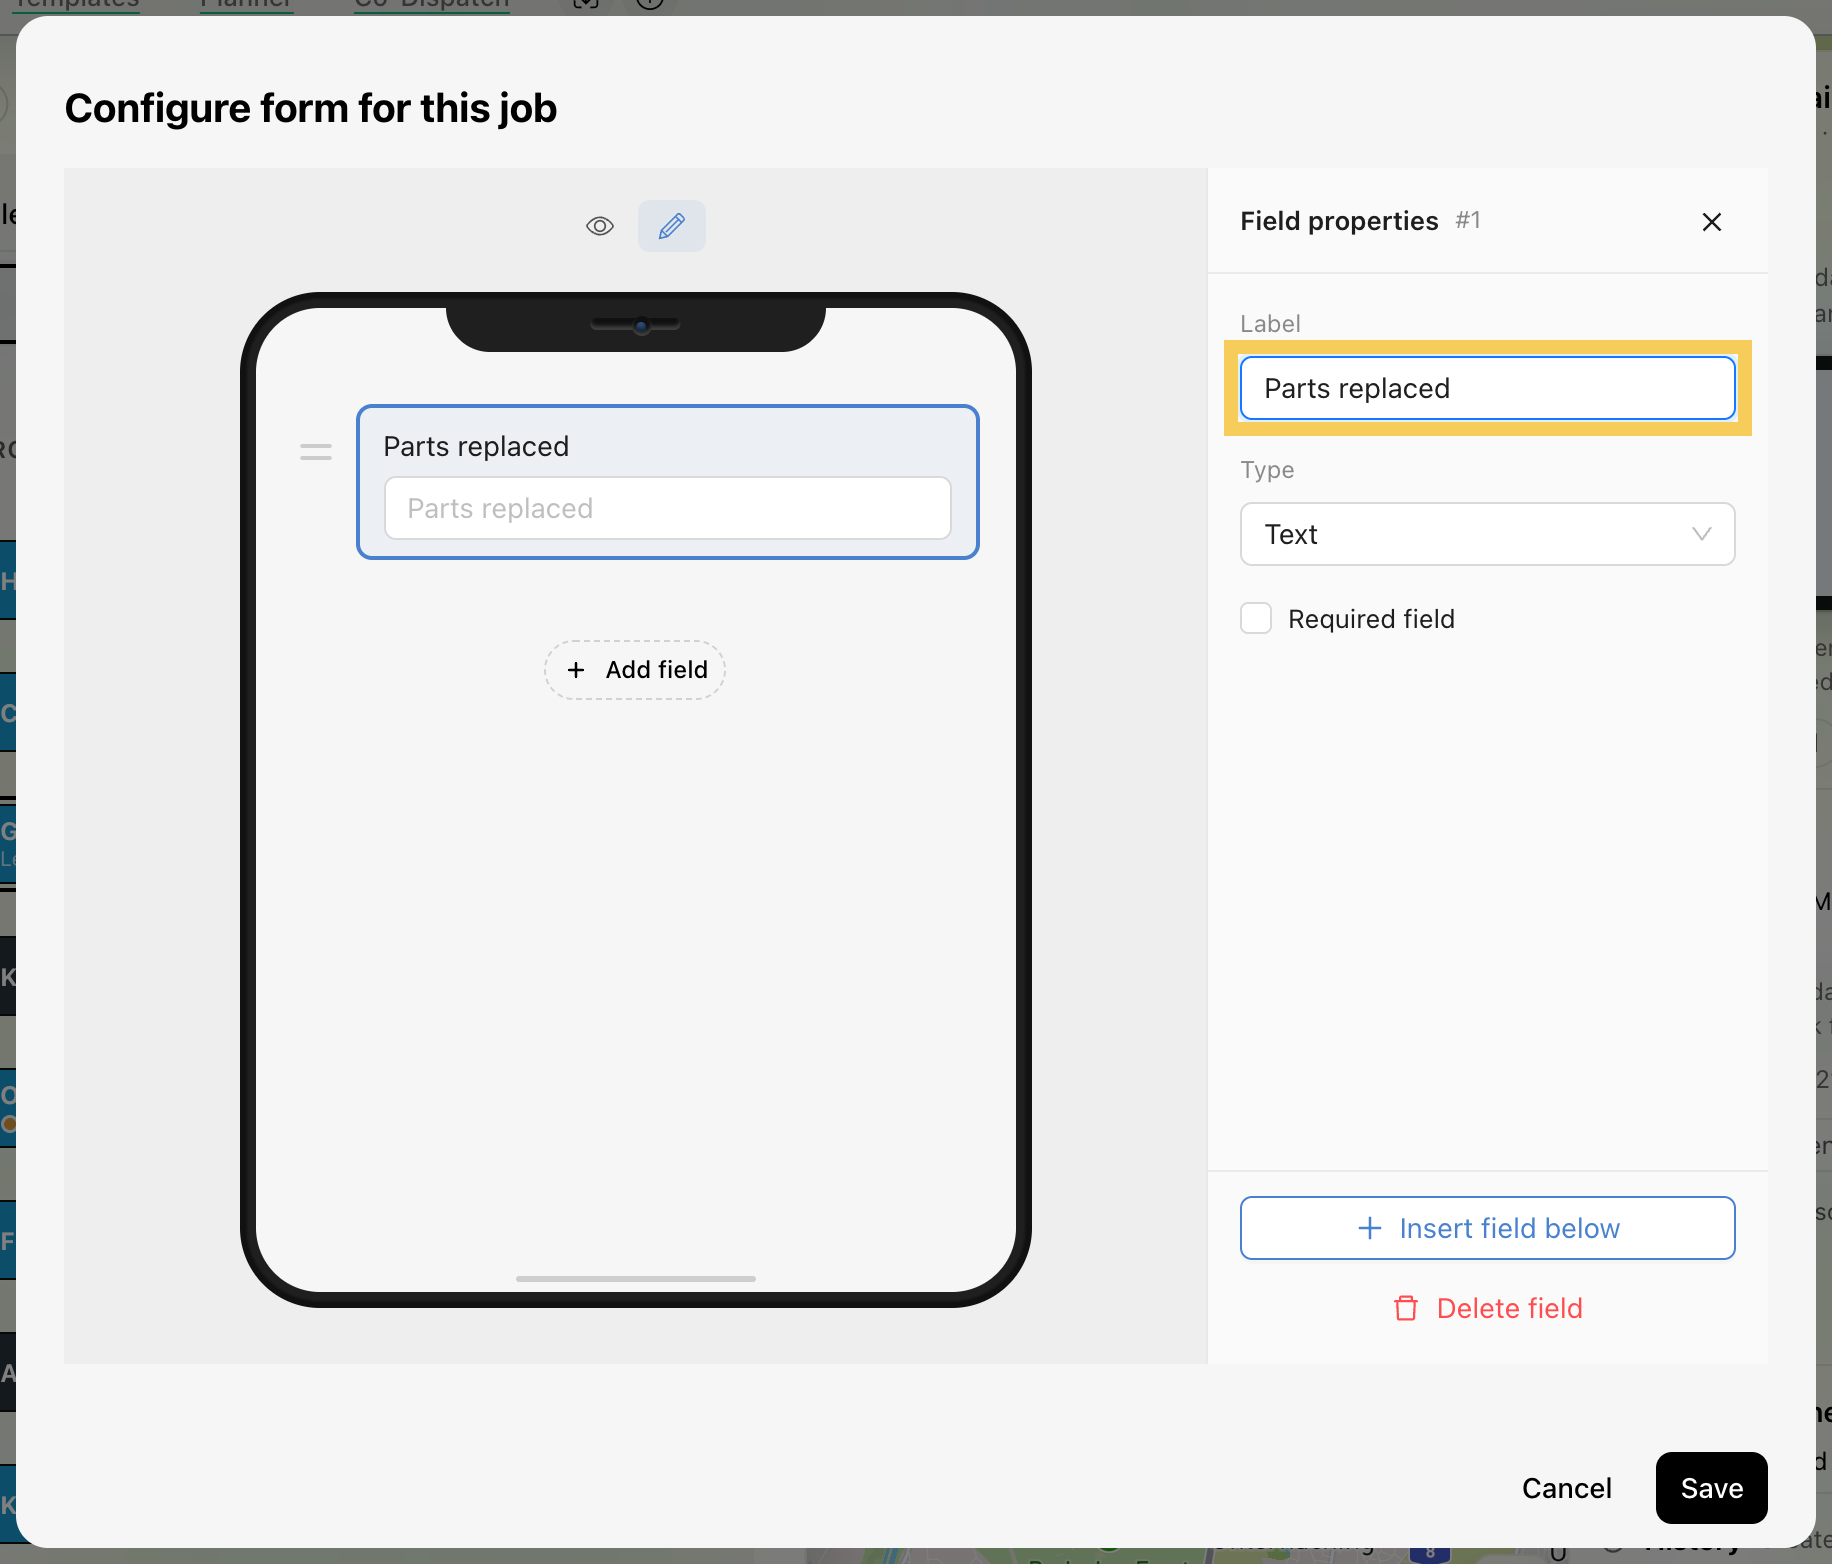
Step 4: Under Field properties, type the Label.
- If the worker must fill in the field, tick Required field.
- To add more fields, repeat Steps 3 and 4.
Step 5: Click Save to save your fields.
Step 6: The phone now shows your questions. Click Save under the phone to keep the form for this job.
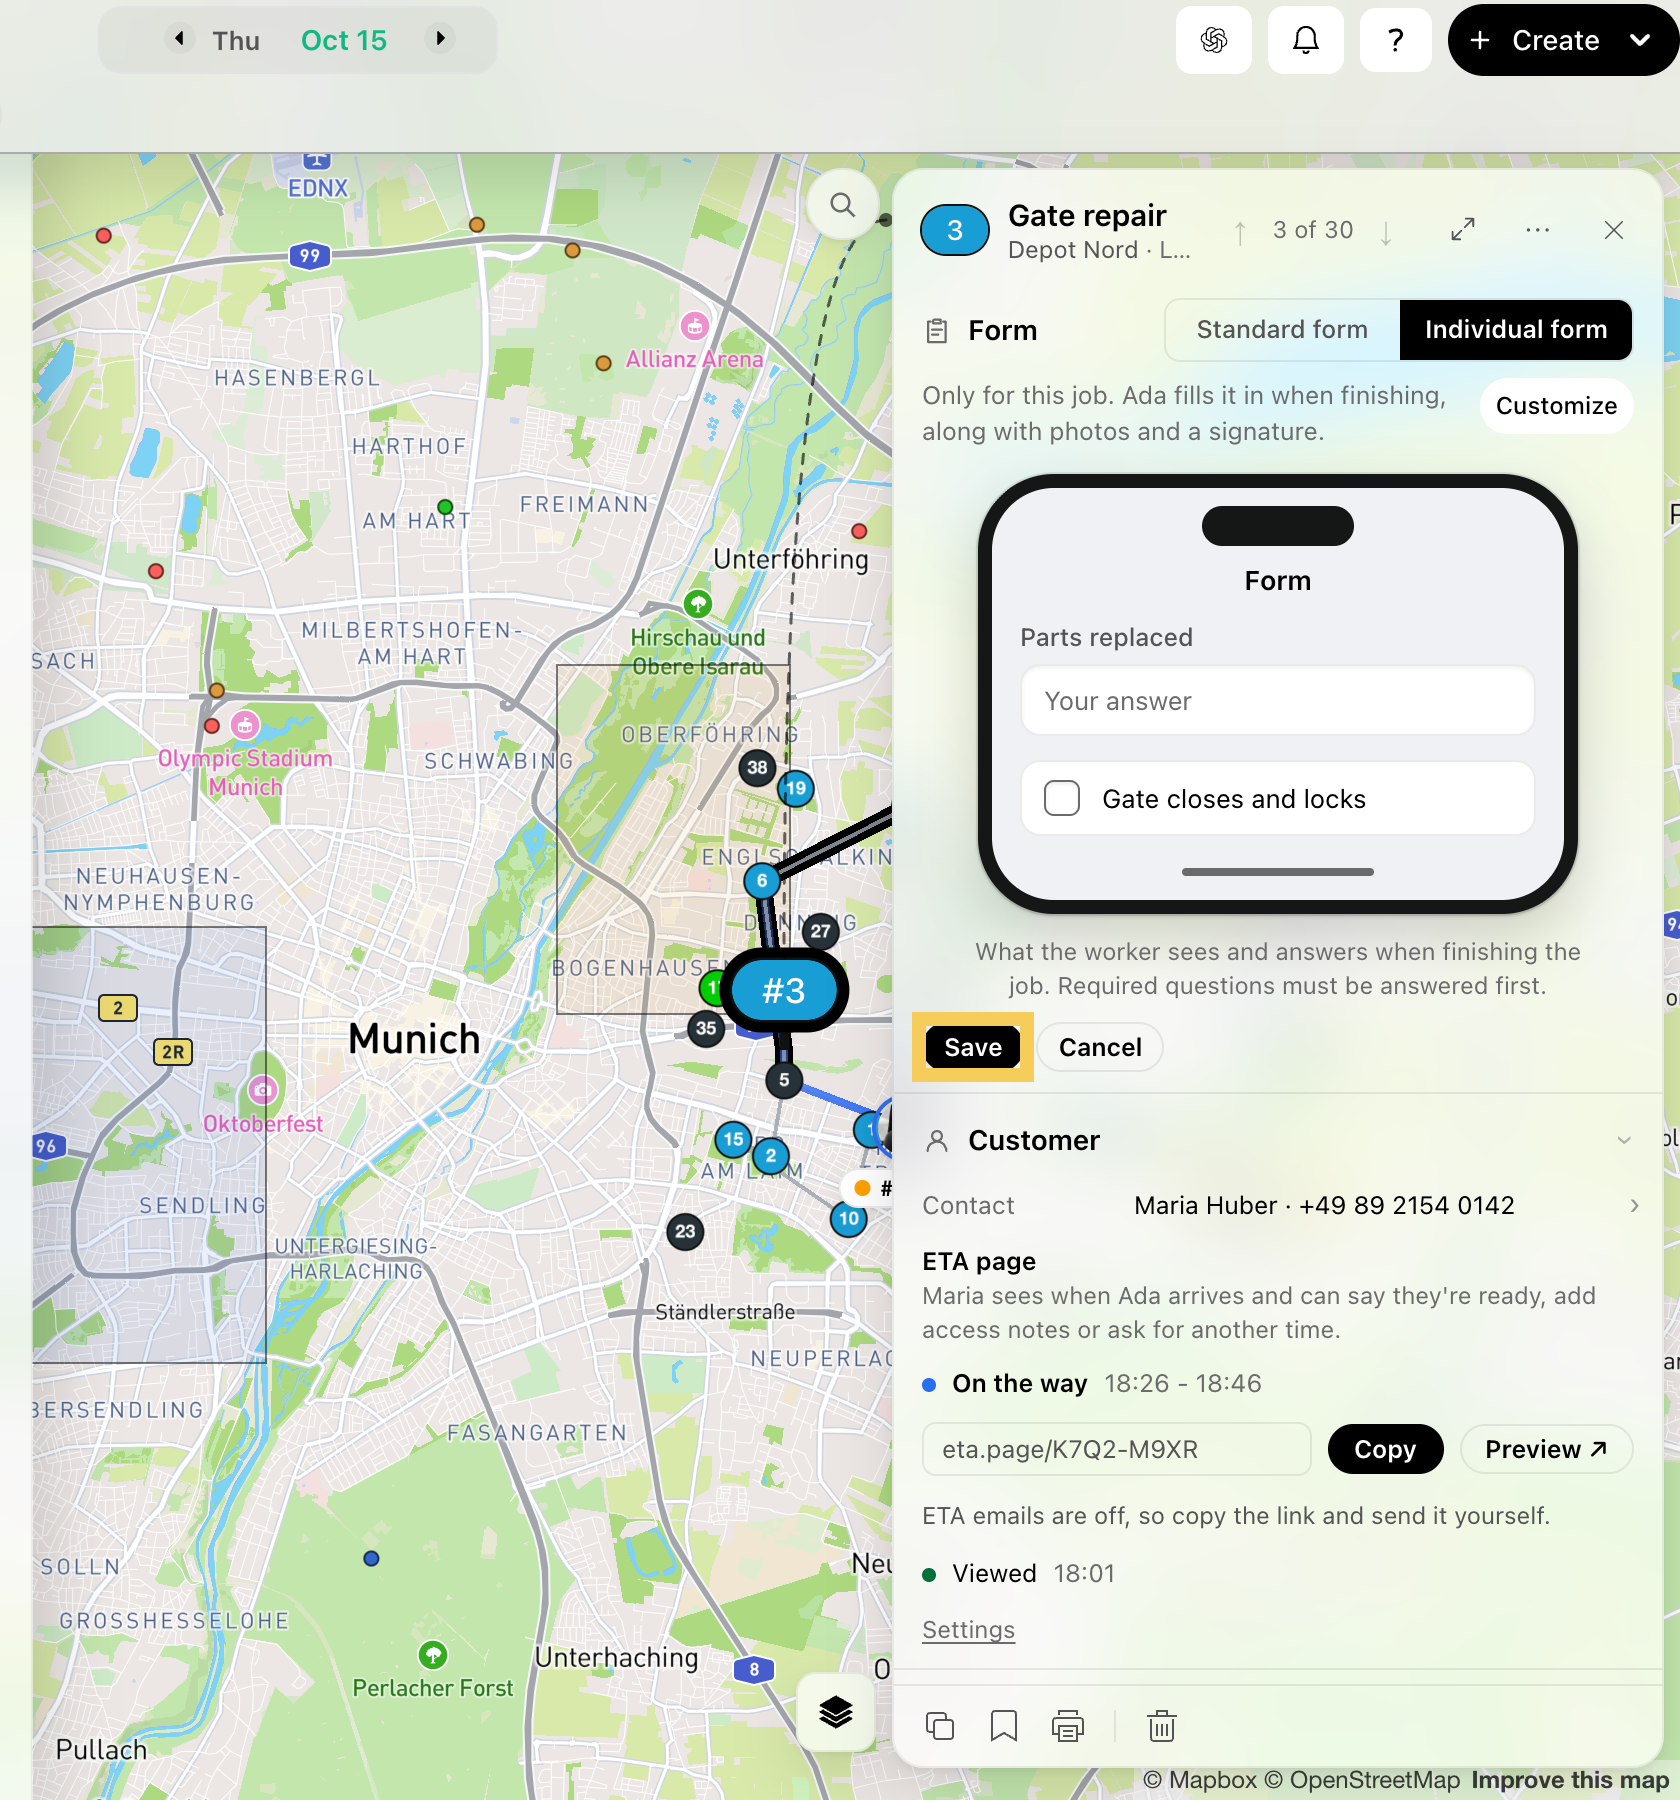
Note: To go back, click Standard form and then Save. This removes the job's individual form. To reverse it, click Undo in the message at the bottom of the sheet.
Tip: You can choose a new job’s form before you create it. In the New job card, click More details, choose the form in the Form section, then click Create job.