How to Integrate with Salesforce
This guide explains how to integrate Salesforce with Hellotracks to connect Salesforce cases to Hellotracks jobs.
Note: Salesforce is available with the Dispatch plan, and only an Administrator can connect it. Your company can use one CRM integration at a time: HubSpot, Salesforce or monday.com.
In this guide:
- Create a Salesforce App
- Configure OAuth Settings
- Connect Salesforce in Hellotracks
- Choose a Salesforce Webhook Method
4.1 Set Up Webhooks via Outbound Messages
4.2 (Optional) Set Up Webhooks via Apex or Custom JSON Callout
-
Create a Salesforce App
Create a Salesforce app to generate the Client ID and Client Secret required to connect Salesforce with Hellotracks.
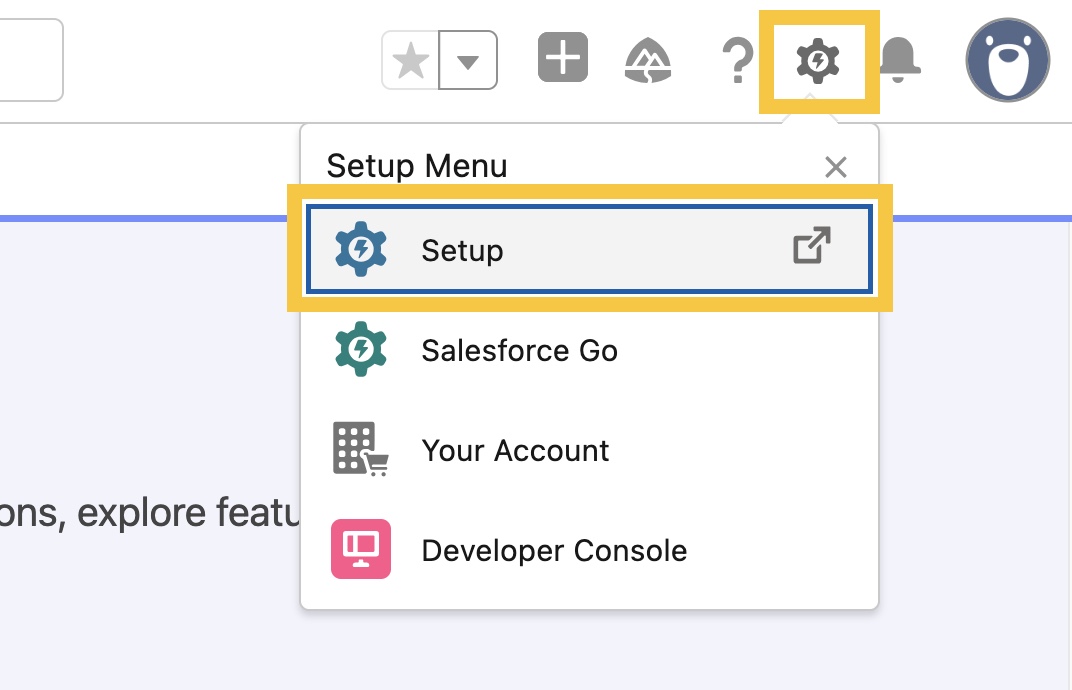
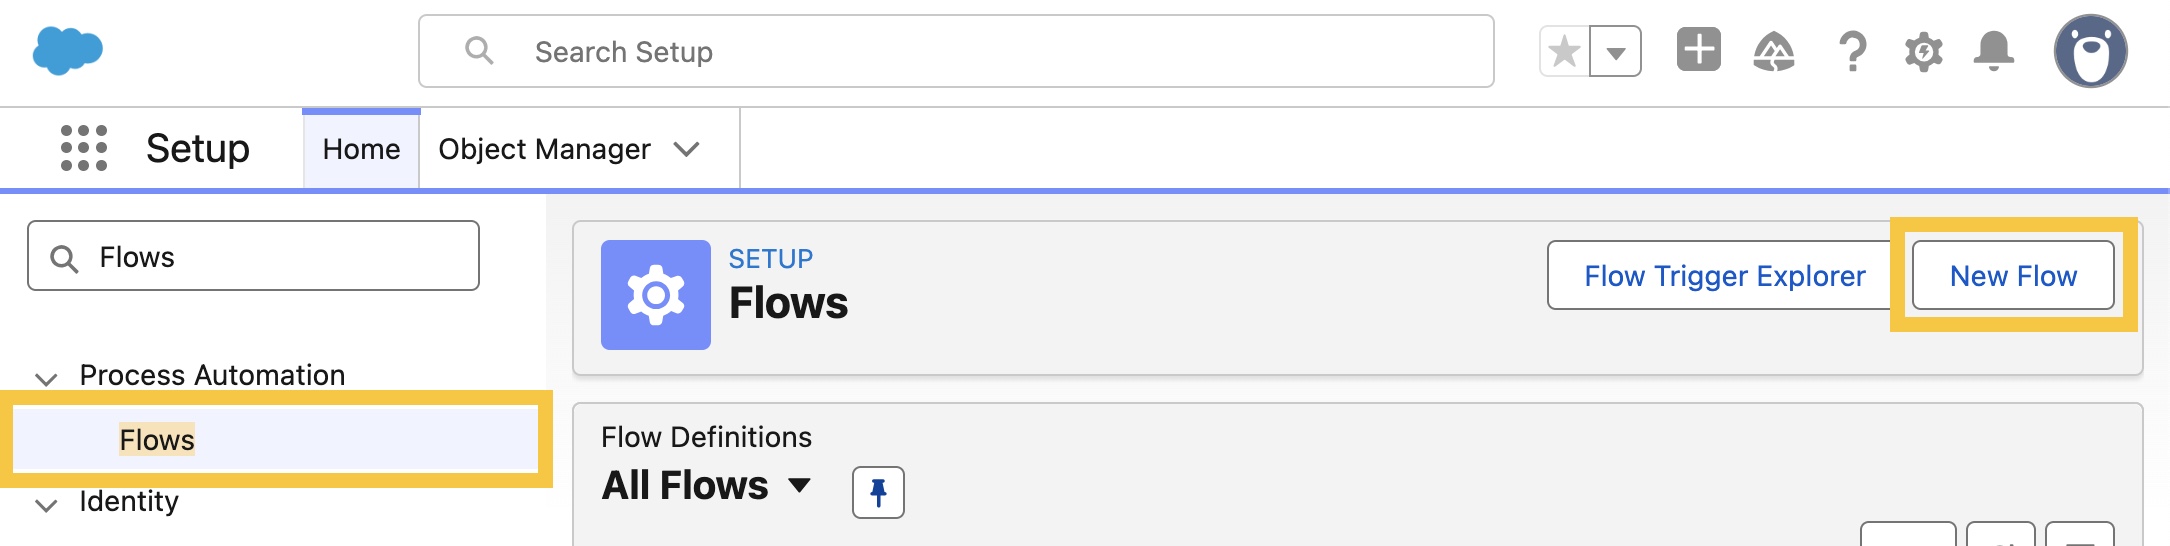
Step 1: In Salesforce, click the gear icon, then select Setup.
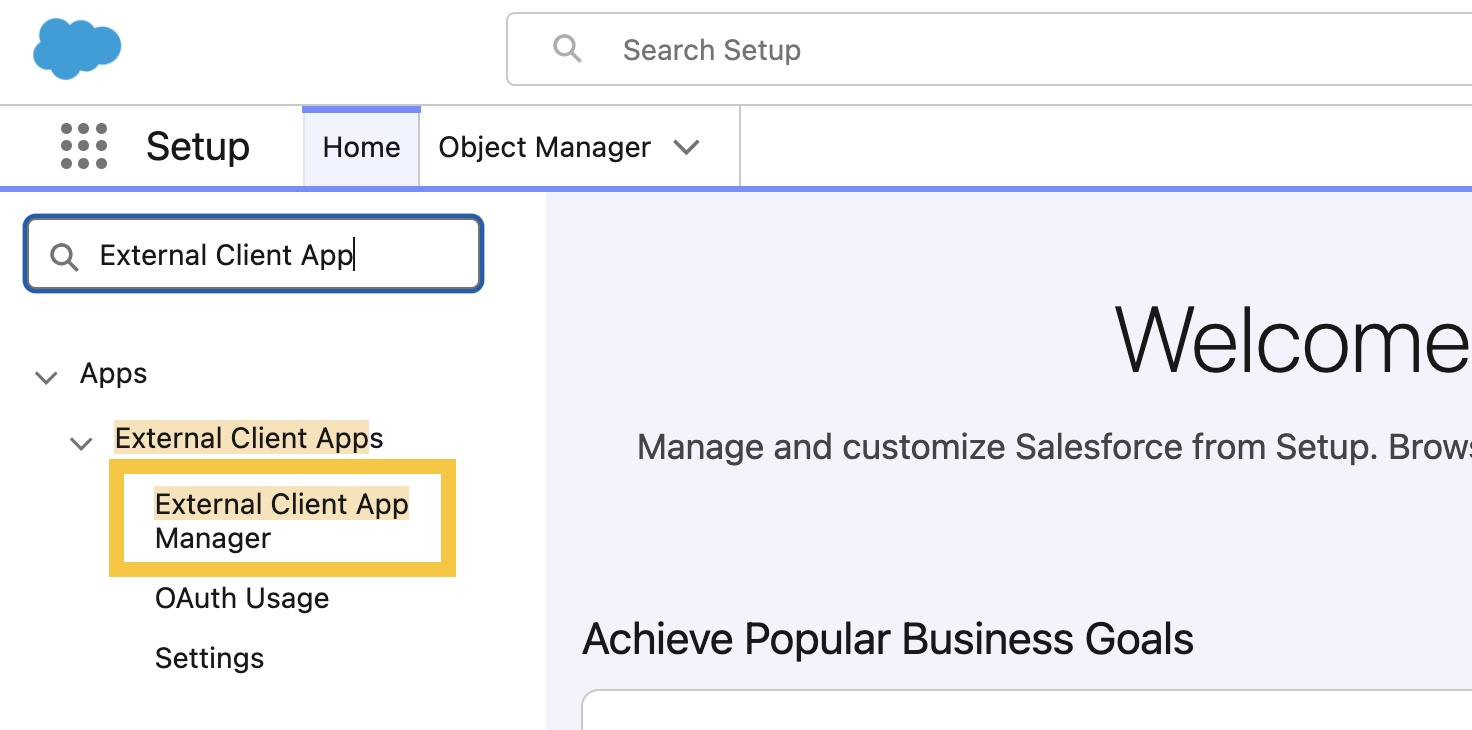
Step 2: In Quick Find, search for External Client App Manager.
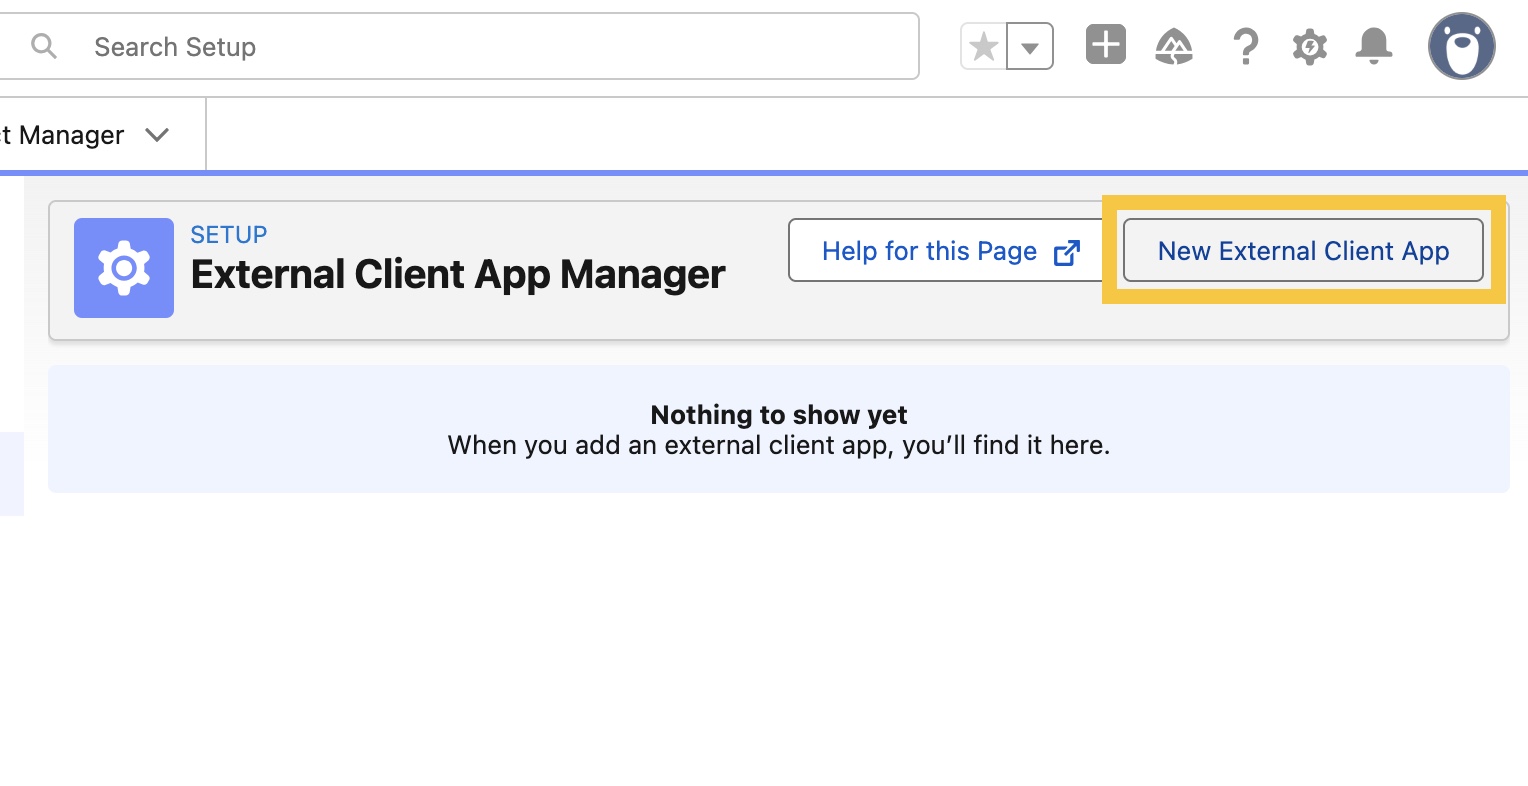
Step 3: Click New External Client App.
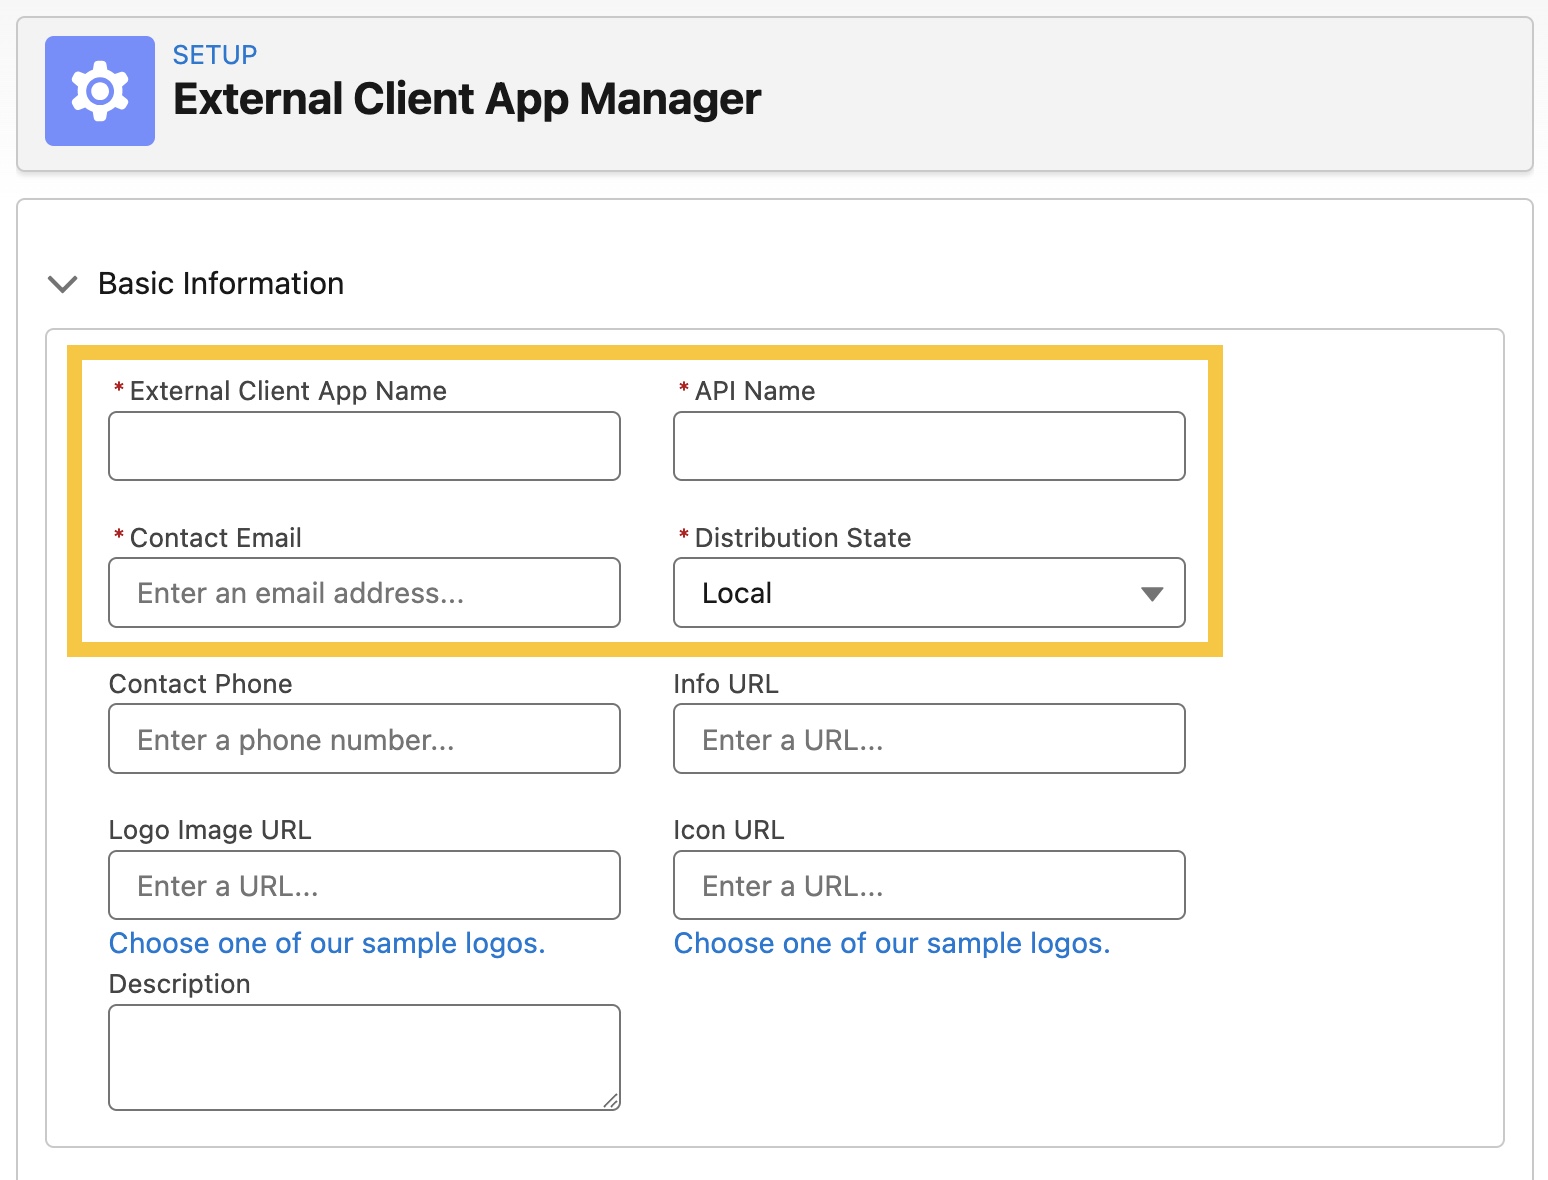
Step 4: Enter the required fields:
- External Client App Name: Hellotracks (or your preferred name)
- API Name: (auto-filled)
- Contact Email: (your email address)
- Distribution State: Local
-
Configure OAuth Settings
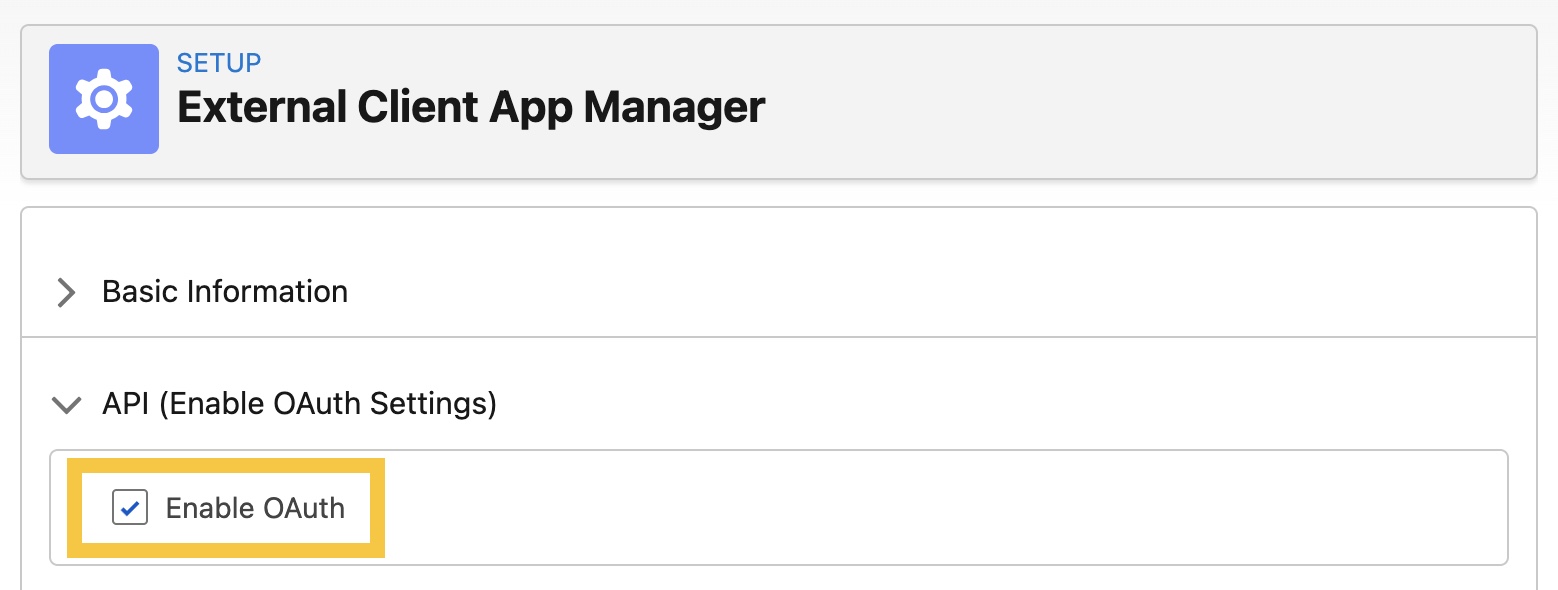
Step 5: Go to API (Enable OAuth Settings), then check Enable OAuth.
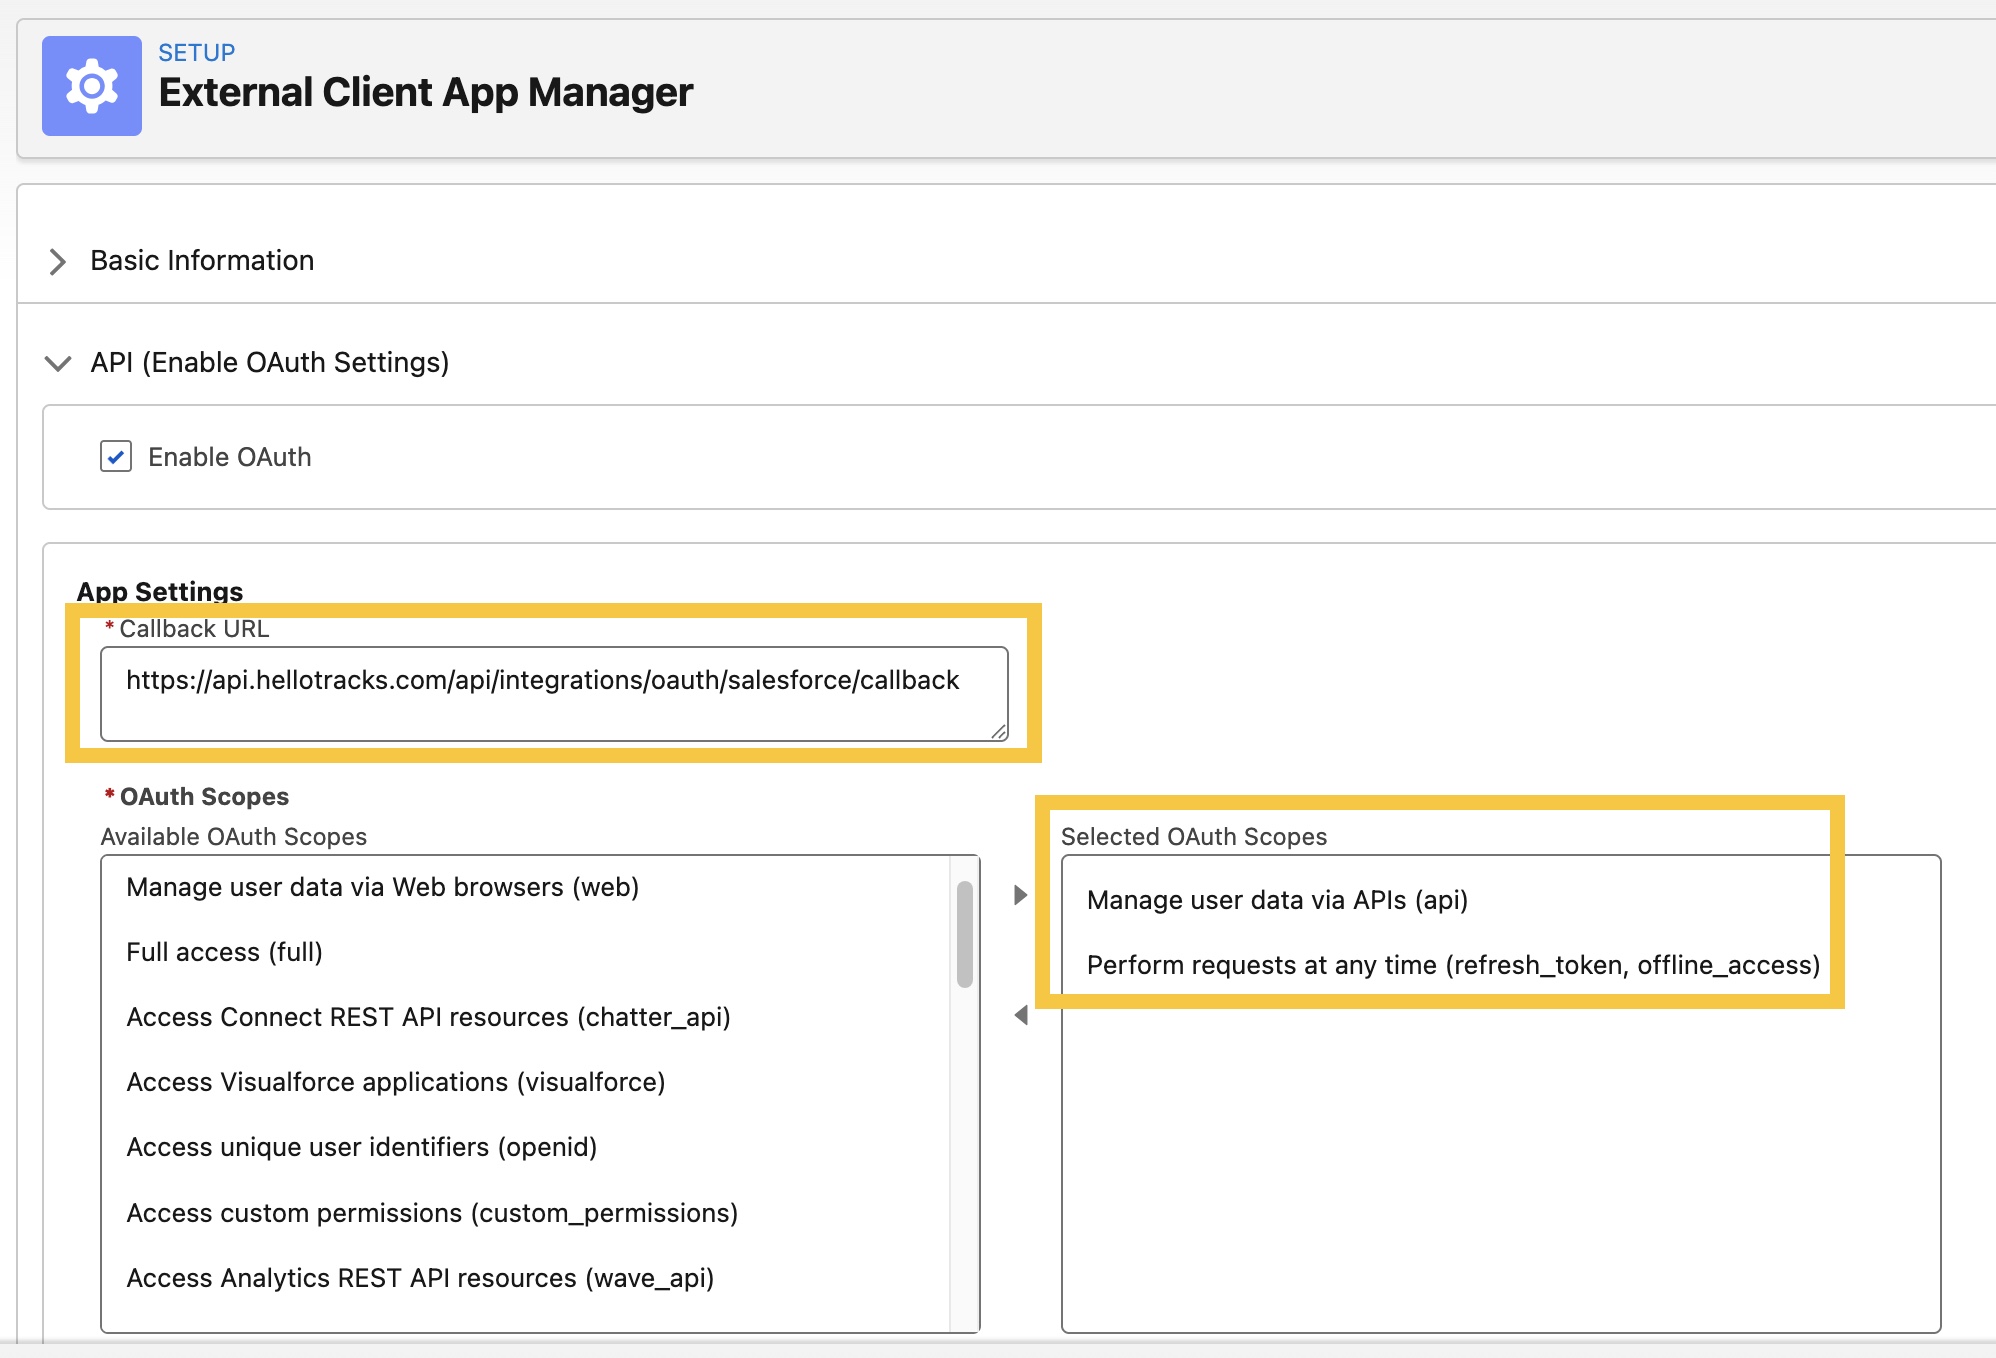
Step 6: Configure the App Settings:
- Under Callback URL, add:
https://api.hellotracks.com/api/integrations/oauth/salesforce/callback
- Under OAuth Scopes, move the following to Selected OAuth Scopes:
api
refresh_token
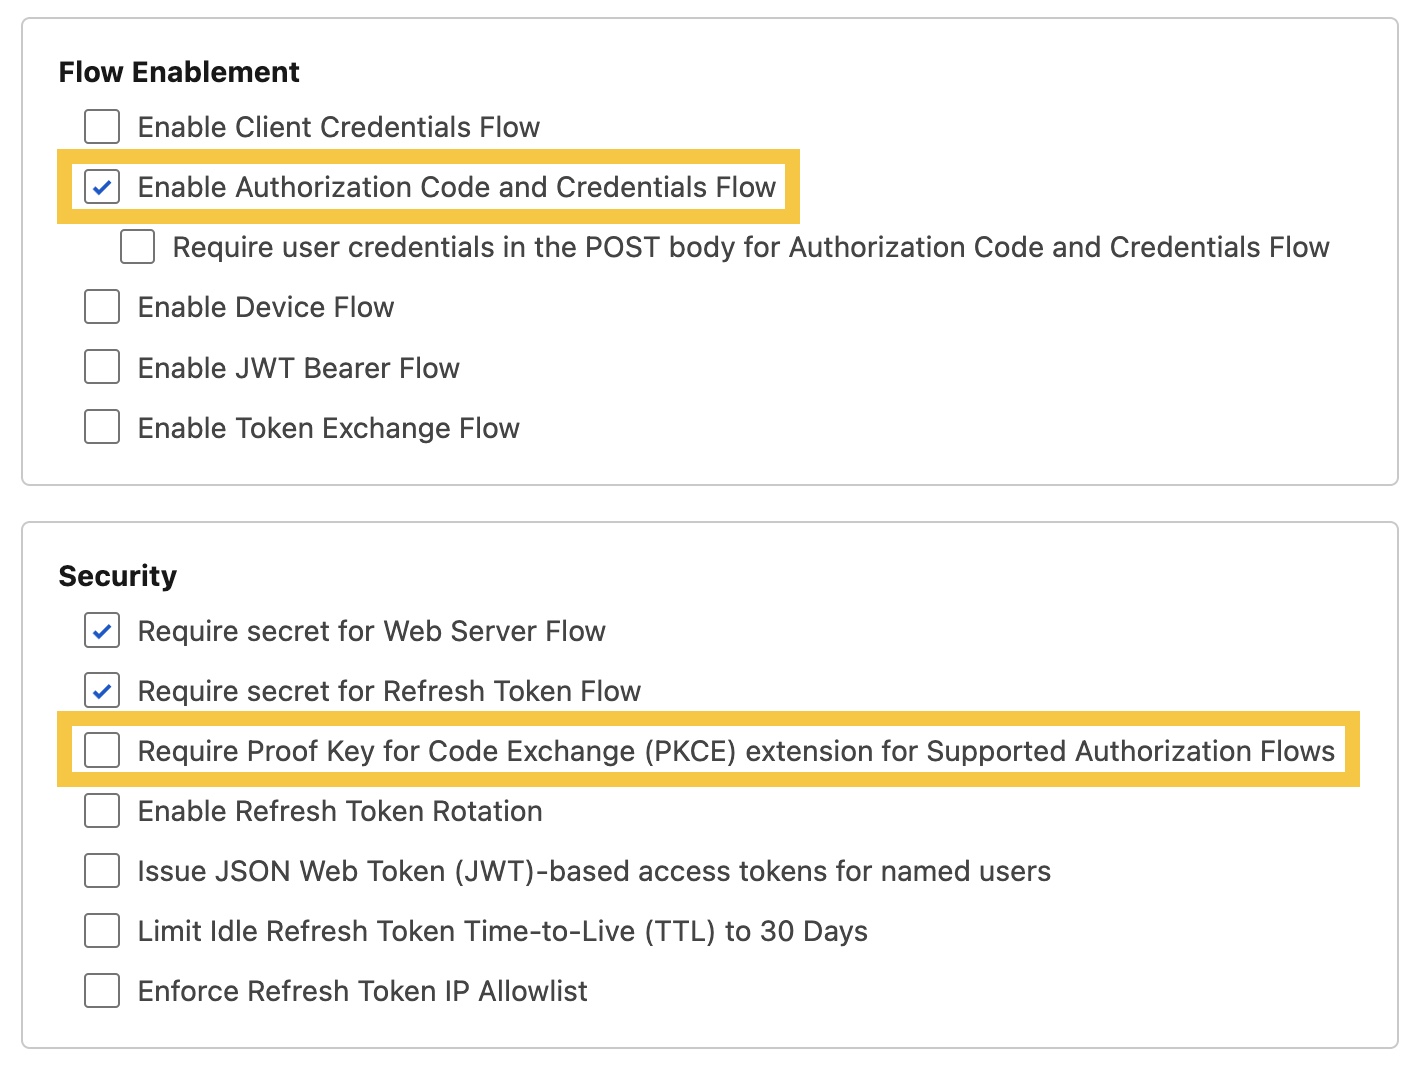
- Under Flow Enablement, check Enable Authorization Code and Credentials Flow
- Under Security, uncheck Require Proof Key for Code Exchange (PKCE) extension for Supported Authorization Flows
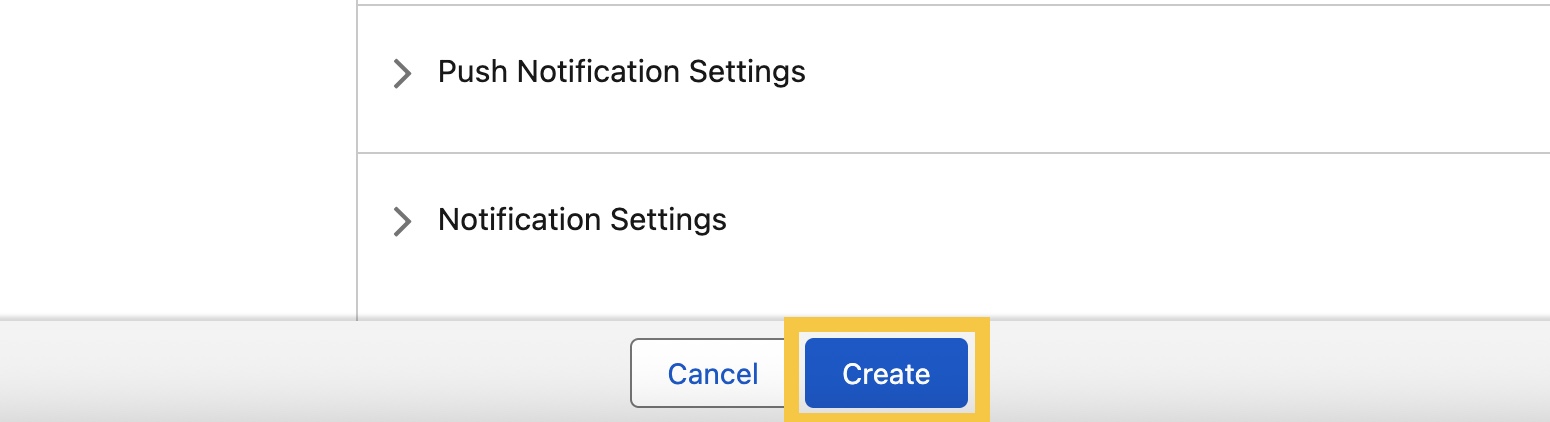
Step 7: Click Create.
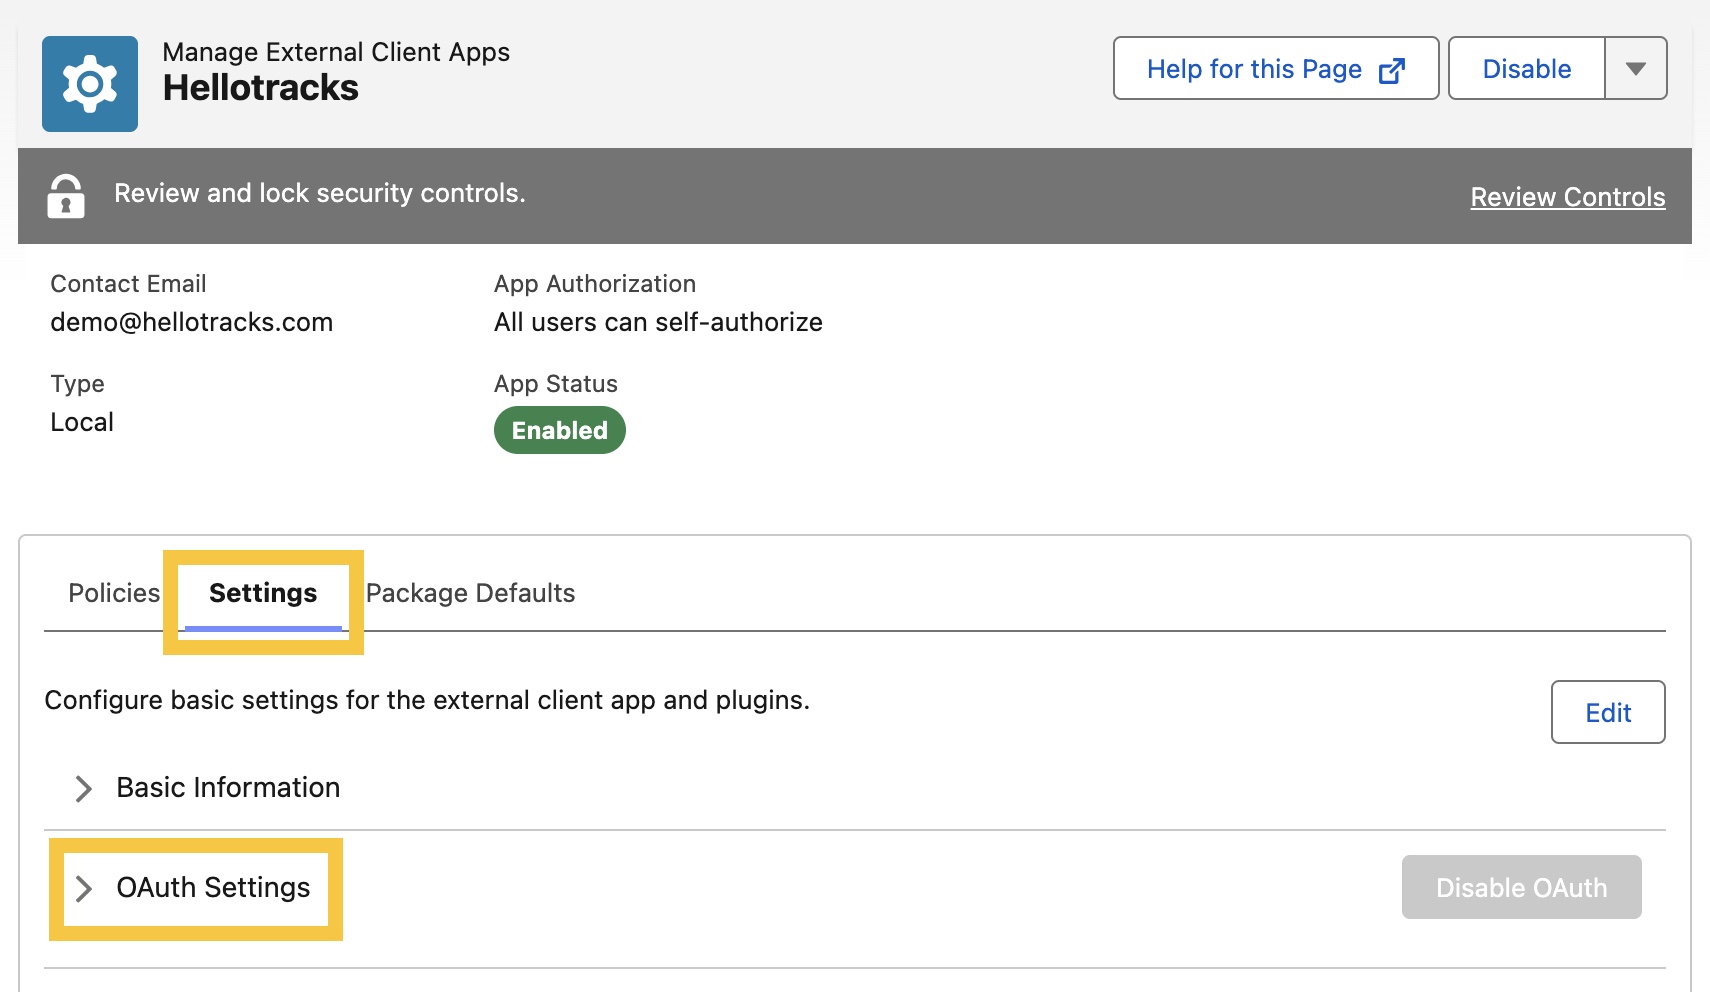
Step 8: Once created, go to Settings, then click OAuth Settings.
Step 9: Click Consumer Key and Secret to copy the following:
- Consumer Key - used as the Client ID in Hellotracks
- Consumer Secret - used as the Client secret in Hellotracks
You need these values in the next section.
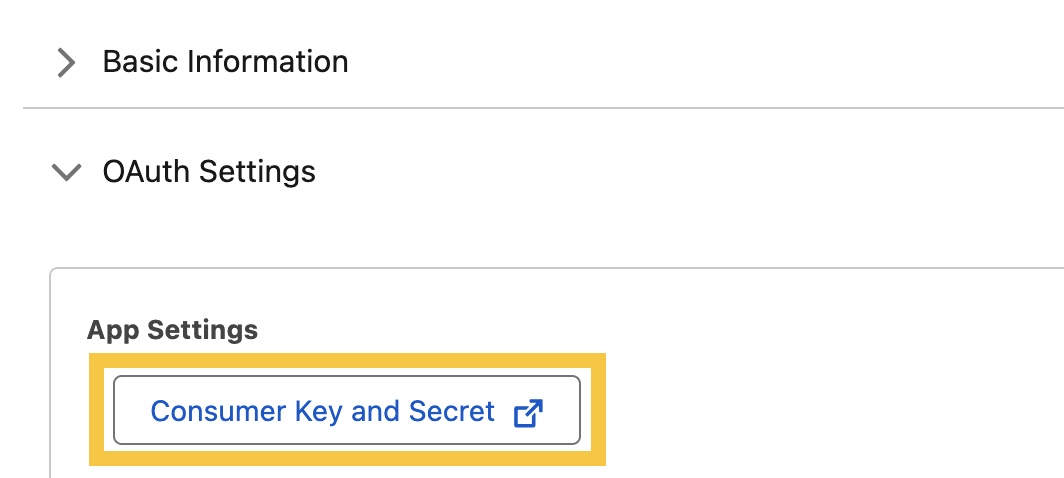
Note: You may be asked to enter a verification code sent to your email to access the Consumer Key and Consumer Secret.
-
Connect Salesforce in Hellotracks
Step 10: In Hellotracks, go to Settings and select API & Integrations.

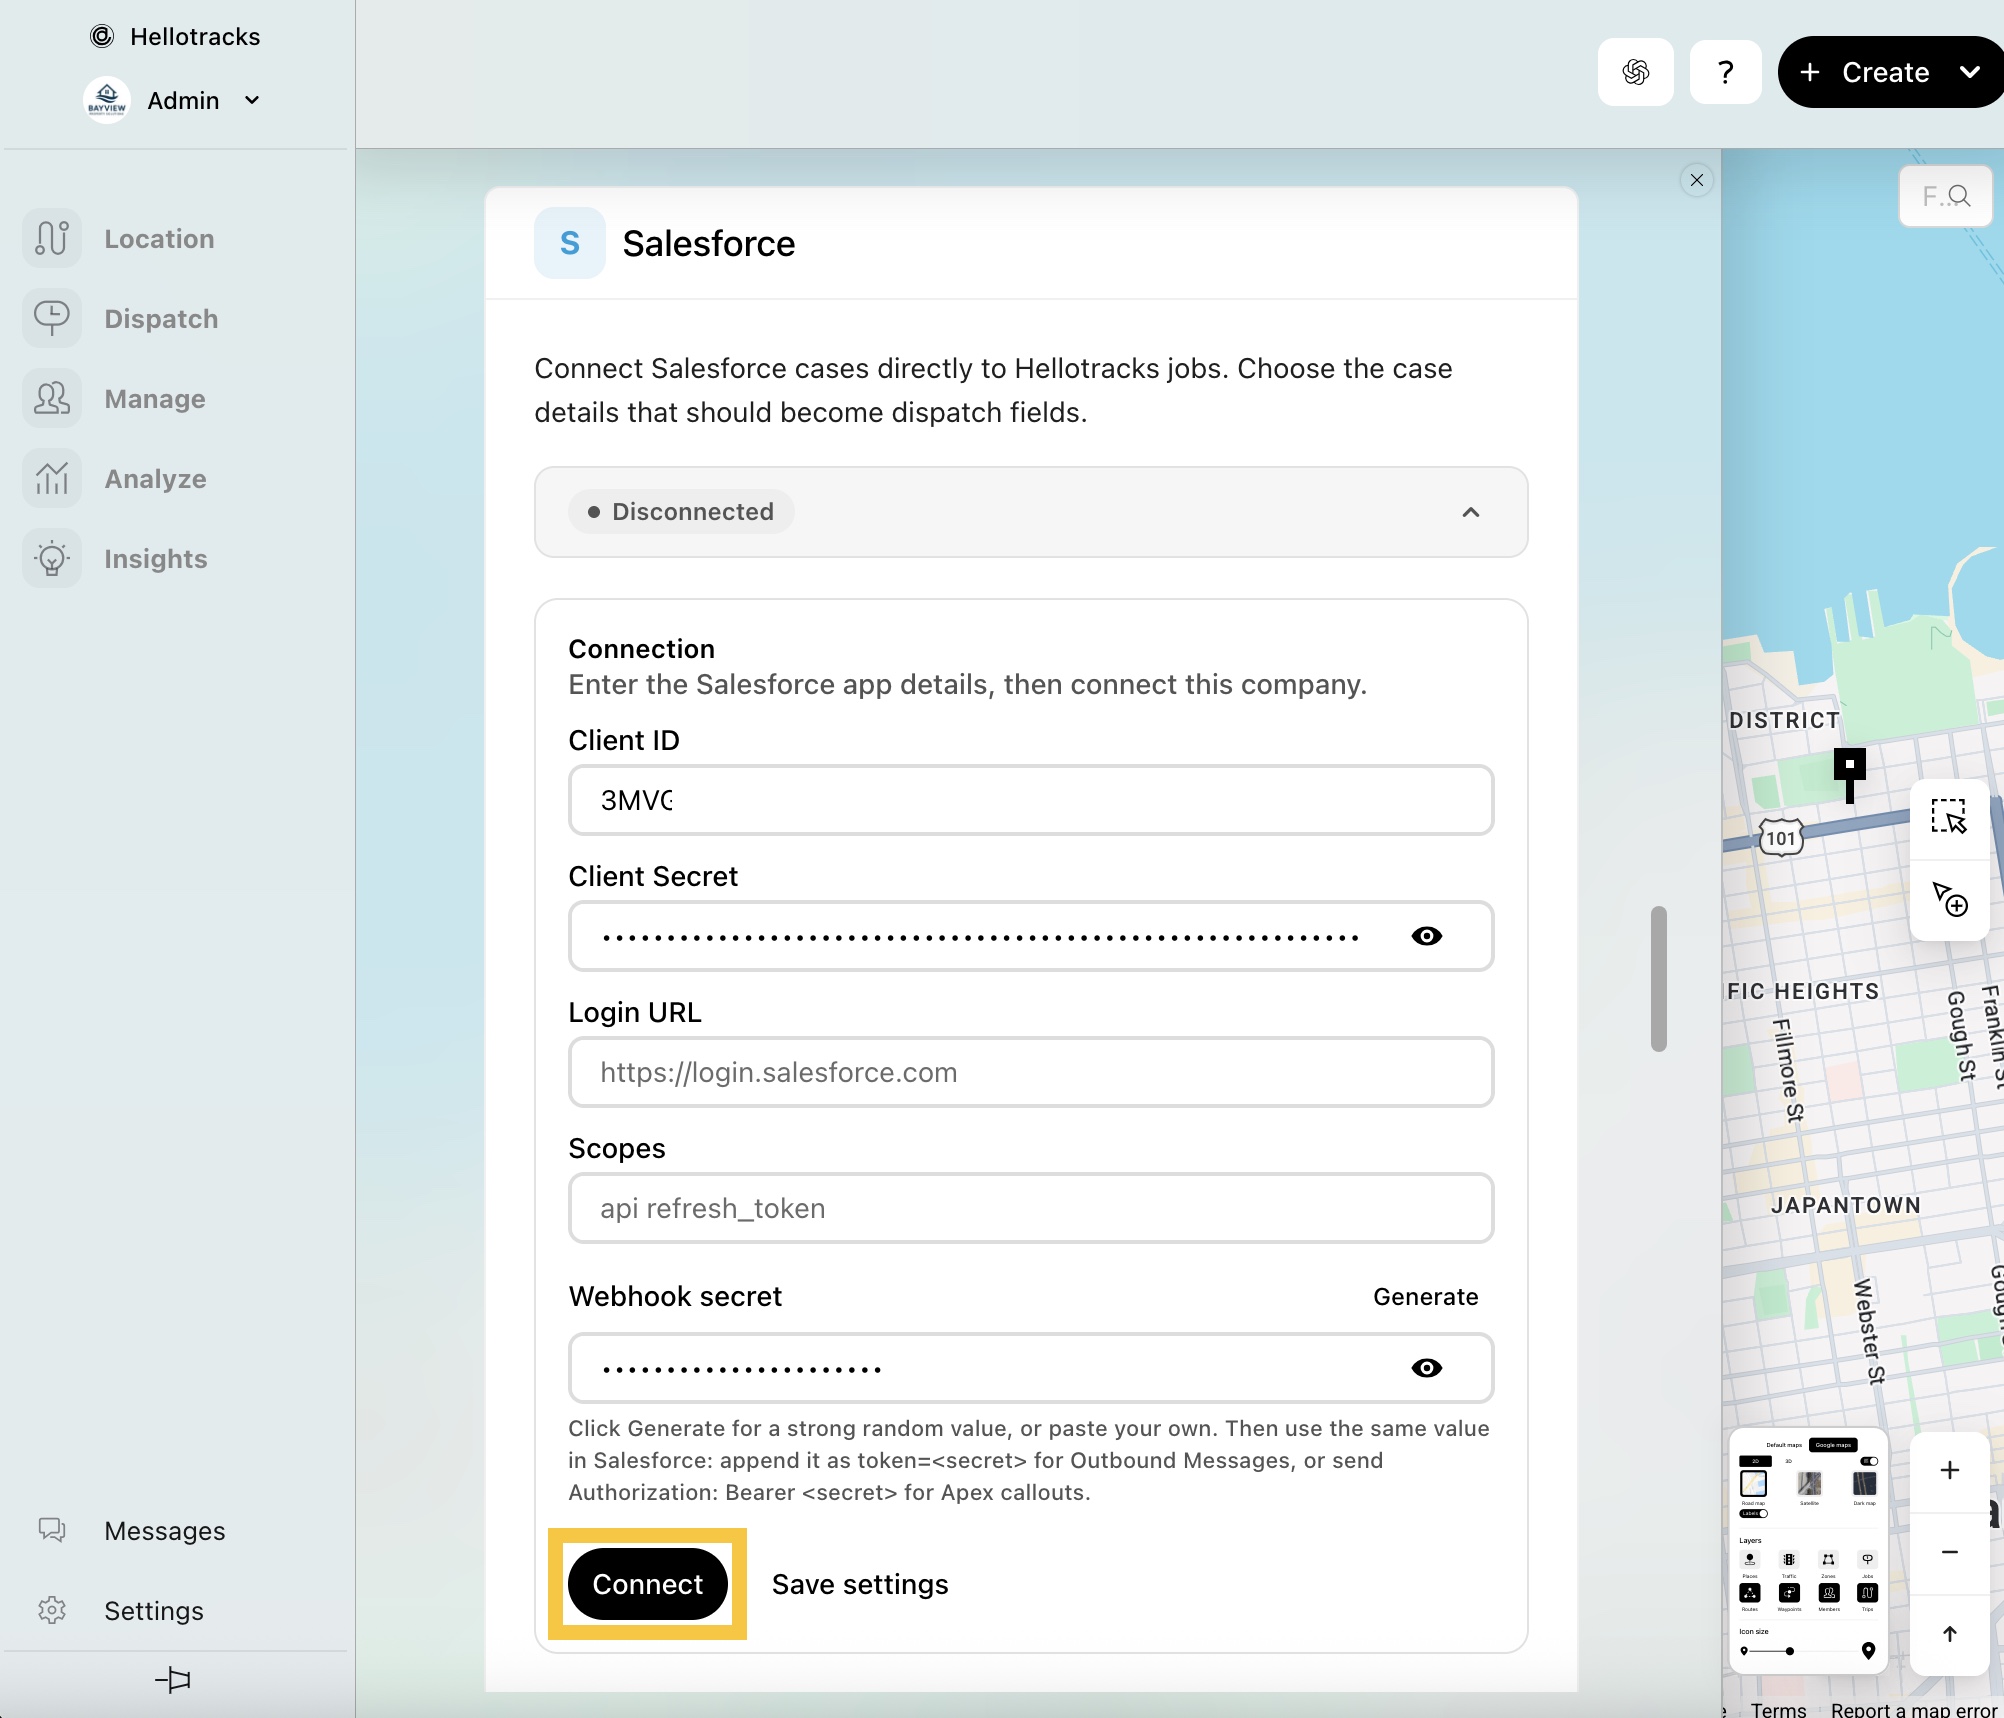
Step 11: Under Salesforce, click the status bar (it shows Disconnected) to open the Salesforce settings, if they aren't open yet.
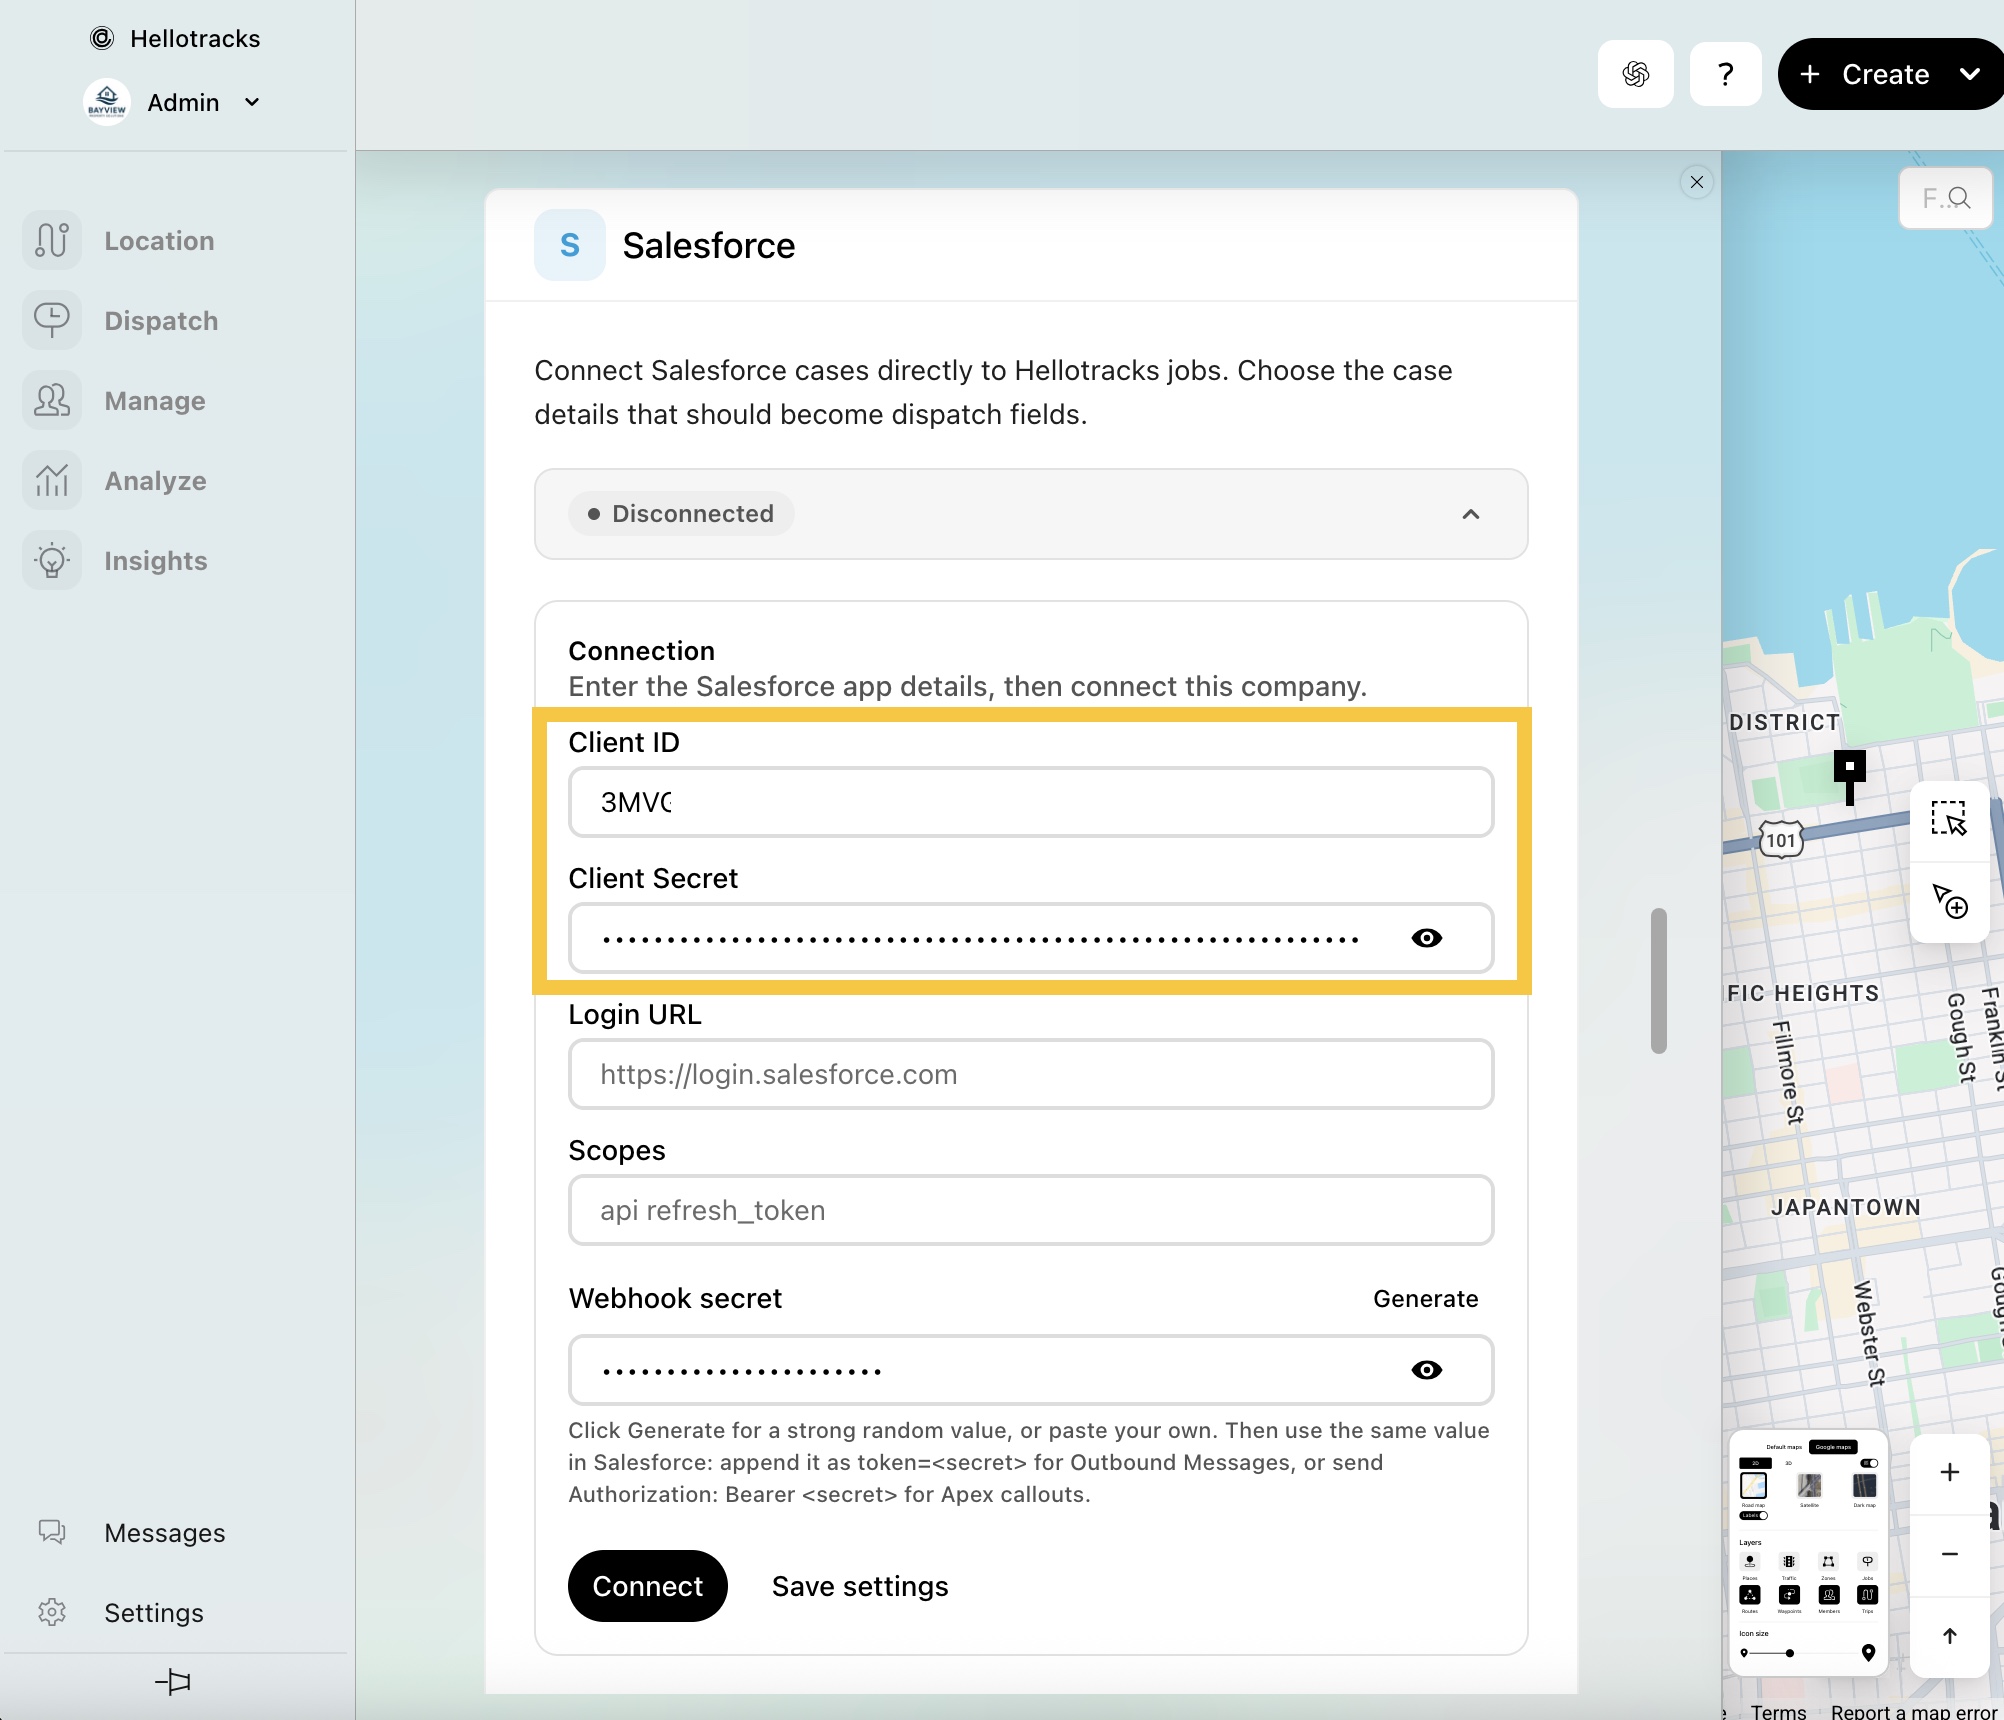
Step 12: Under Connection, enter the values you copied from Salesforce in Step 9:
- Client ID: the Consumer Key
- Client secret: the Consumer Secret
Leave Login URL empty if you connect your production Salesforce org (Hellotracks then uses https://login.salesforce.com). For a sandbox org, enter https://test.salesforce.com . You can also leave Scopes empty: Hellotracks uses api refresh_token by default.
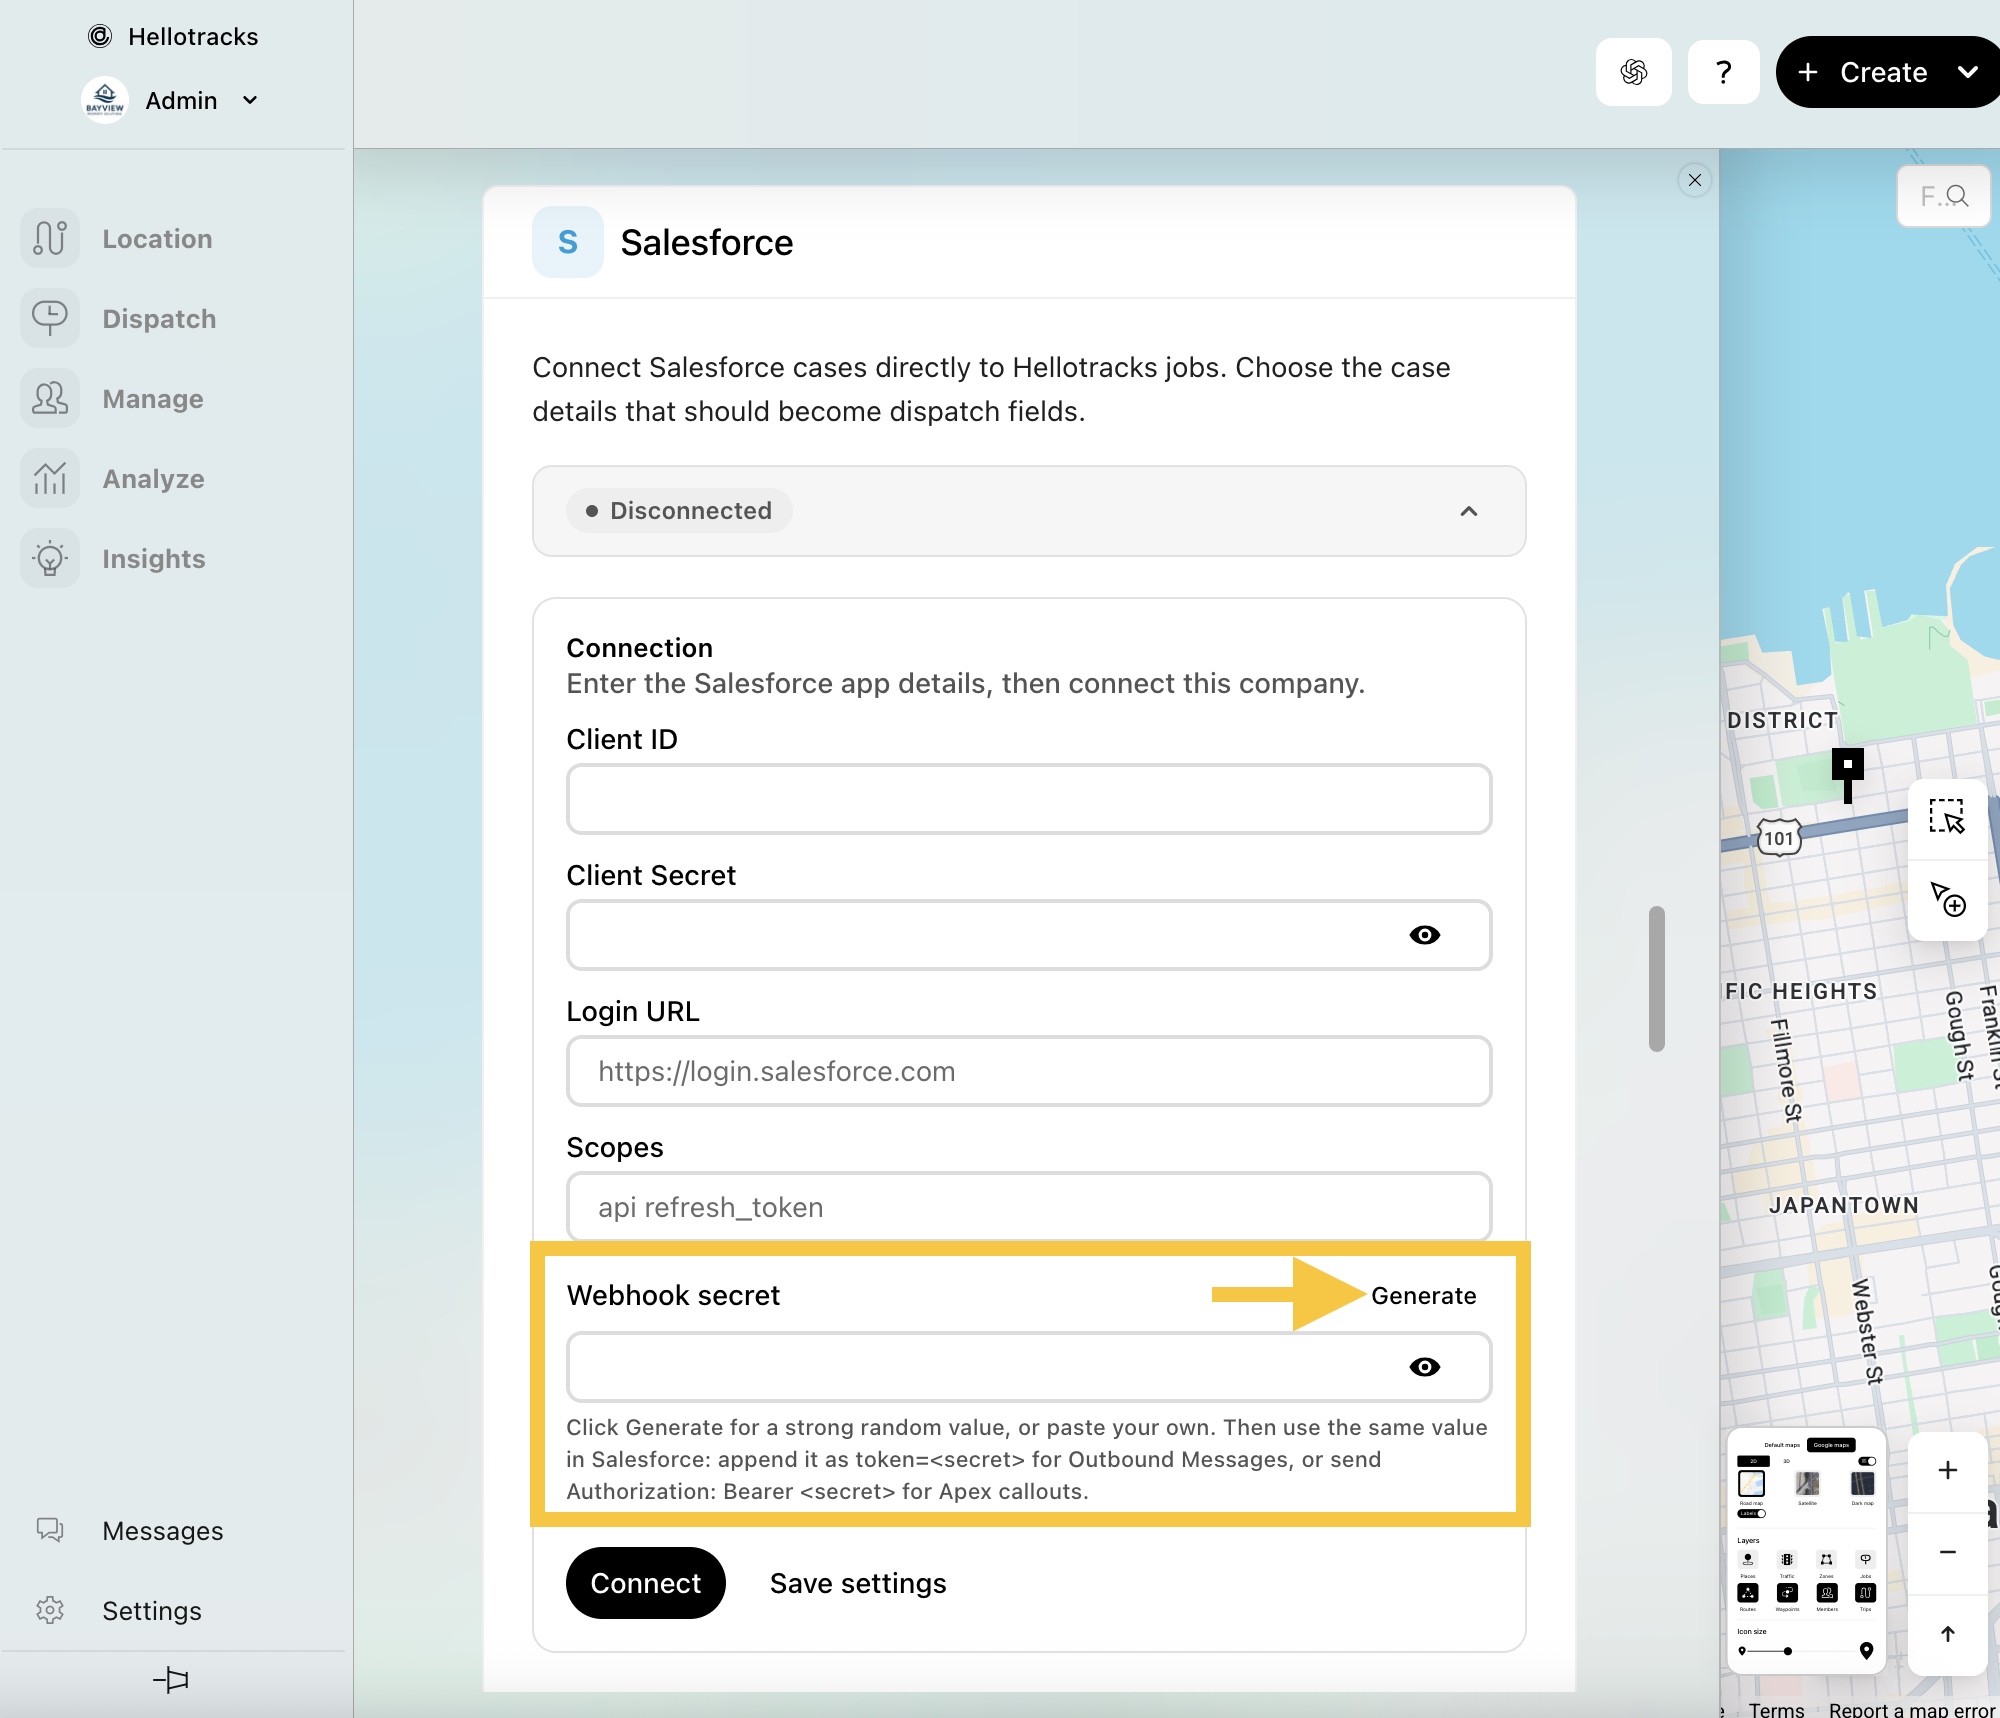
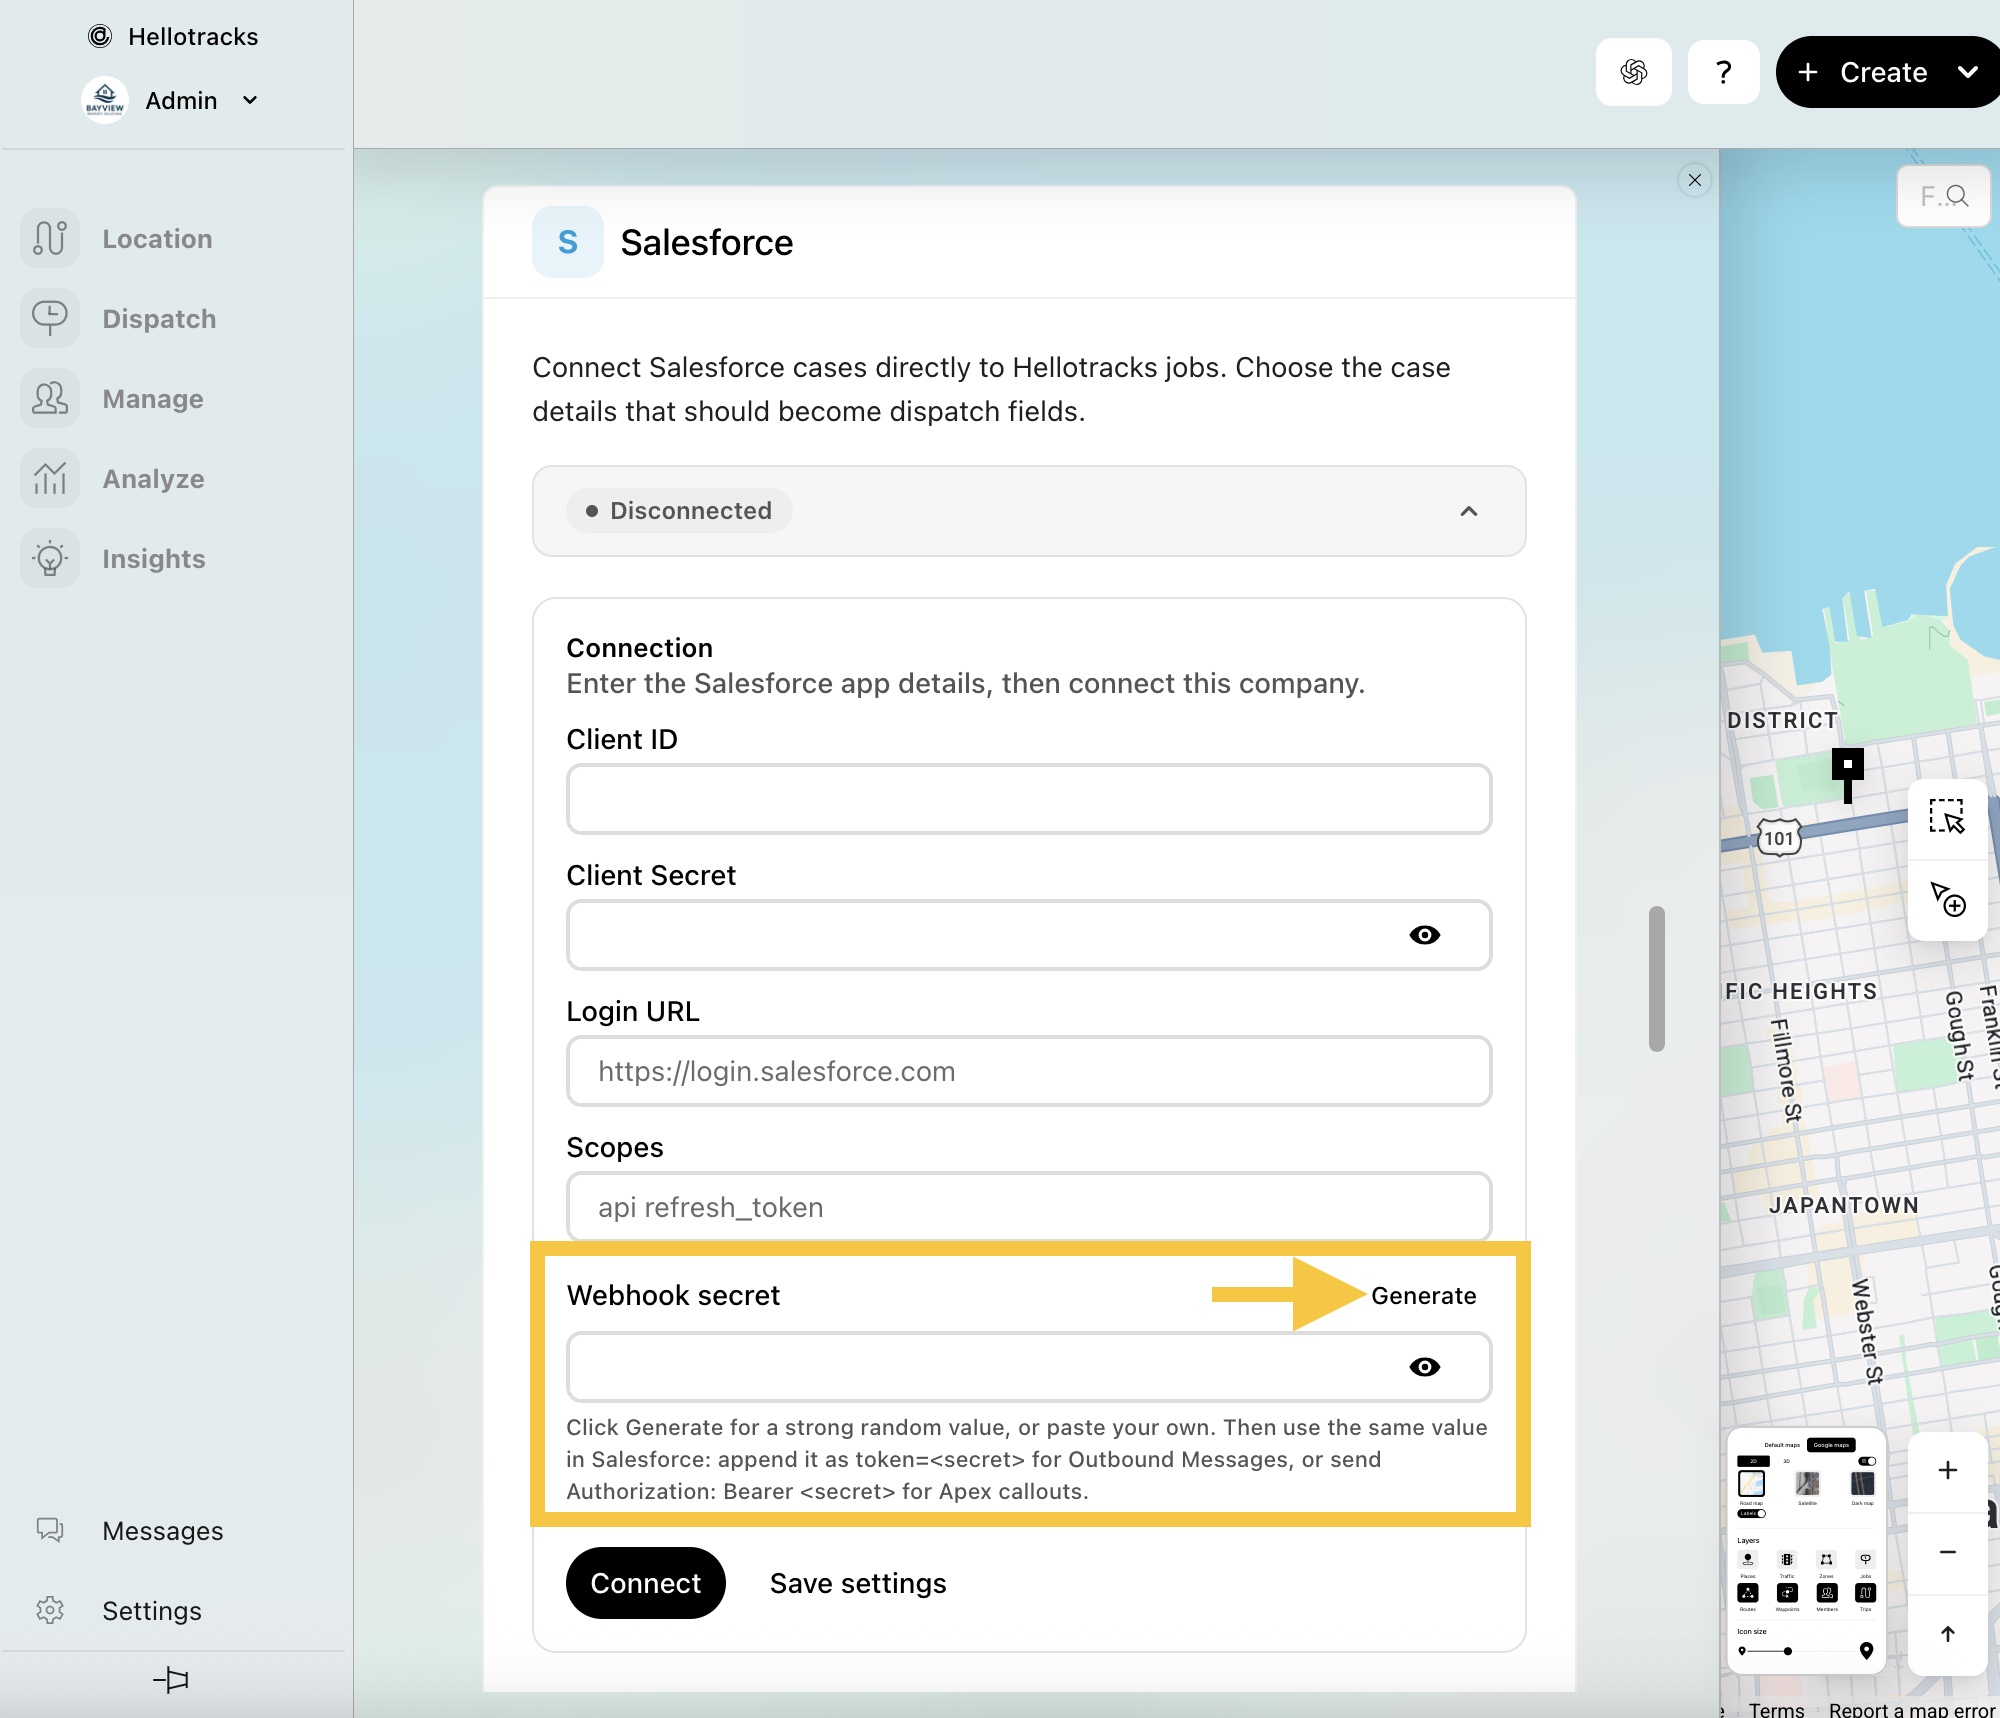
Step 13: Next to Webhook secret, click Generate, or paste your own value. Hellotracks shows the generated secret once below the field: copy it and keep it somewhere safe. You need it in Salesforce in the next section.
Step 14: Click Save settings.
Step 15: Click Connect. Salesforce opens in a new tab. Log in if prompted, allow the Hellotracks app to access your Salesforce org, then go back to the Hellotracks tab.
Your Salesforce org is now connected. The status in Hellotracks changes to Active.
-
Choose a Salesforce Webhook Method
Choose one webhook method to send Salesforce case updates to Hellotracks. Both use the webhook secret you saved in Step 13.
4.1 Set Up Webhooks via Outbound Messages
Use this method for the standard no-code setup. If you require more control over the data or trigger logic, proceed to 4.2 (Optional) Set Up Webhooks via Apex or Custom JSON Callout.
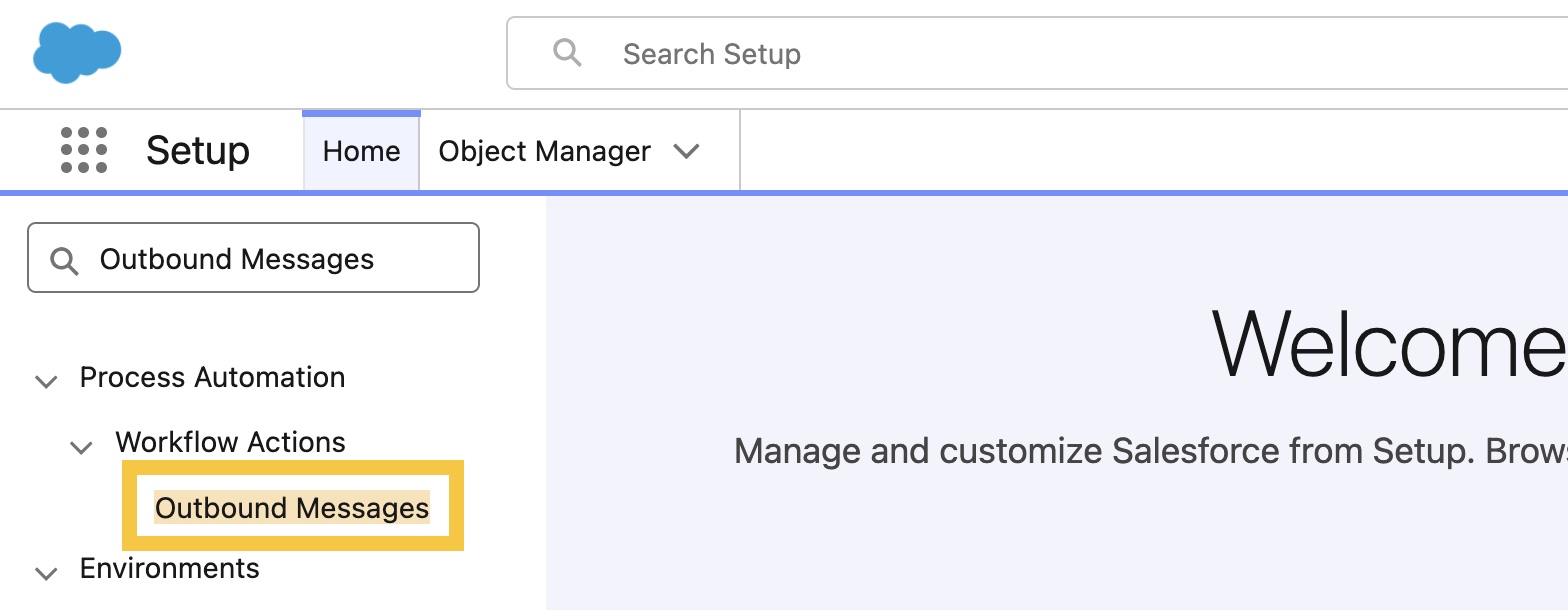
Step 16: In Salesforce, in Quick Find, search for Outbound Messages.
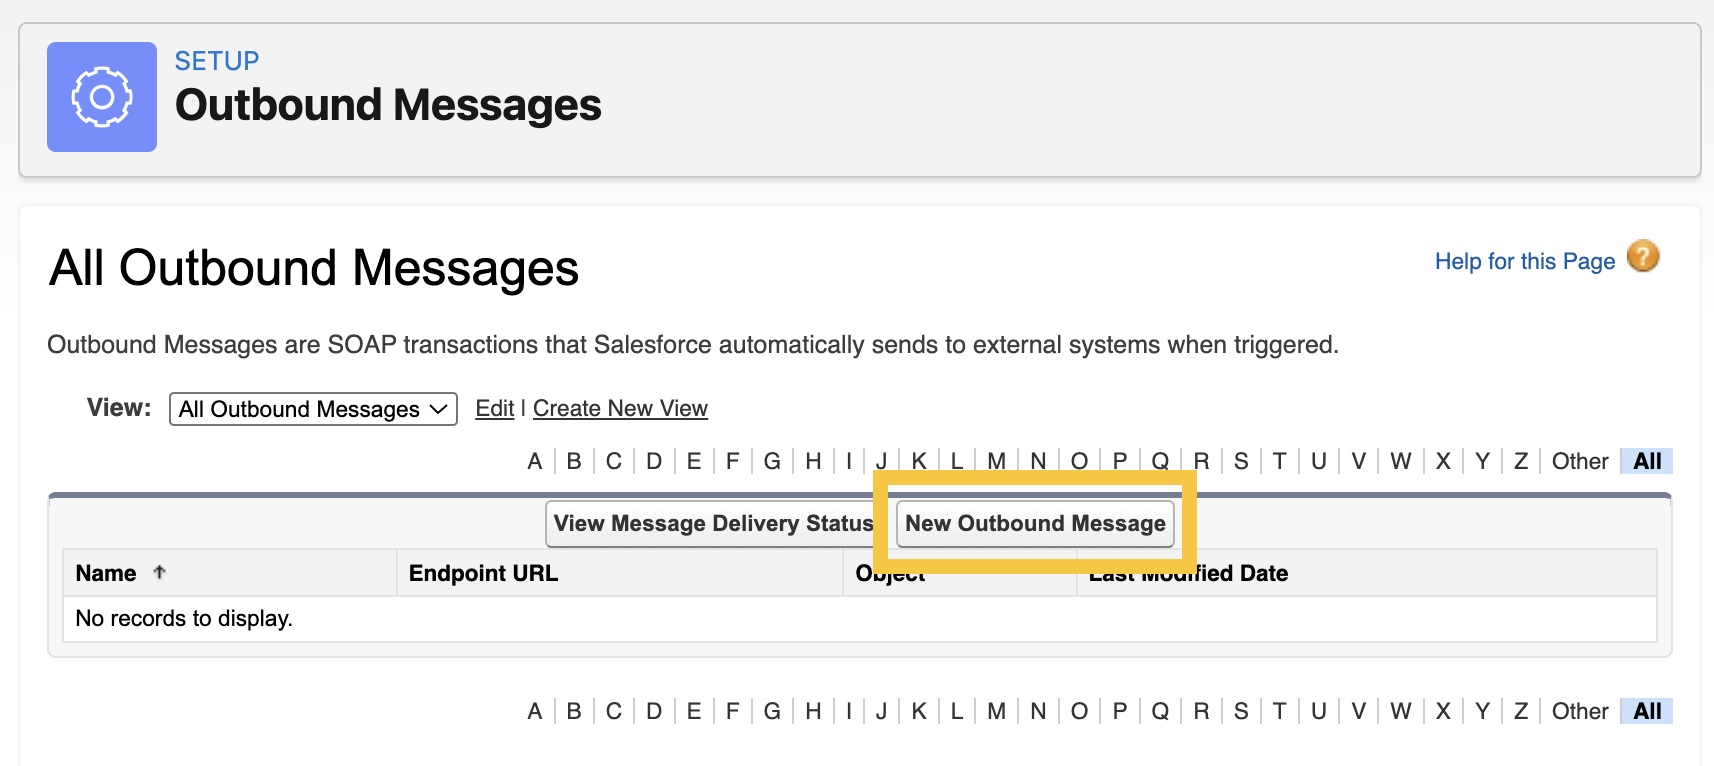
Step 17: Click New Outbound Message.
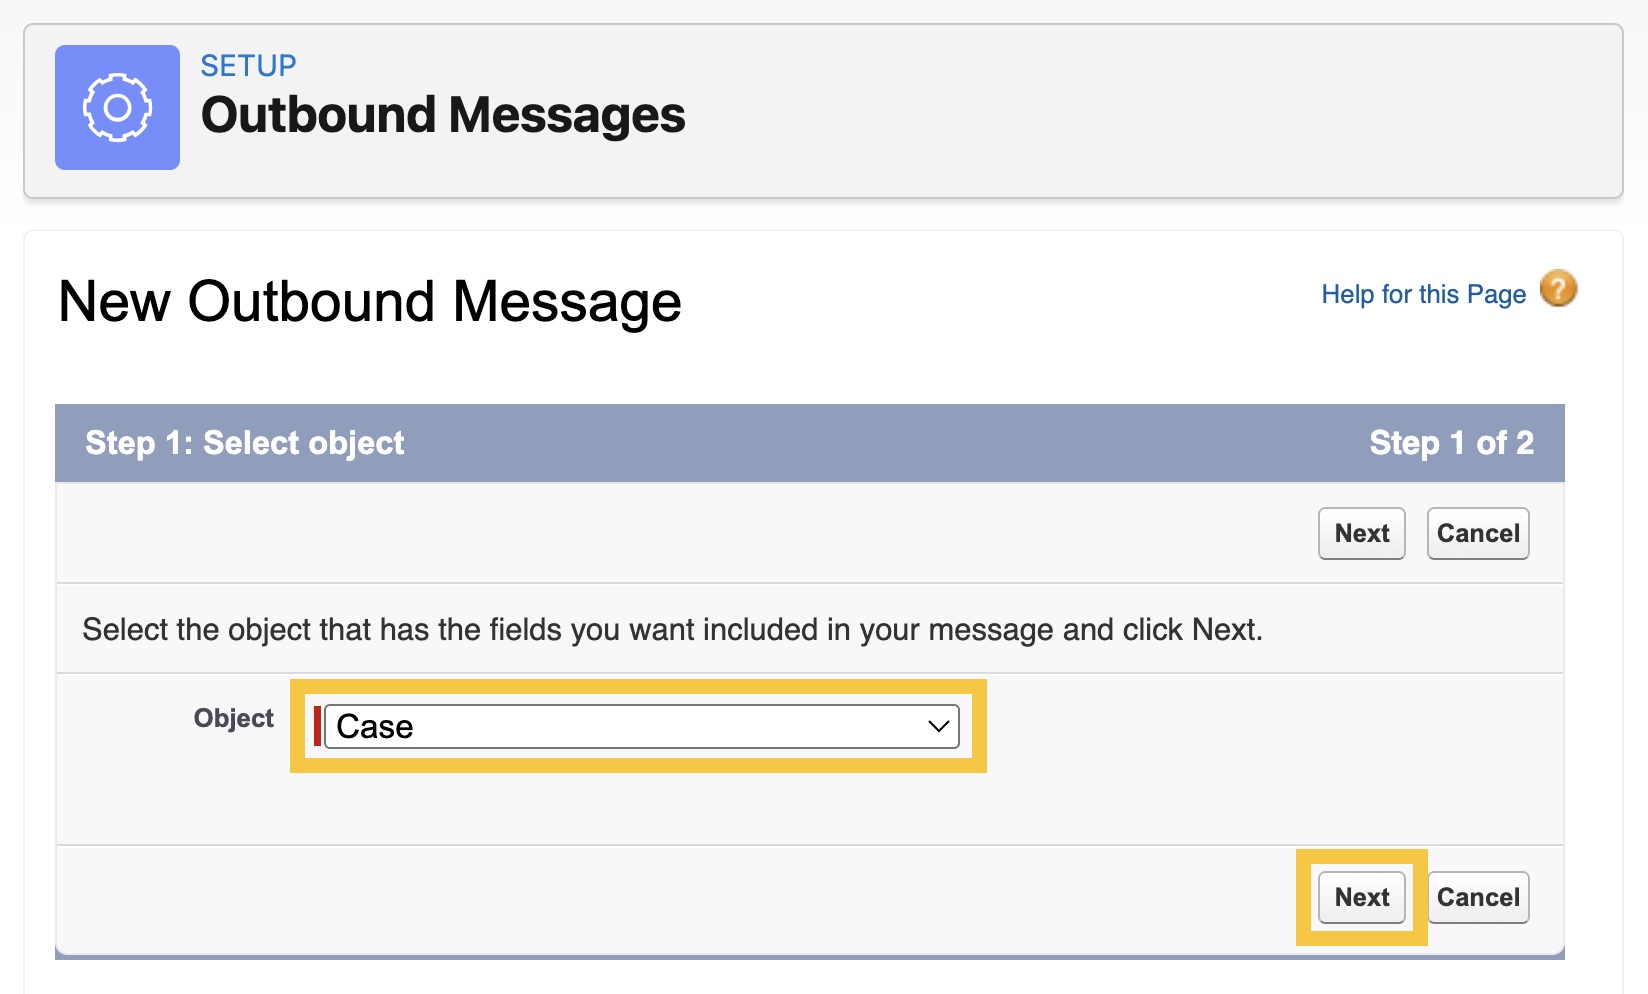
Step 18: Select Case as the object, then click Next.
Step 19: Configure the following:
-
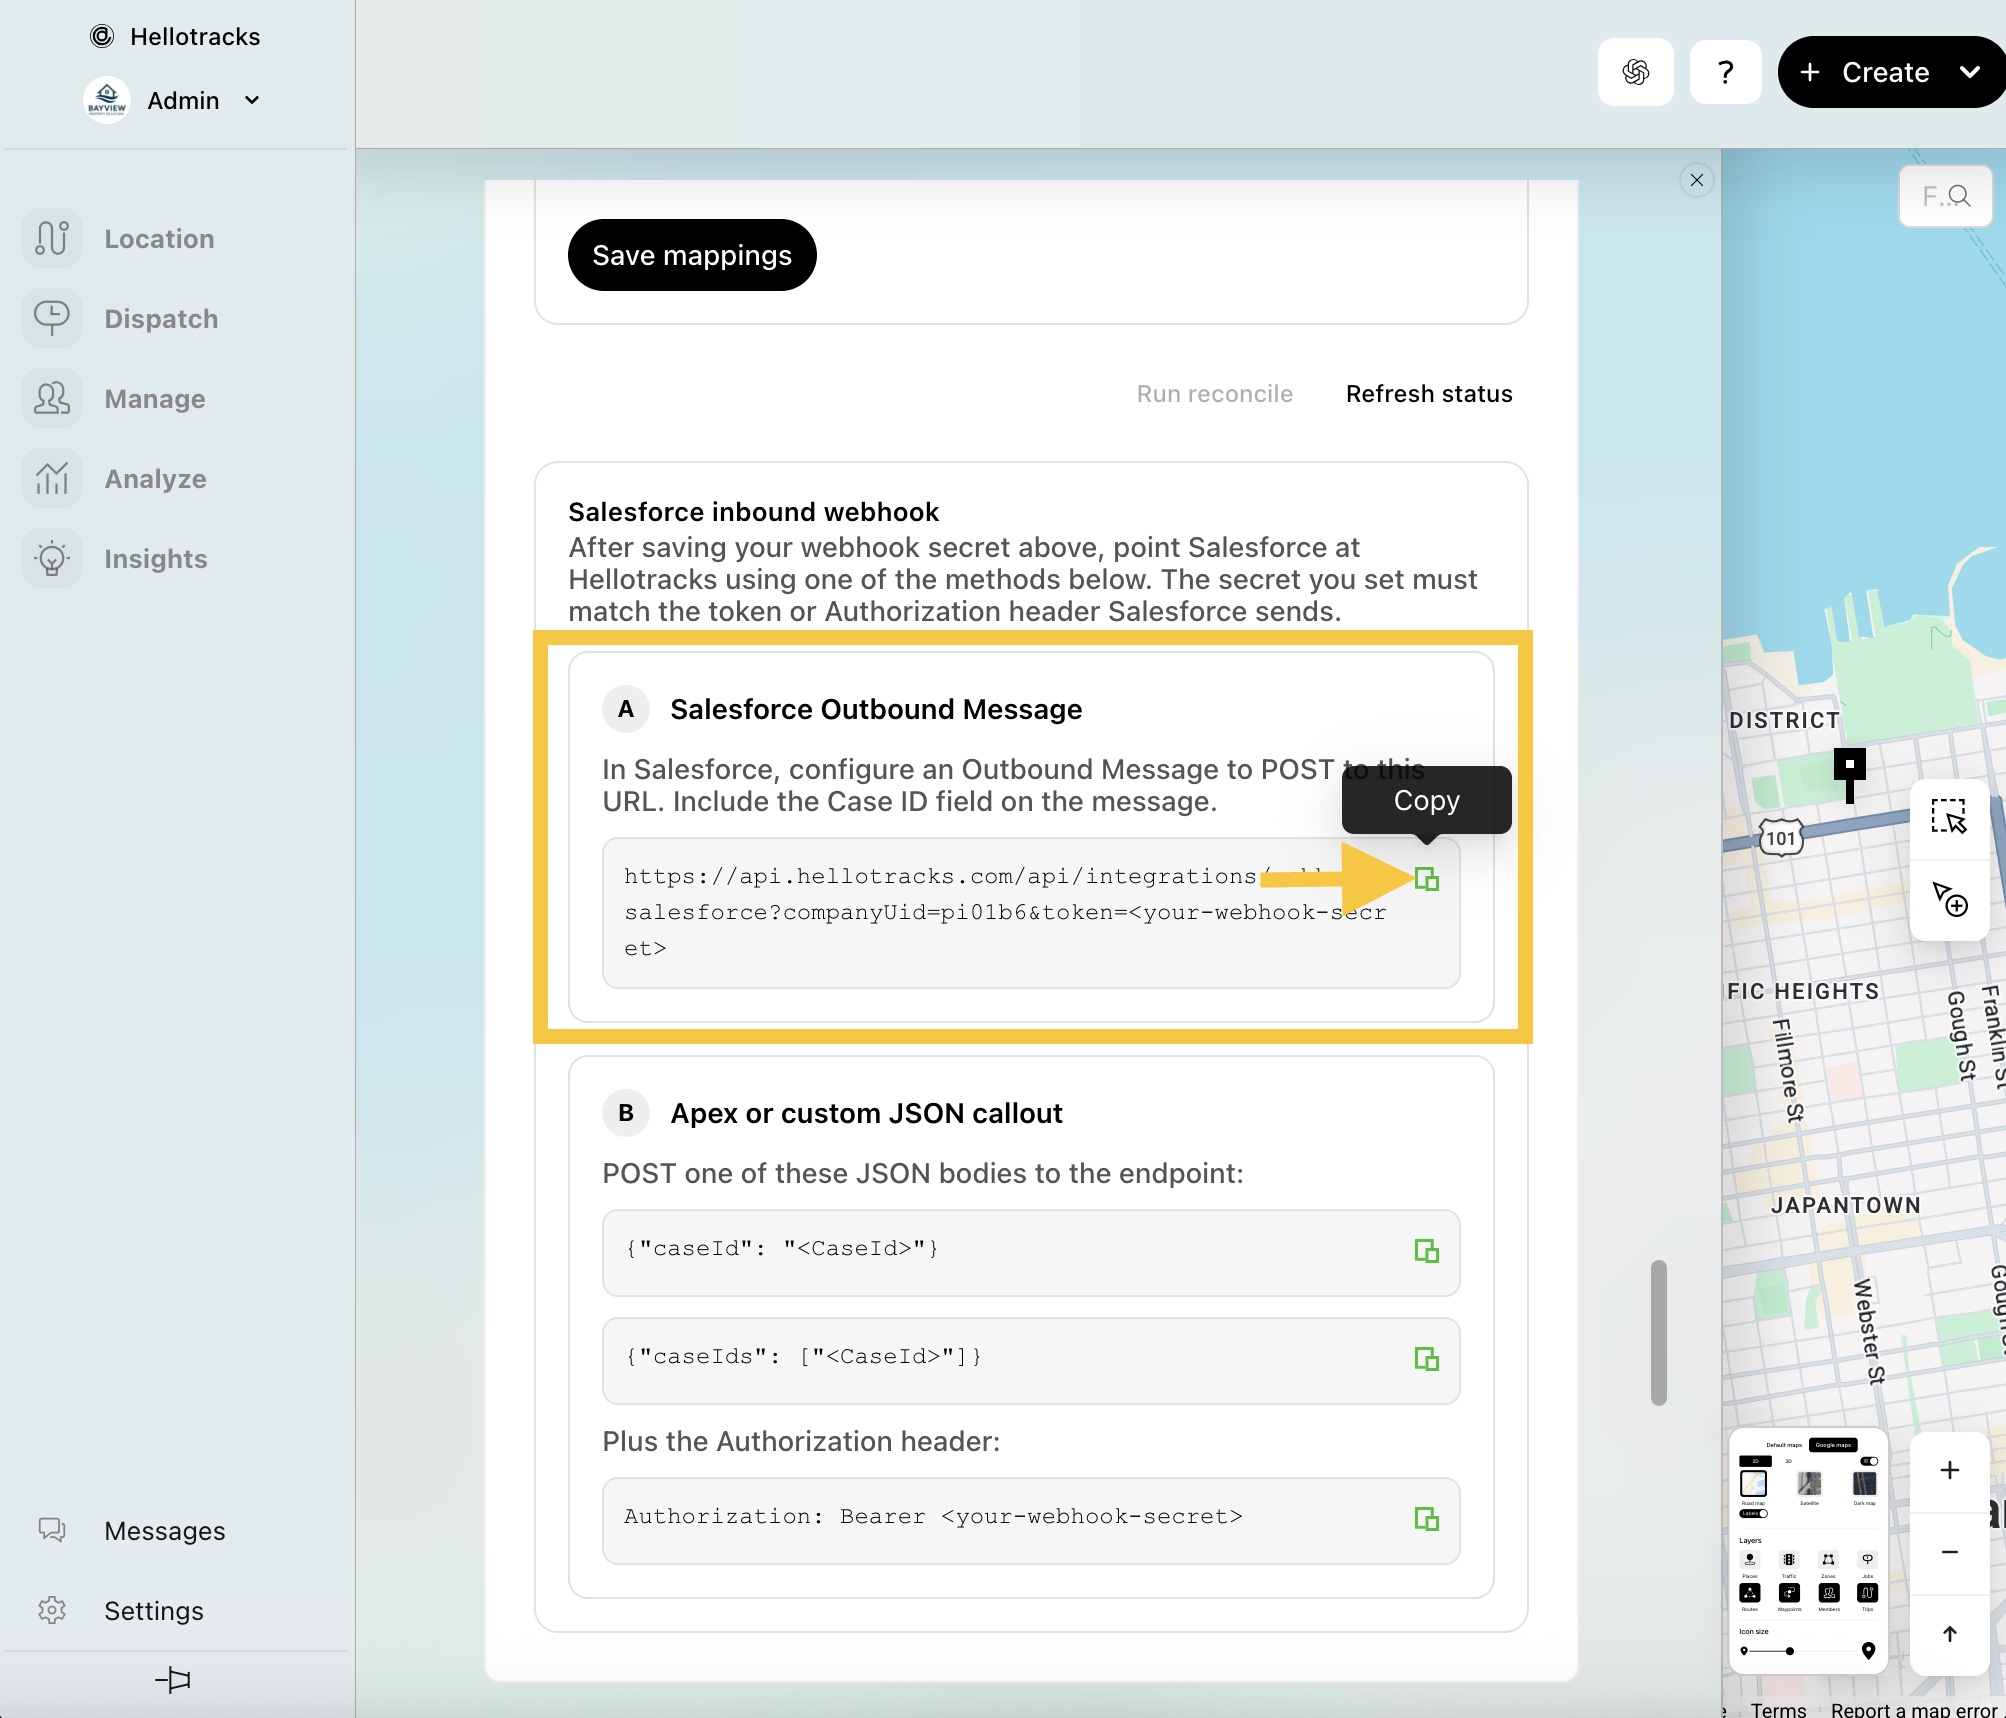
Endpoint URL: In Hellotracks, under Salesforce, scroll down to Salesforce inbound webhook. Under Salesforce Outbound Message, click the copy icon next to the URL.
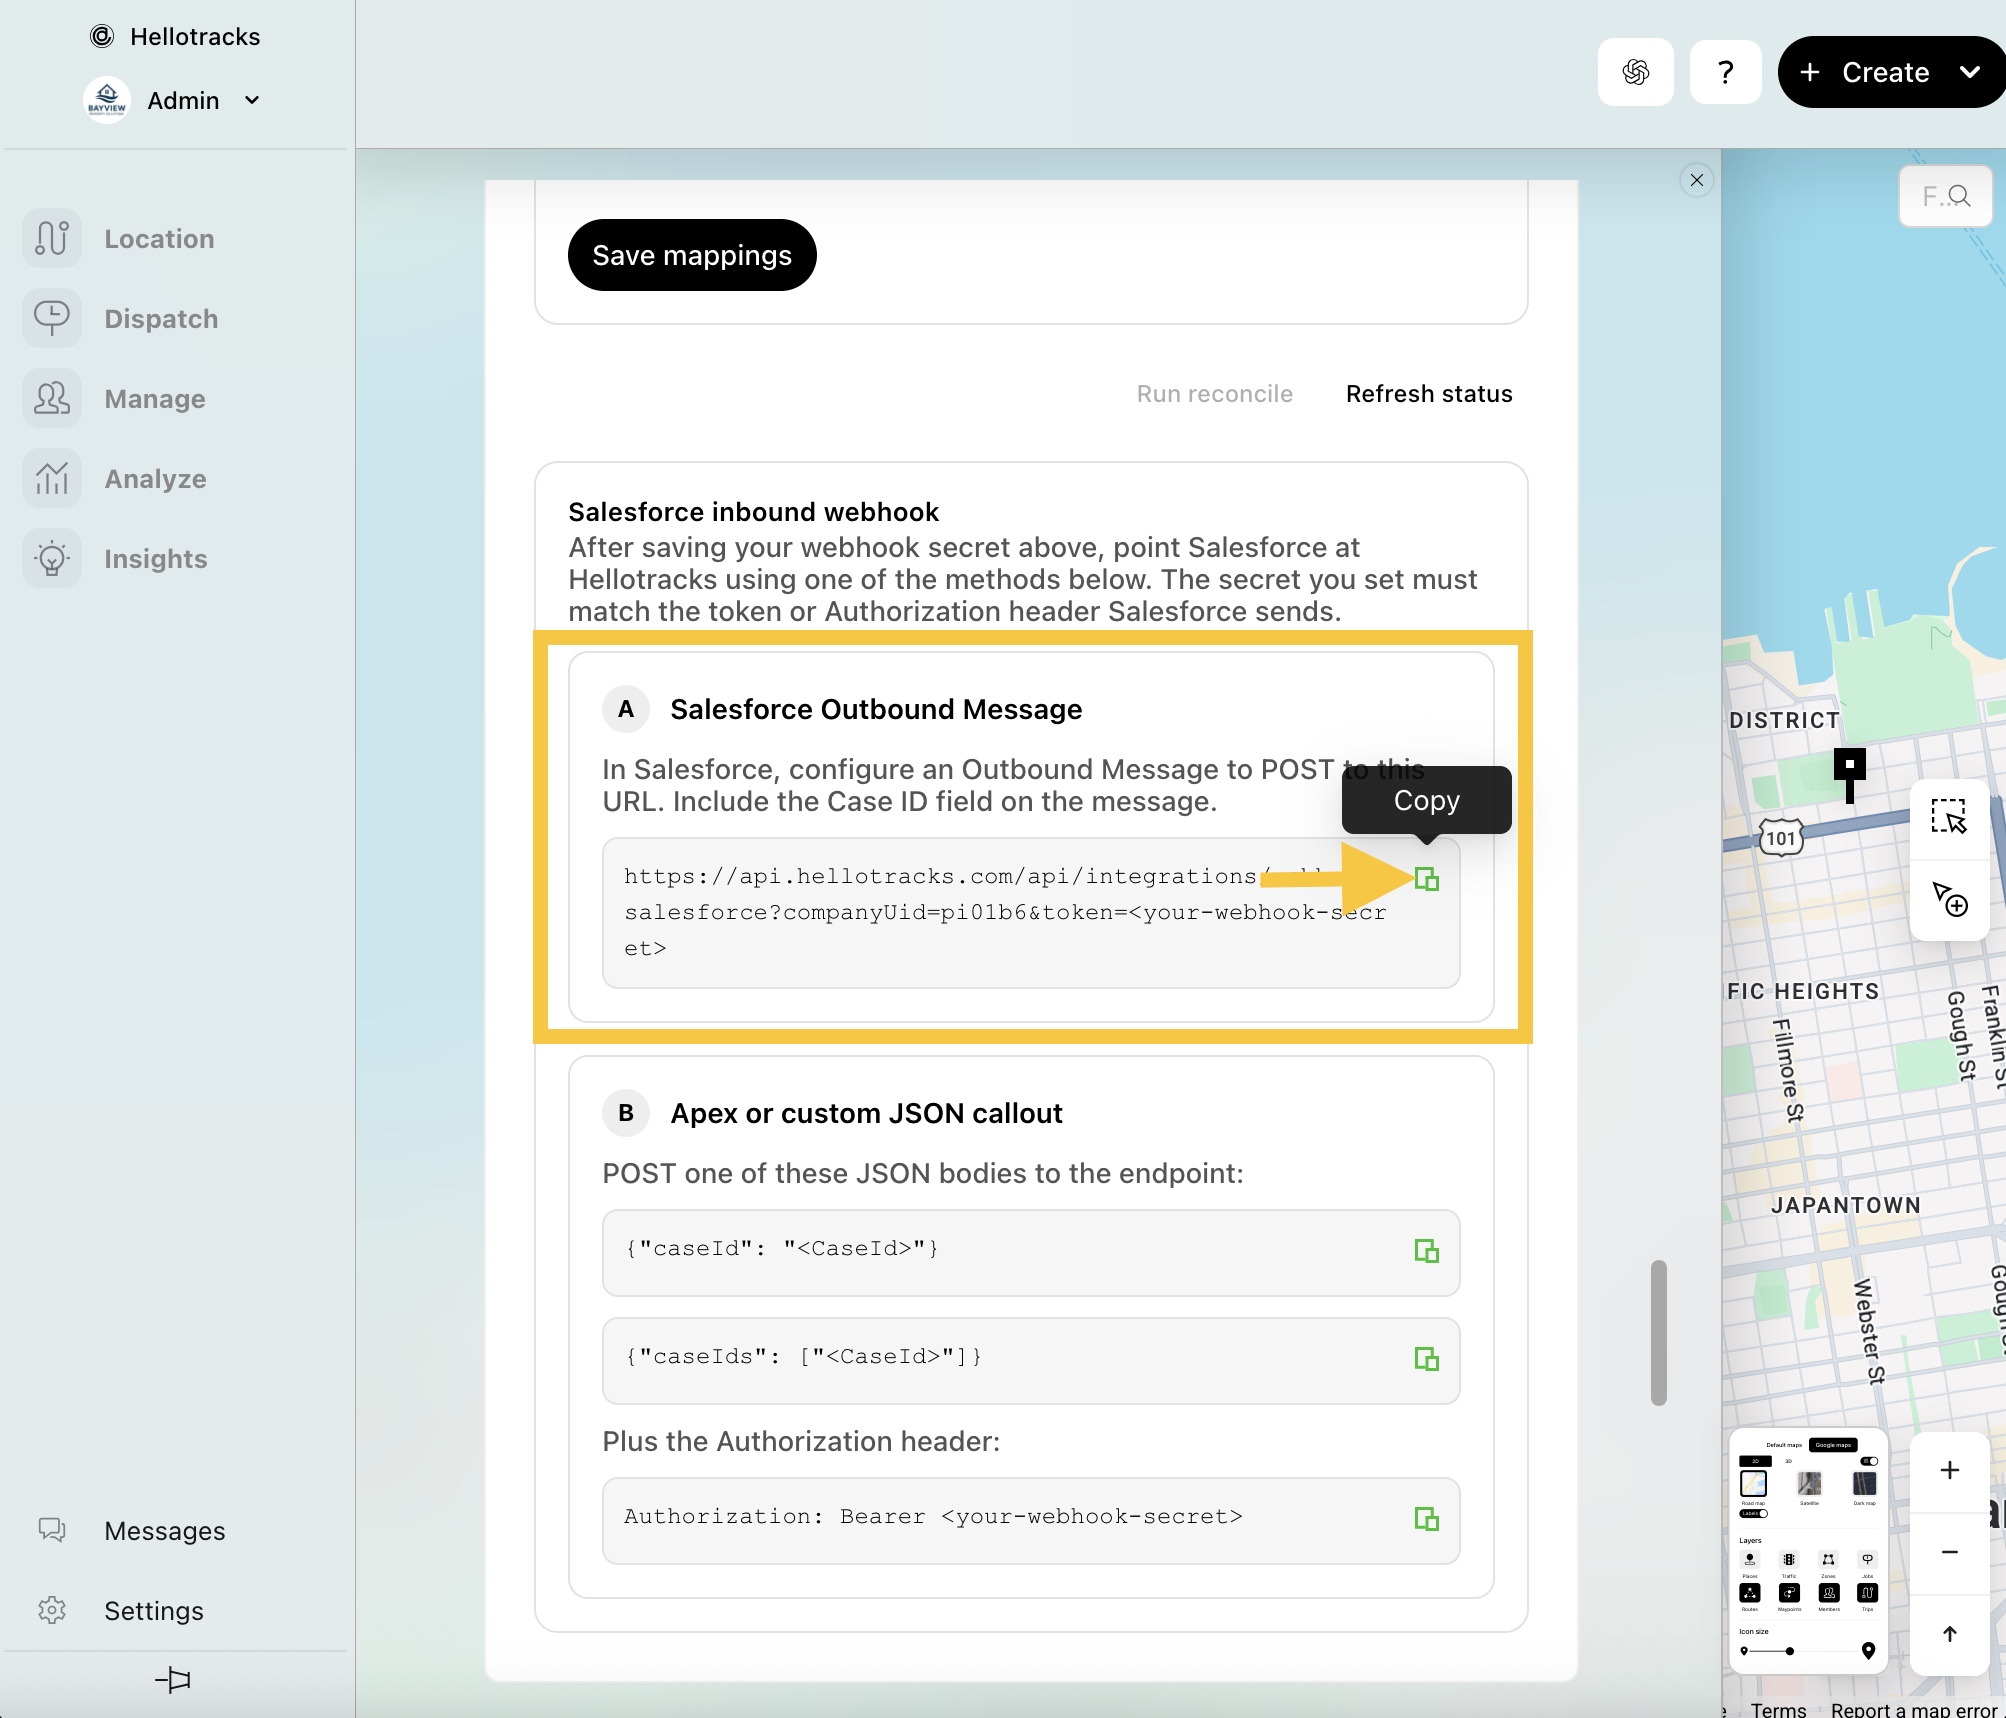
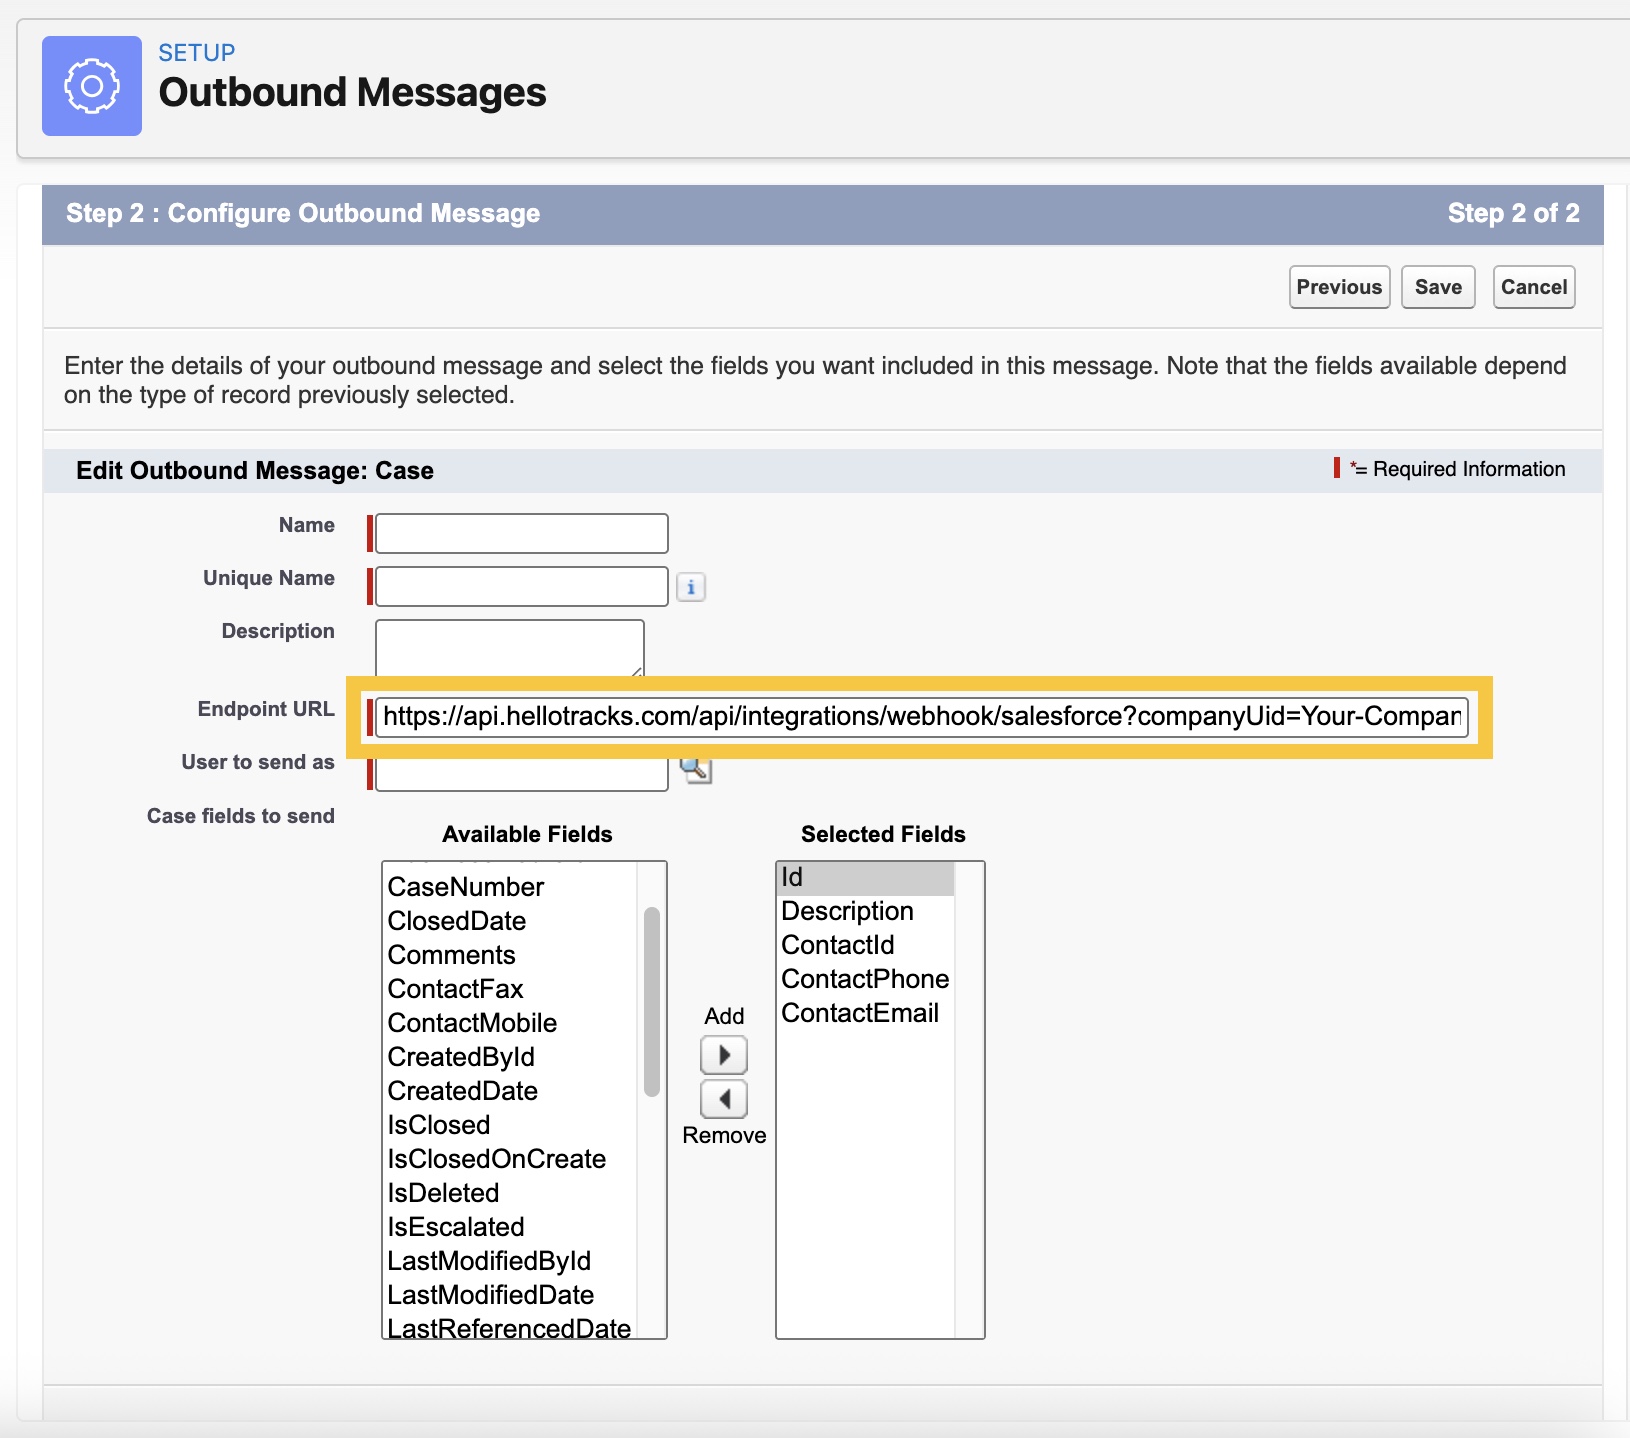
Paste the URL into the Endpoint URL field in Salesforce. Then replace <your-webhook-secret> at the end with the webhook secret from Step 13. The finished URL looks like this:
https://api.hellotracks.com/api/integrations/webhook/salesforce?companyUid=Your-Company-ID &token=Your-Webhook-Secret
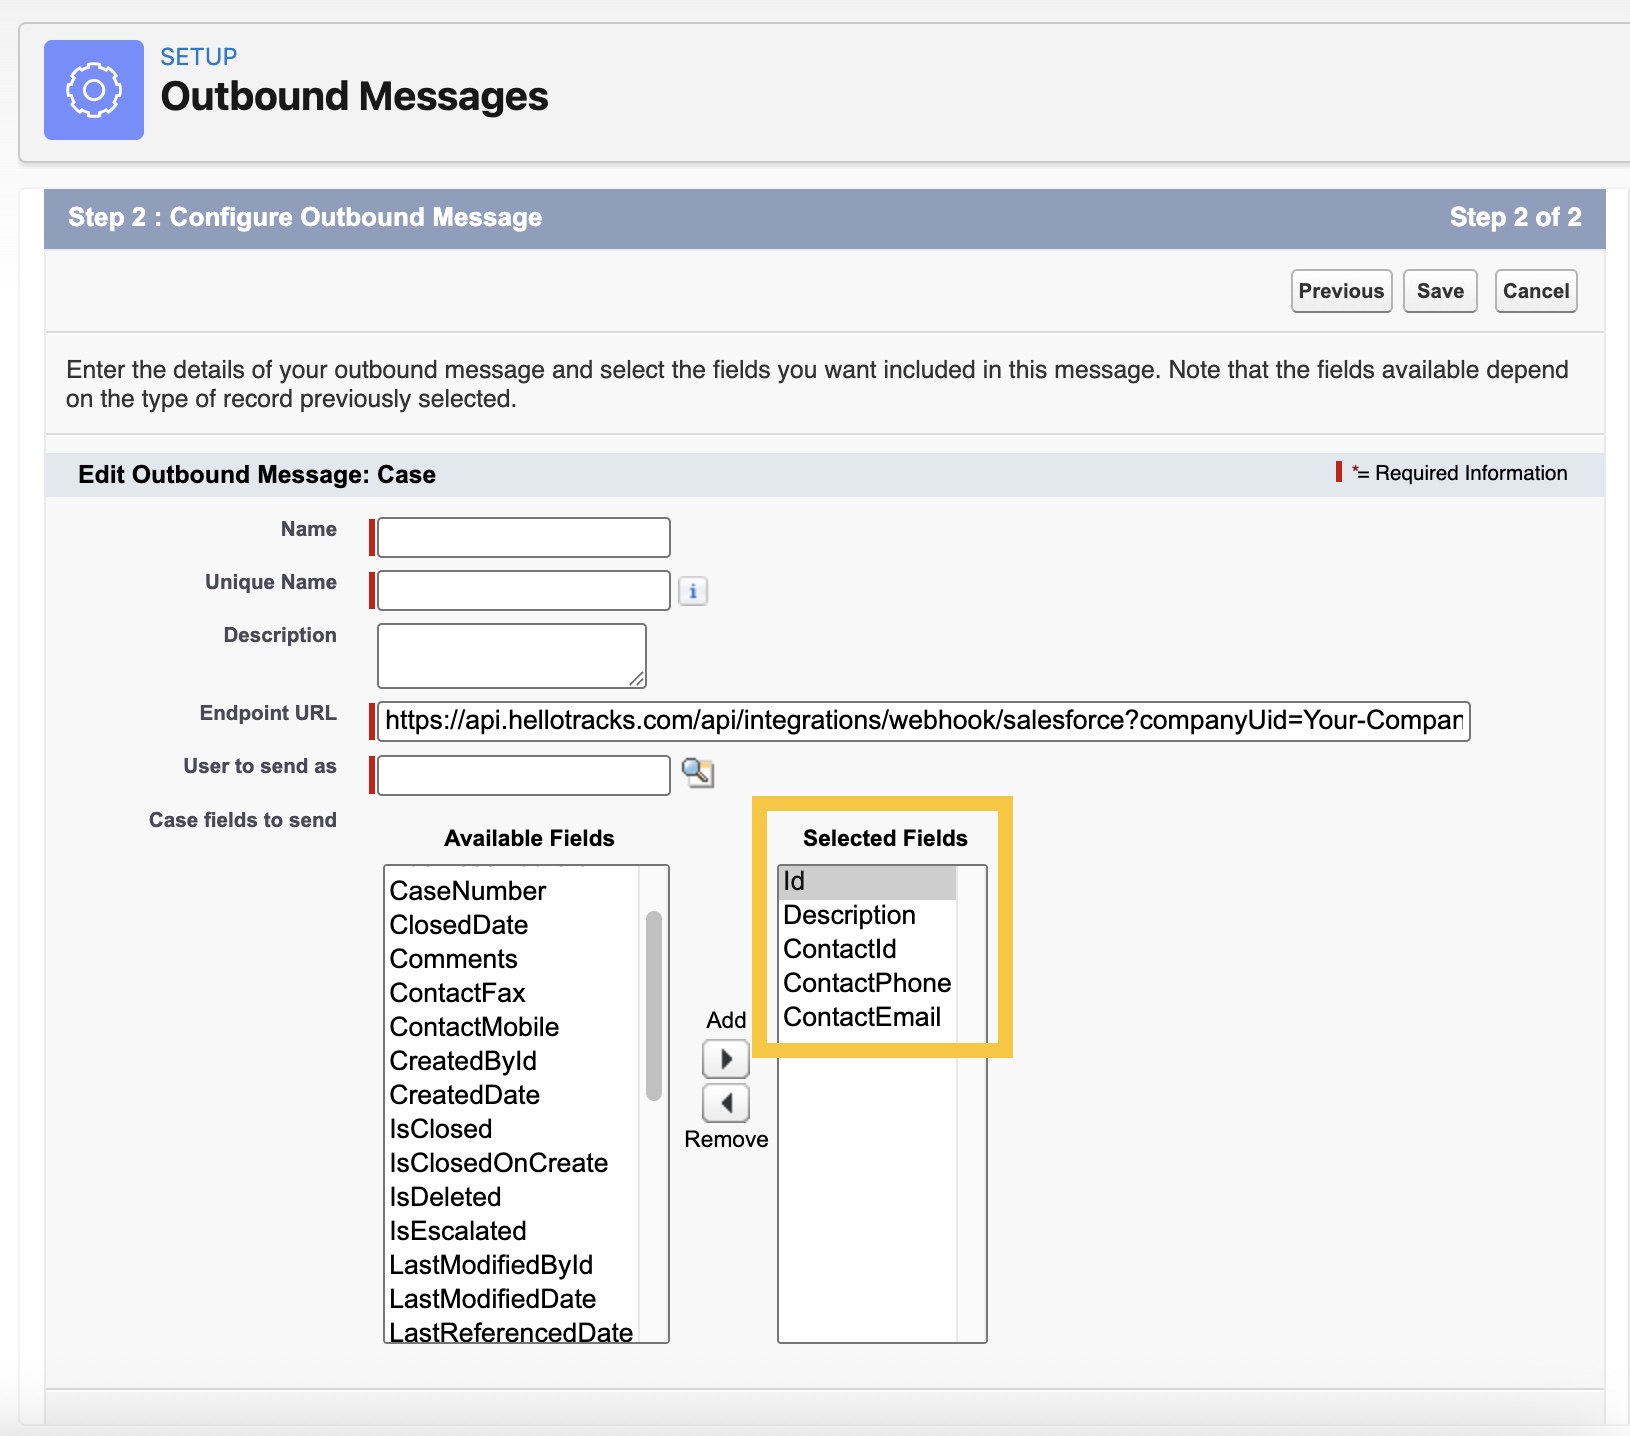
- Under Case fields to send, select the fields you plan to use for field mapping, then move them to Selected Fields. Ensure Id is included.
Note: You can return here later to add additional Salesforce fields for mapping.
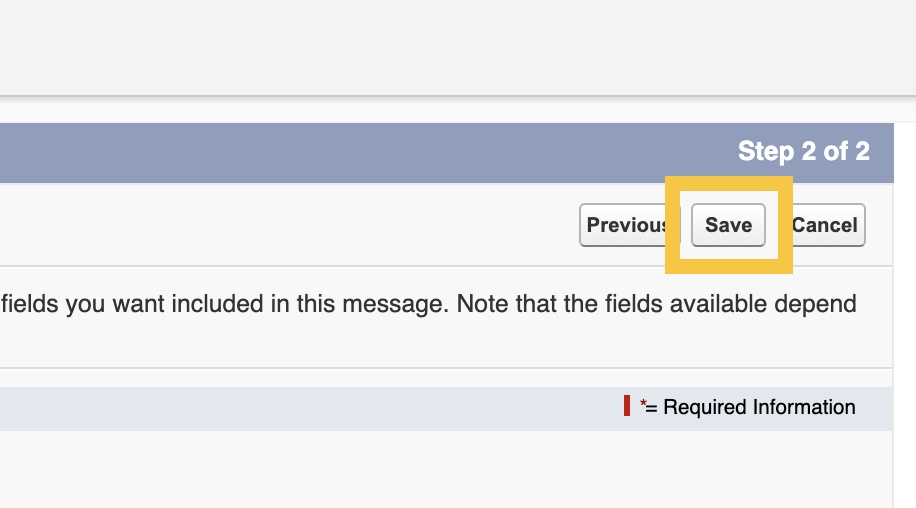
Step 20: Click Save.
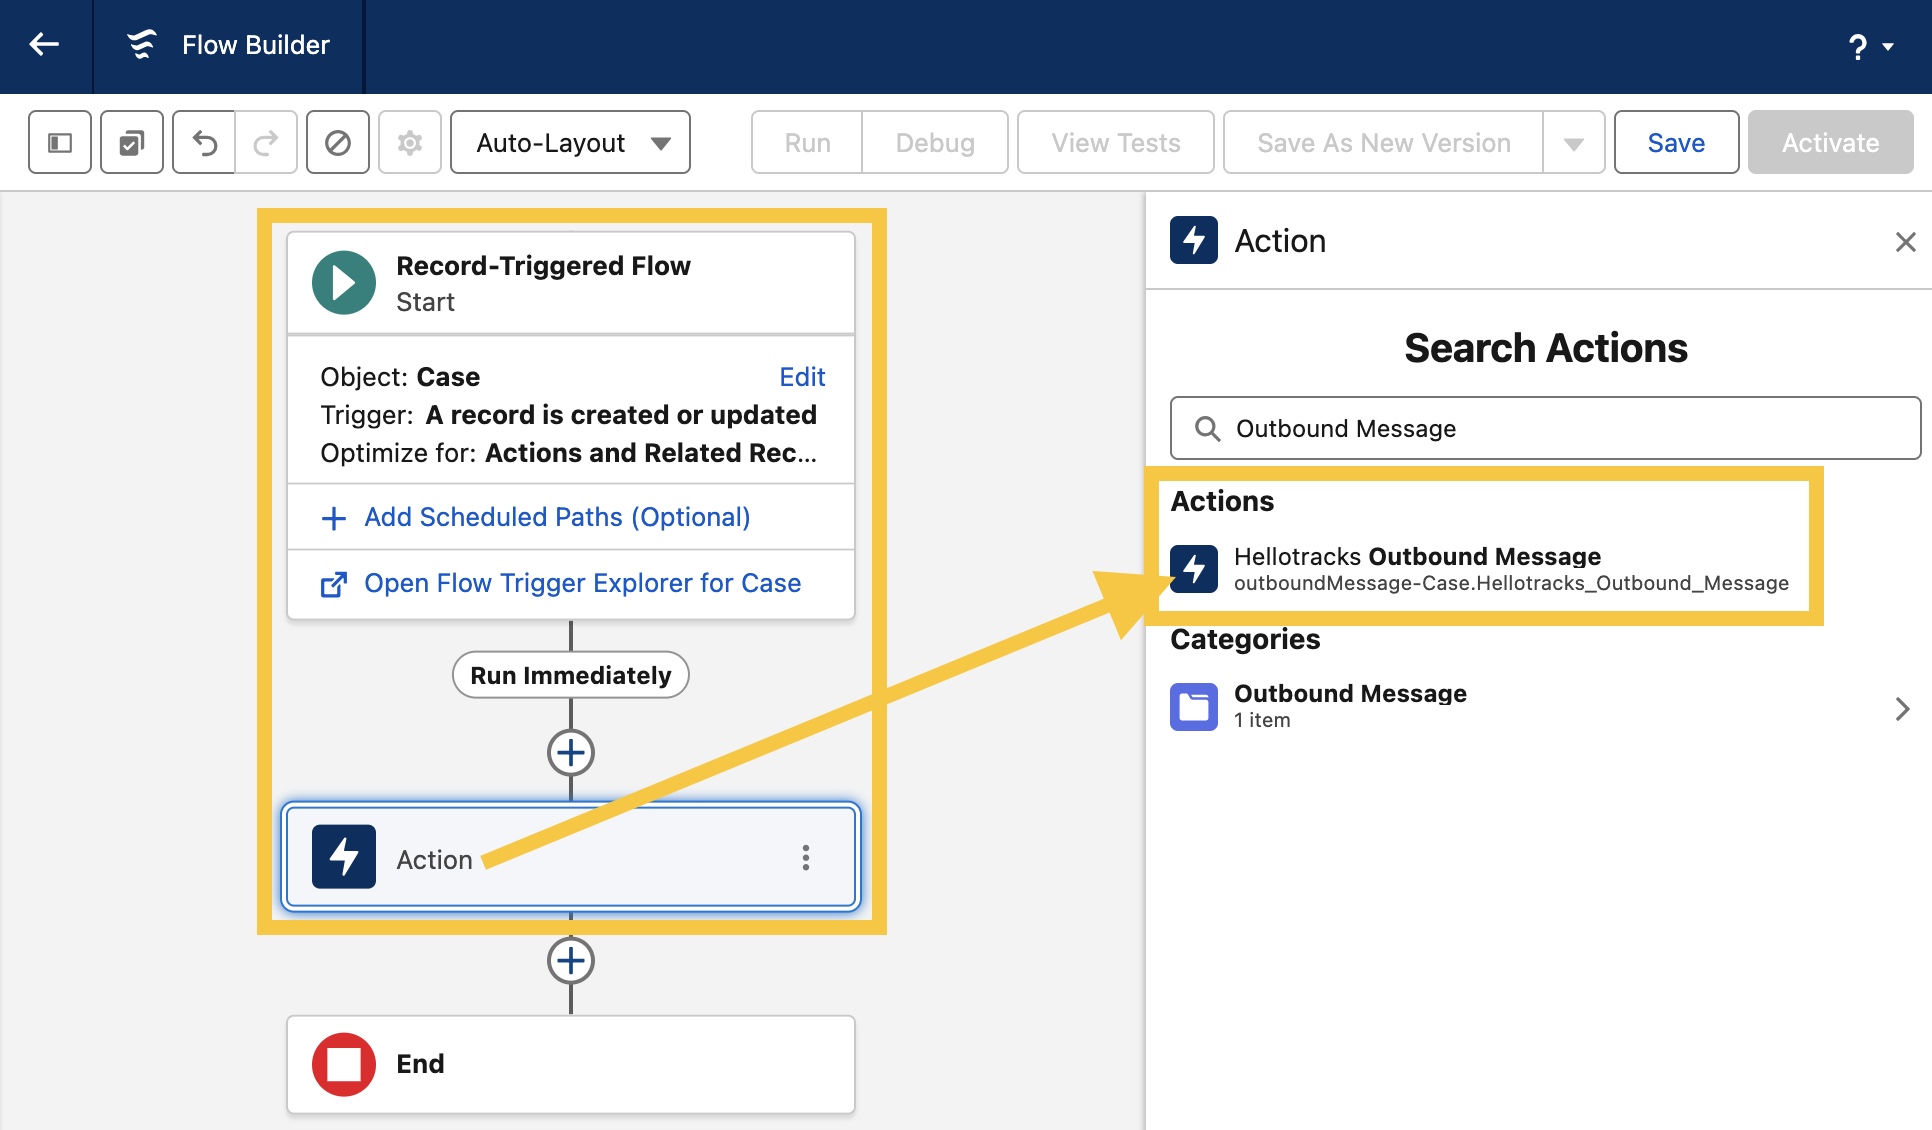
Step 21: Create a Flow (or Workflow Rule) to trigger the Outbound Message when a case is created or updated. To learn more about creating a Flow, refer to Salesforce Flow Builder documentation here.
Example of a Case Flow using the Hellotracks Outbound Message:
4.2 (Optional) Set Up Webhooks via Apex or Custom JSON Callout
Use this advanced option if you require more control over the data or trigger logic.
Step 22: In Salesforce, create an Apex class or custom JSON callout to send HTTP POST requests.
Step 23: Send them to the same webhook URL, without the token parameter:
https://api.hellotracks.com/api/integrations/webhook/salesforce?companyUid=Your-Company-ID
To get it, copy the URL under Salesforce Outbound Message in Hellotracks (as in Step 19) and remove &token=<your-webhook-secret> at the end.
Step 24: Configure the Authorization header and JSON request body.
-
POST one of the following JSON bodies:
{"caseId":"<CaseId>"}or
{"caseIds":["<CaseId>"]}
-
Authorization header:
Authorization: Bearer <your-webhook-secret>
Replace <your-webhook-secret> with the Webhook secret you saved in Hellotracks in Step 13.
Step 25: Set up the Apex or custom JSON callout to run when a case is created or updated.
Once connected, configure your field mappings to define how Salesforce case fields map to Hellotracks job fields.
To learn how to map Salesforce case fields to Hellotracks jobs, click here.
If you have questions or difficulties with your Salesforce integration, please contact support via support@hellotracks.com.