How to Enable Two-Factor Authentication (2FA)
Two-factor authentication (2FA) adds an extra layer of security for Administrators and Operators when signing in to the Web dashboard by requiring them to enter:
- Their regular password, and
-
A one-time 6-digit verification code generated by an authenticator app.
Before you start: Make sure you have a compatible authenticator app installed on your mobile device, such as Google Authenticator, 1Password, or Authy.
Each Administrator and Operator must set up two-factor authentication (2FA) in their own Profile settings.
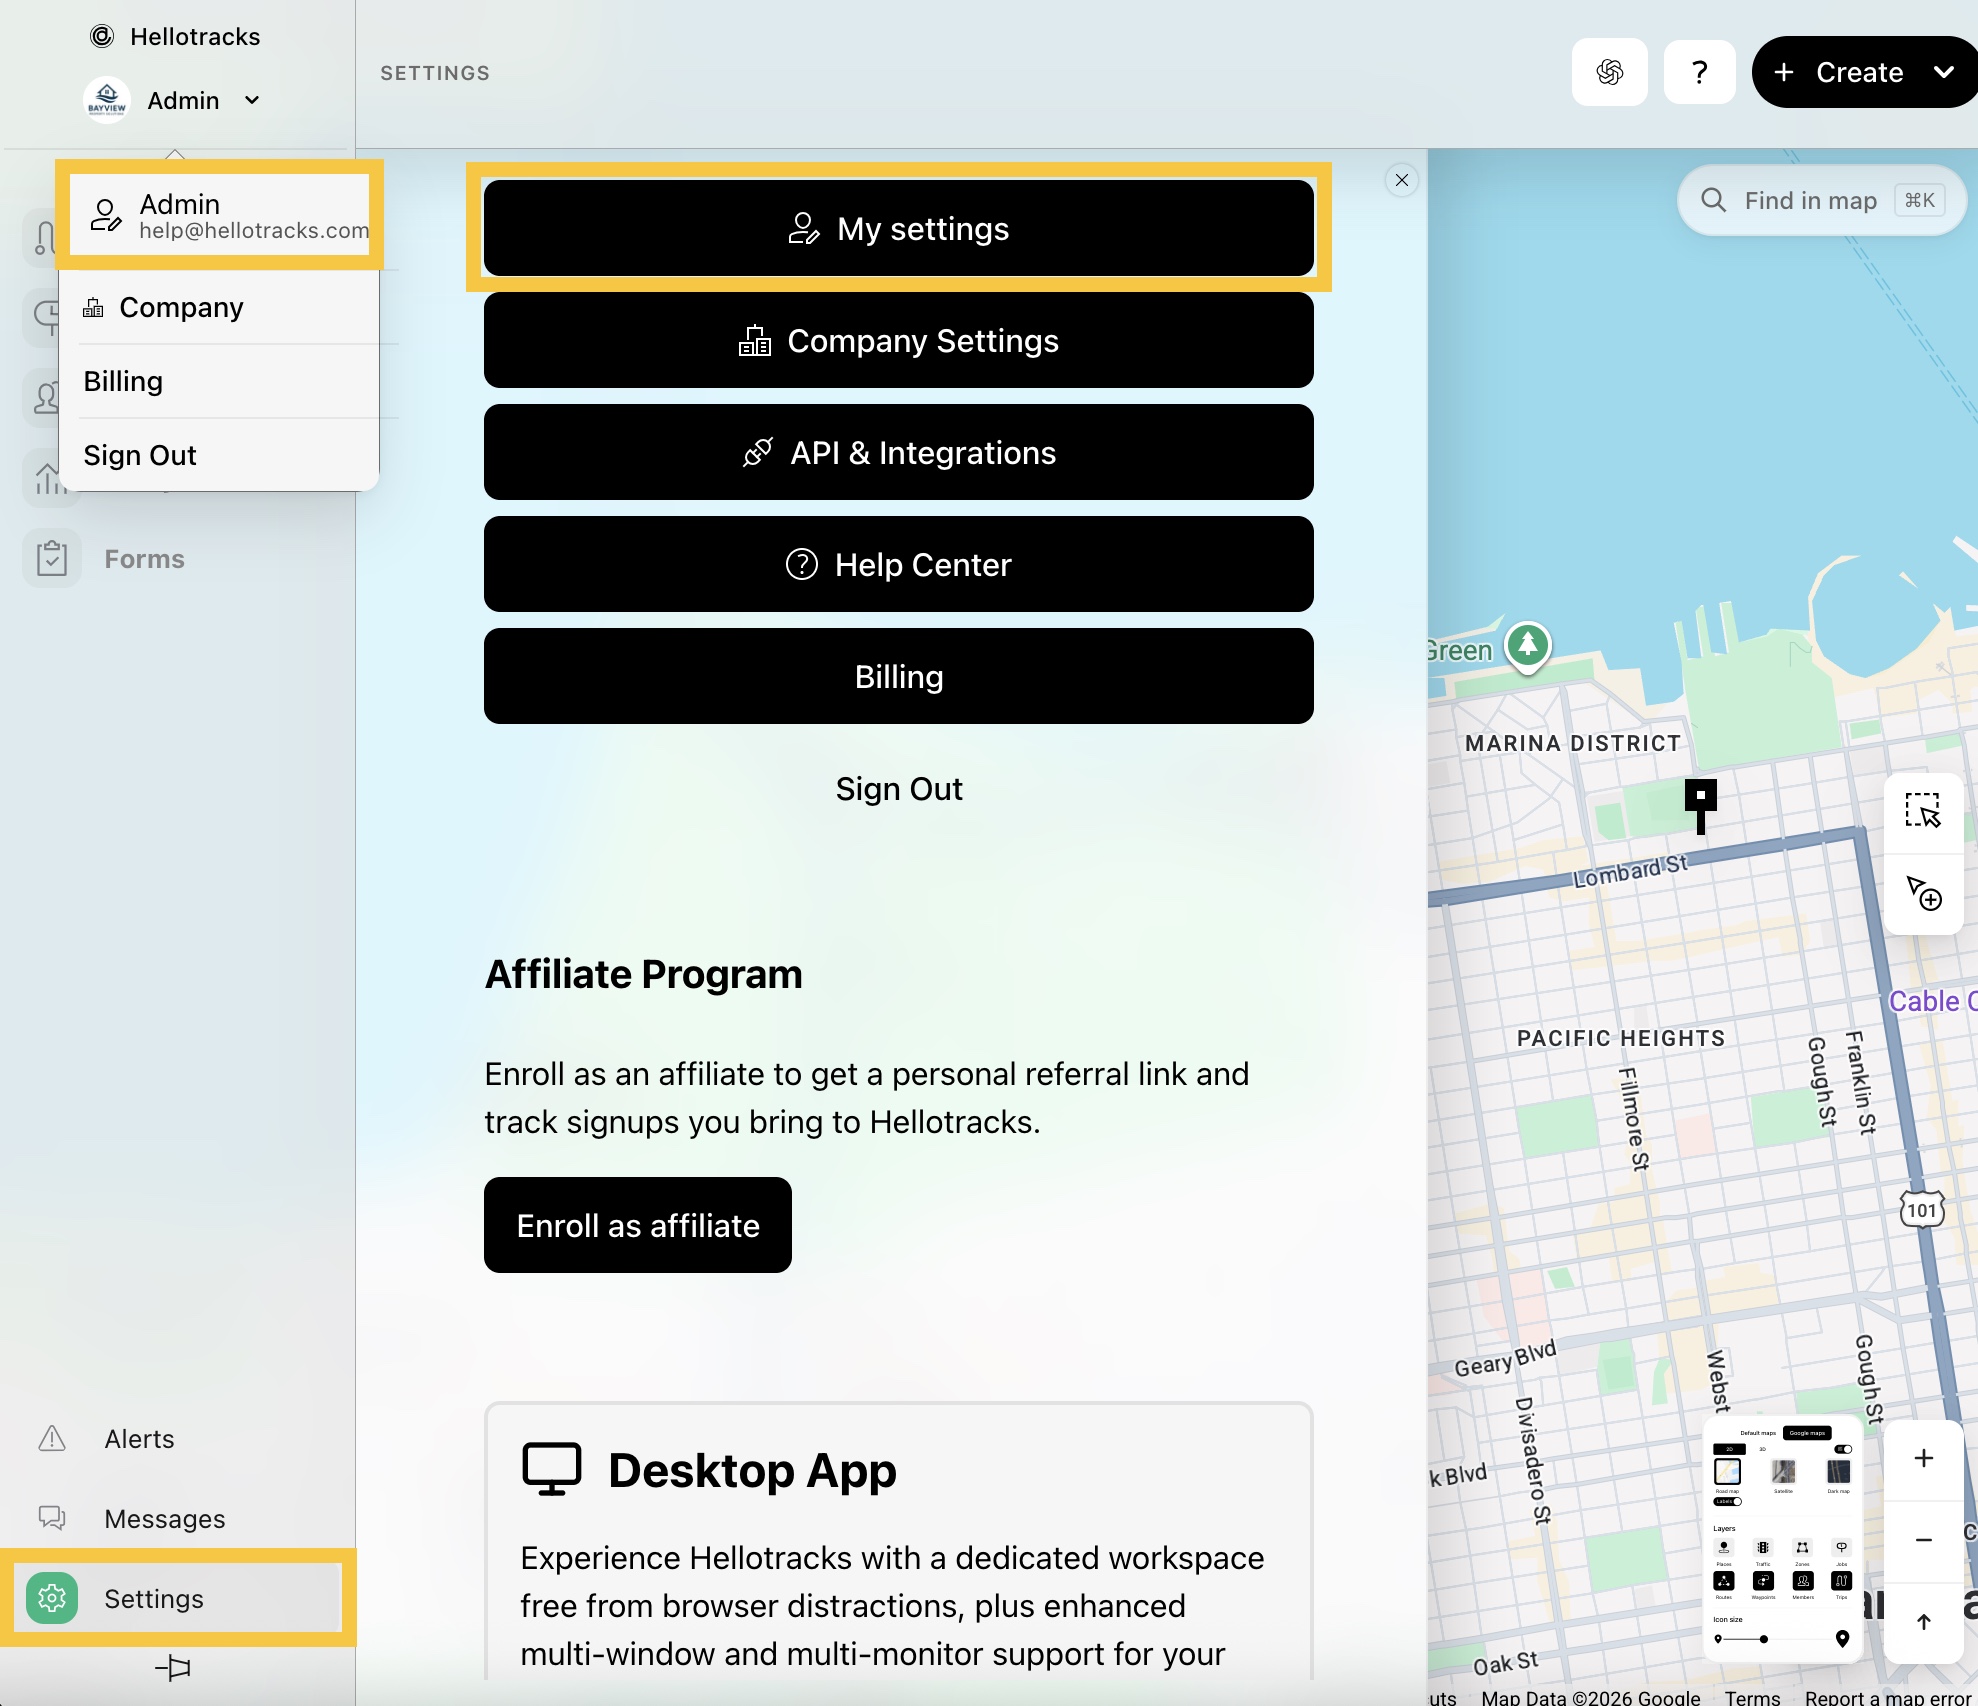
Step 1: Click the dropdown menu next to your profile, then select your profile. Or, go to Settings at the bottom of the main menu and select My settings.
Step 2: In Profile, click Set up authenticator app.
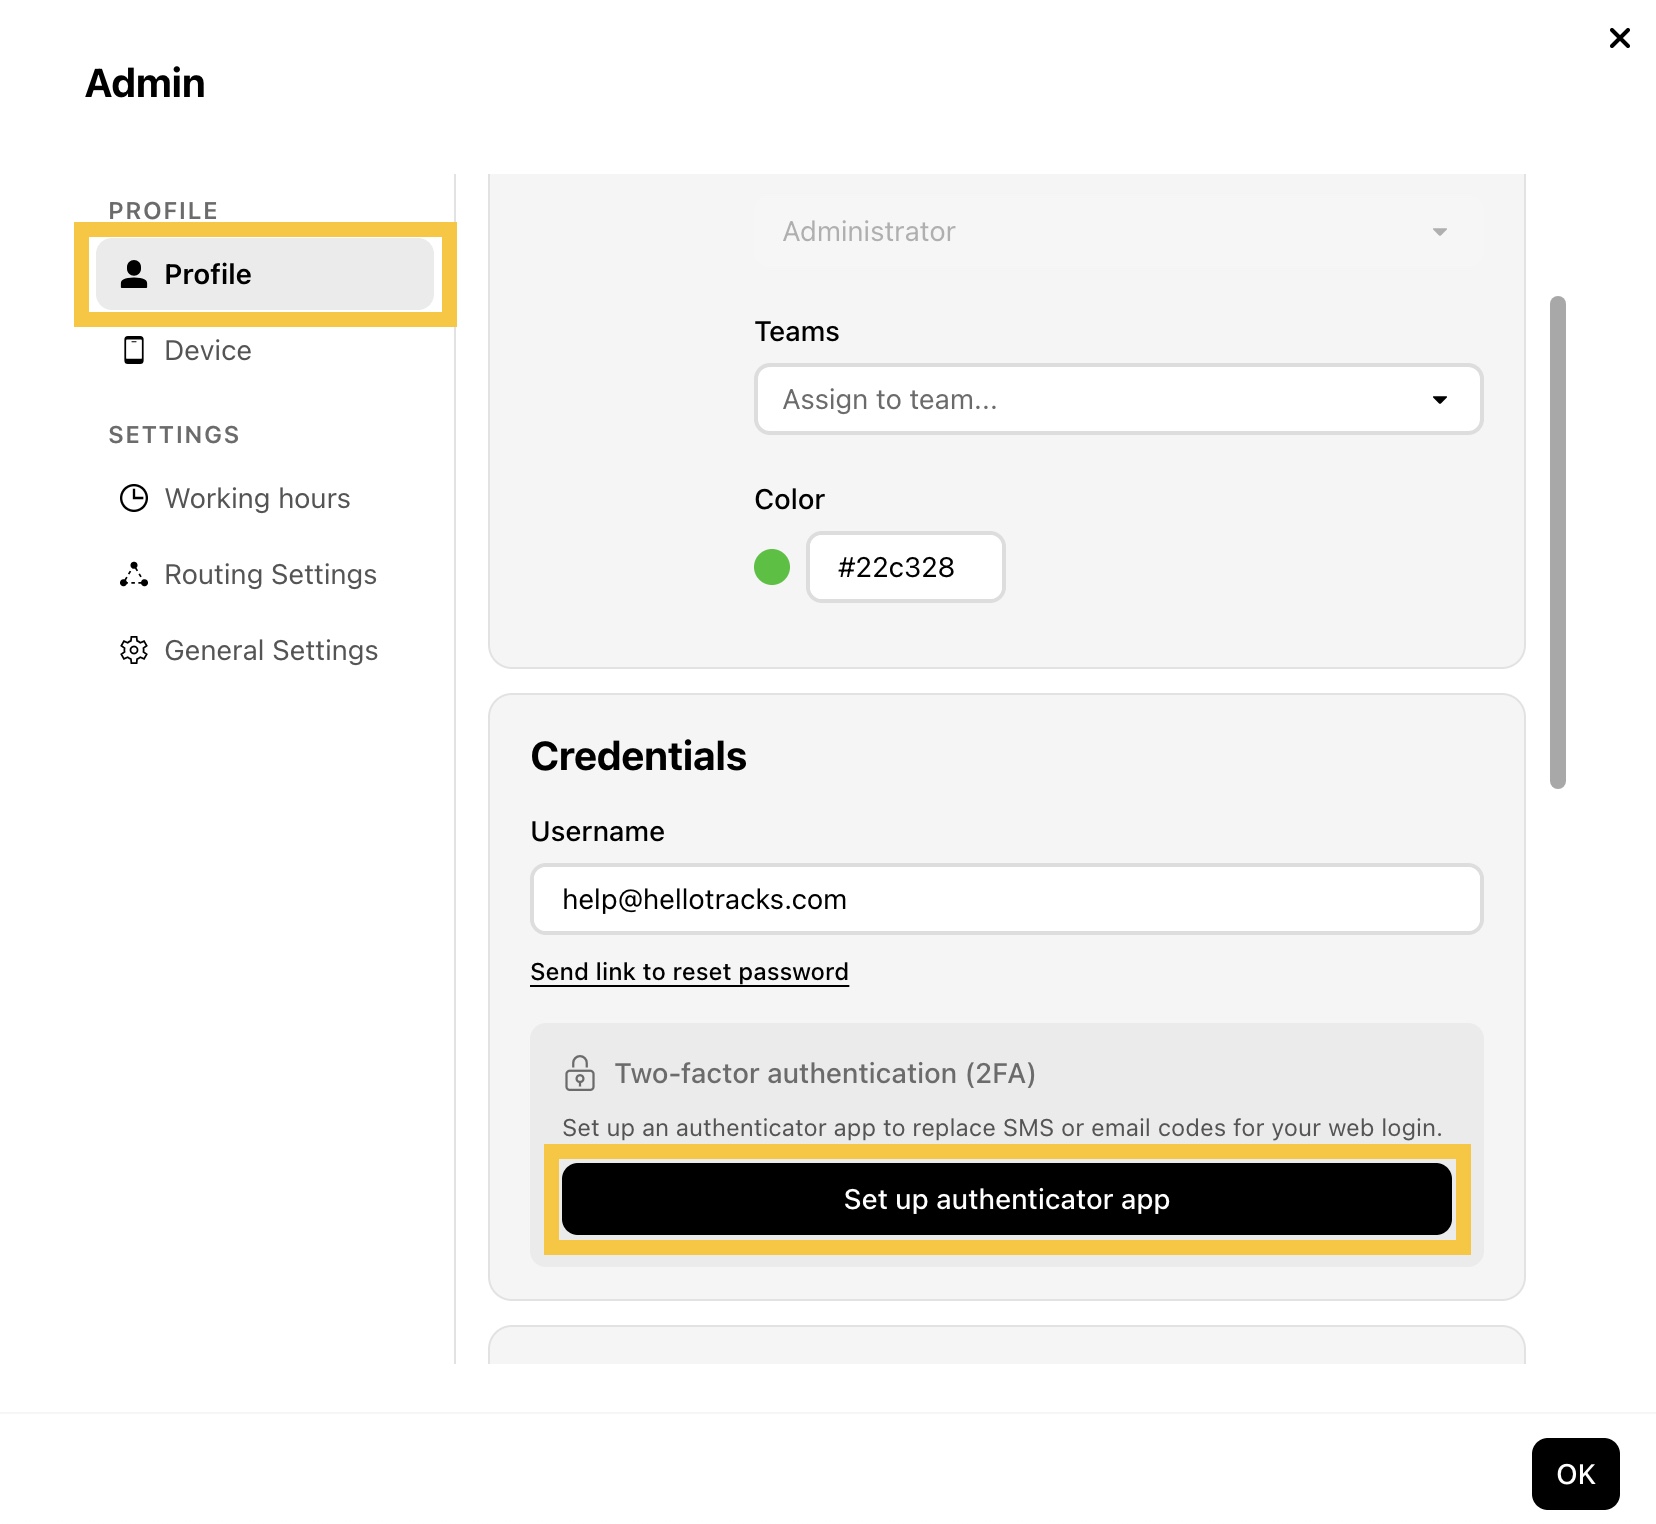
Note: Only a member with the Administrator or Operator role—who has access to the Web dashboard—will see the option to enable 2FA; this option isn’t available for Workers.
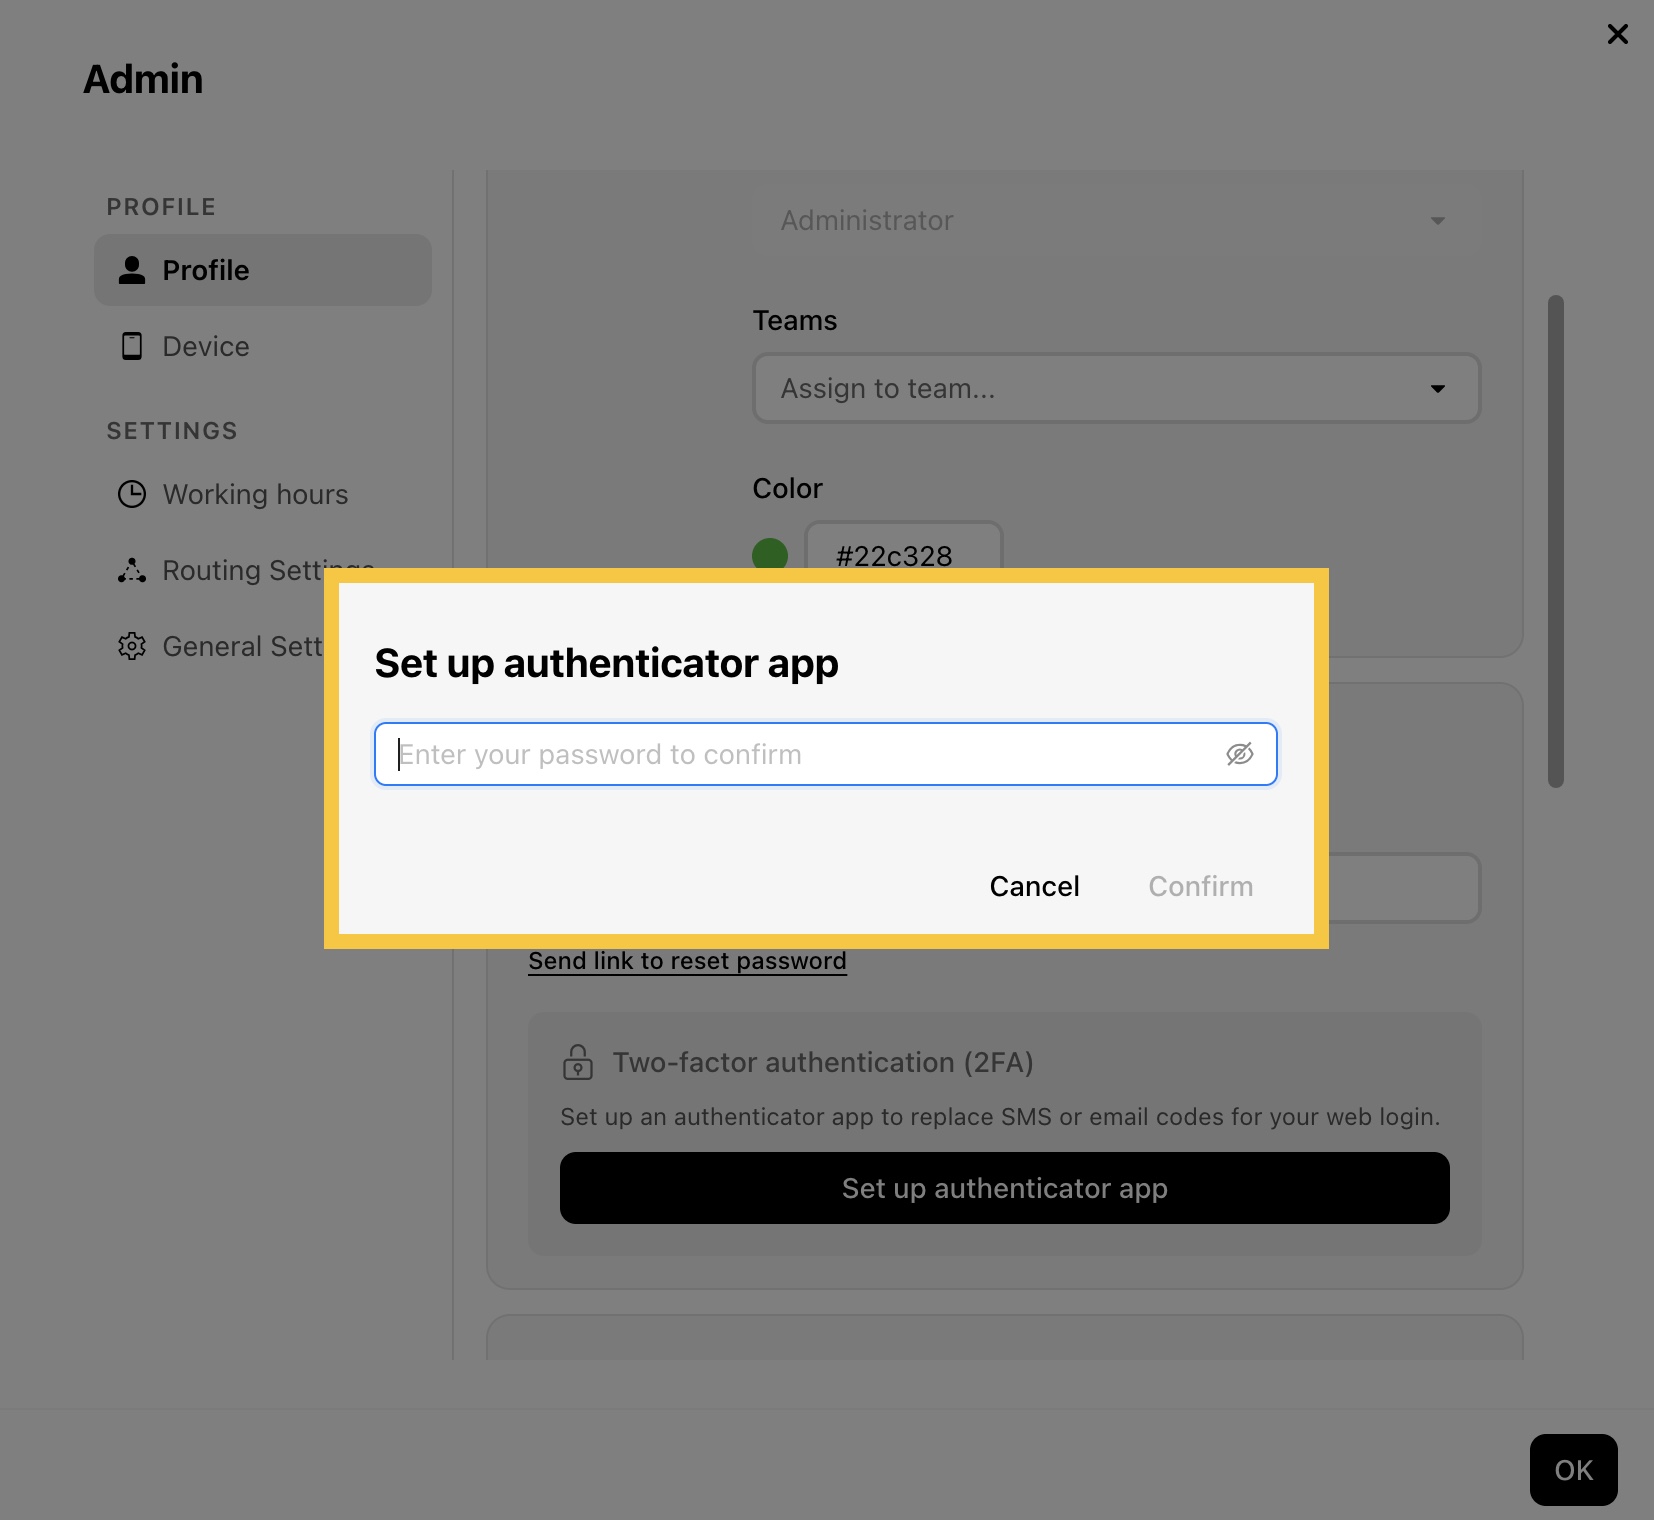
Step 3: Enter your password, then click Confirm.
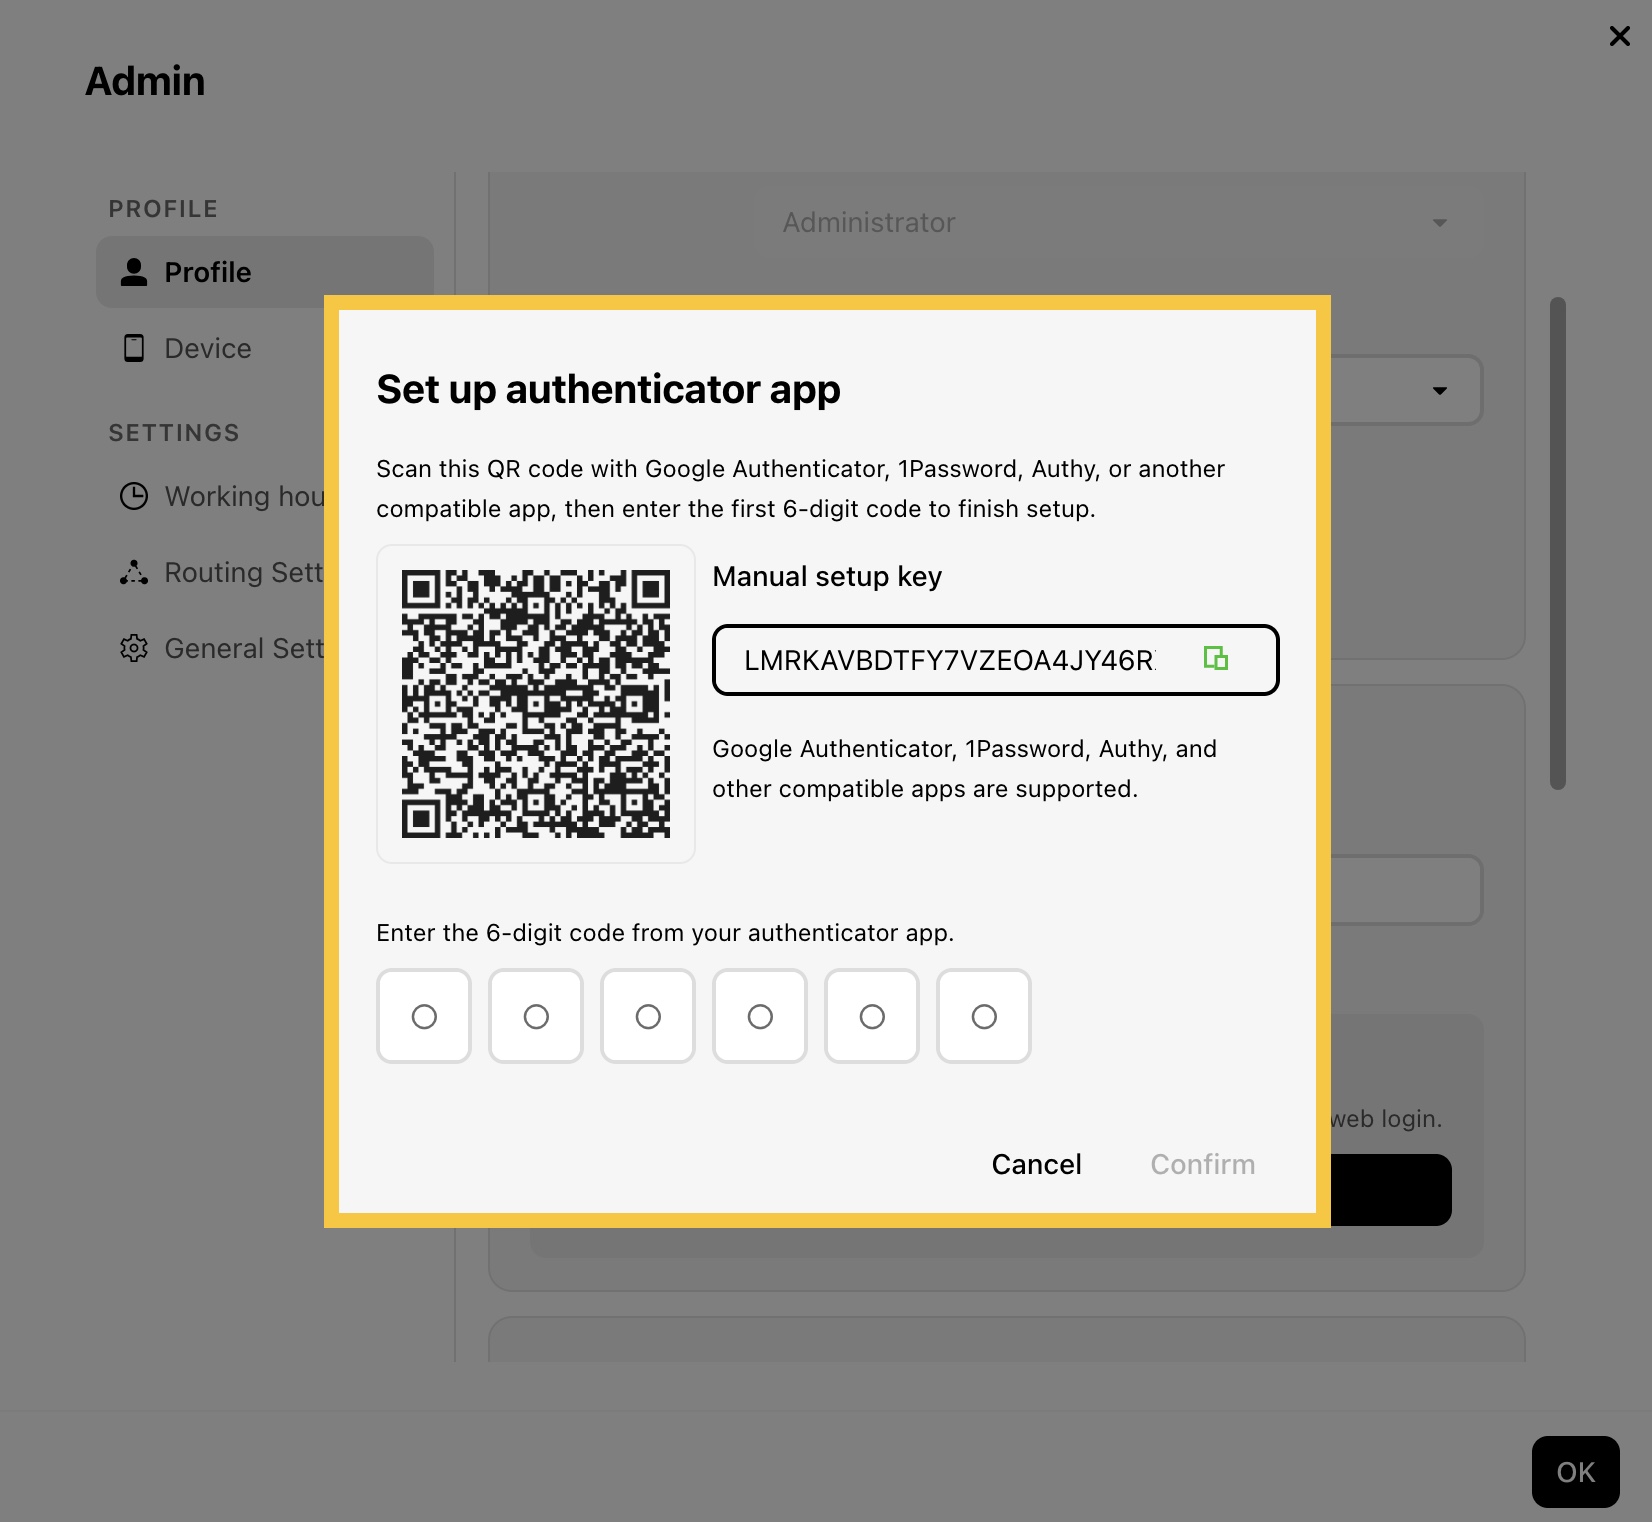
Step 4: Scan the QR code with your authenticator app, or enter the manual setup key. Then enter the 6-digit code and click Confirm.
Step 5: Save your backup codes by downloading, printing, or copying them, then click Close.
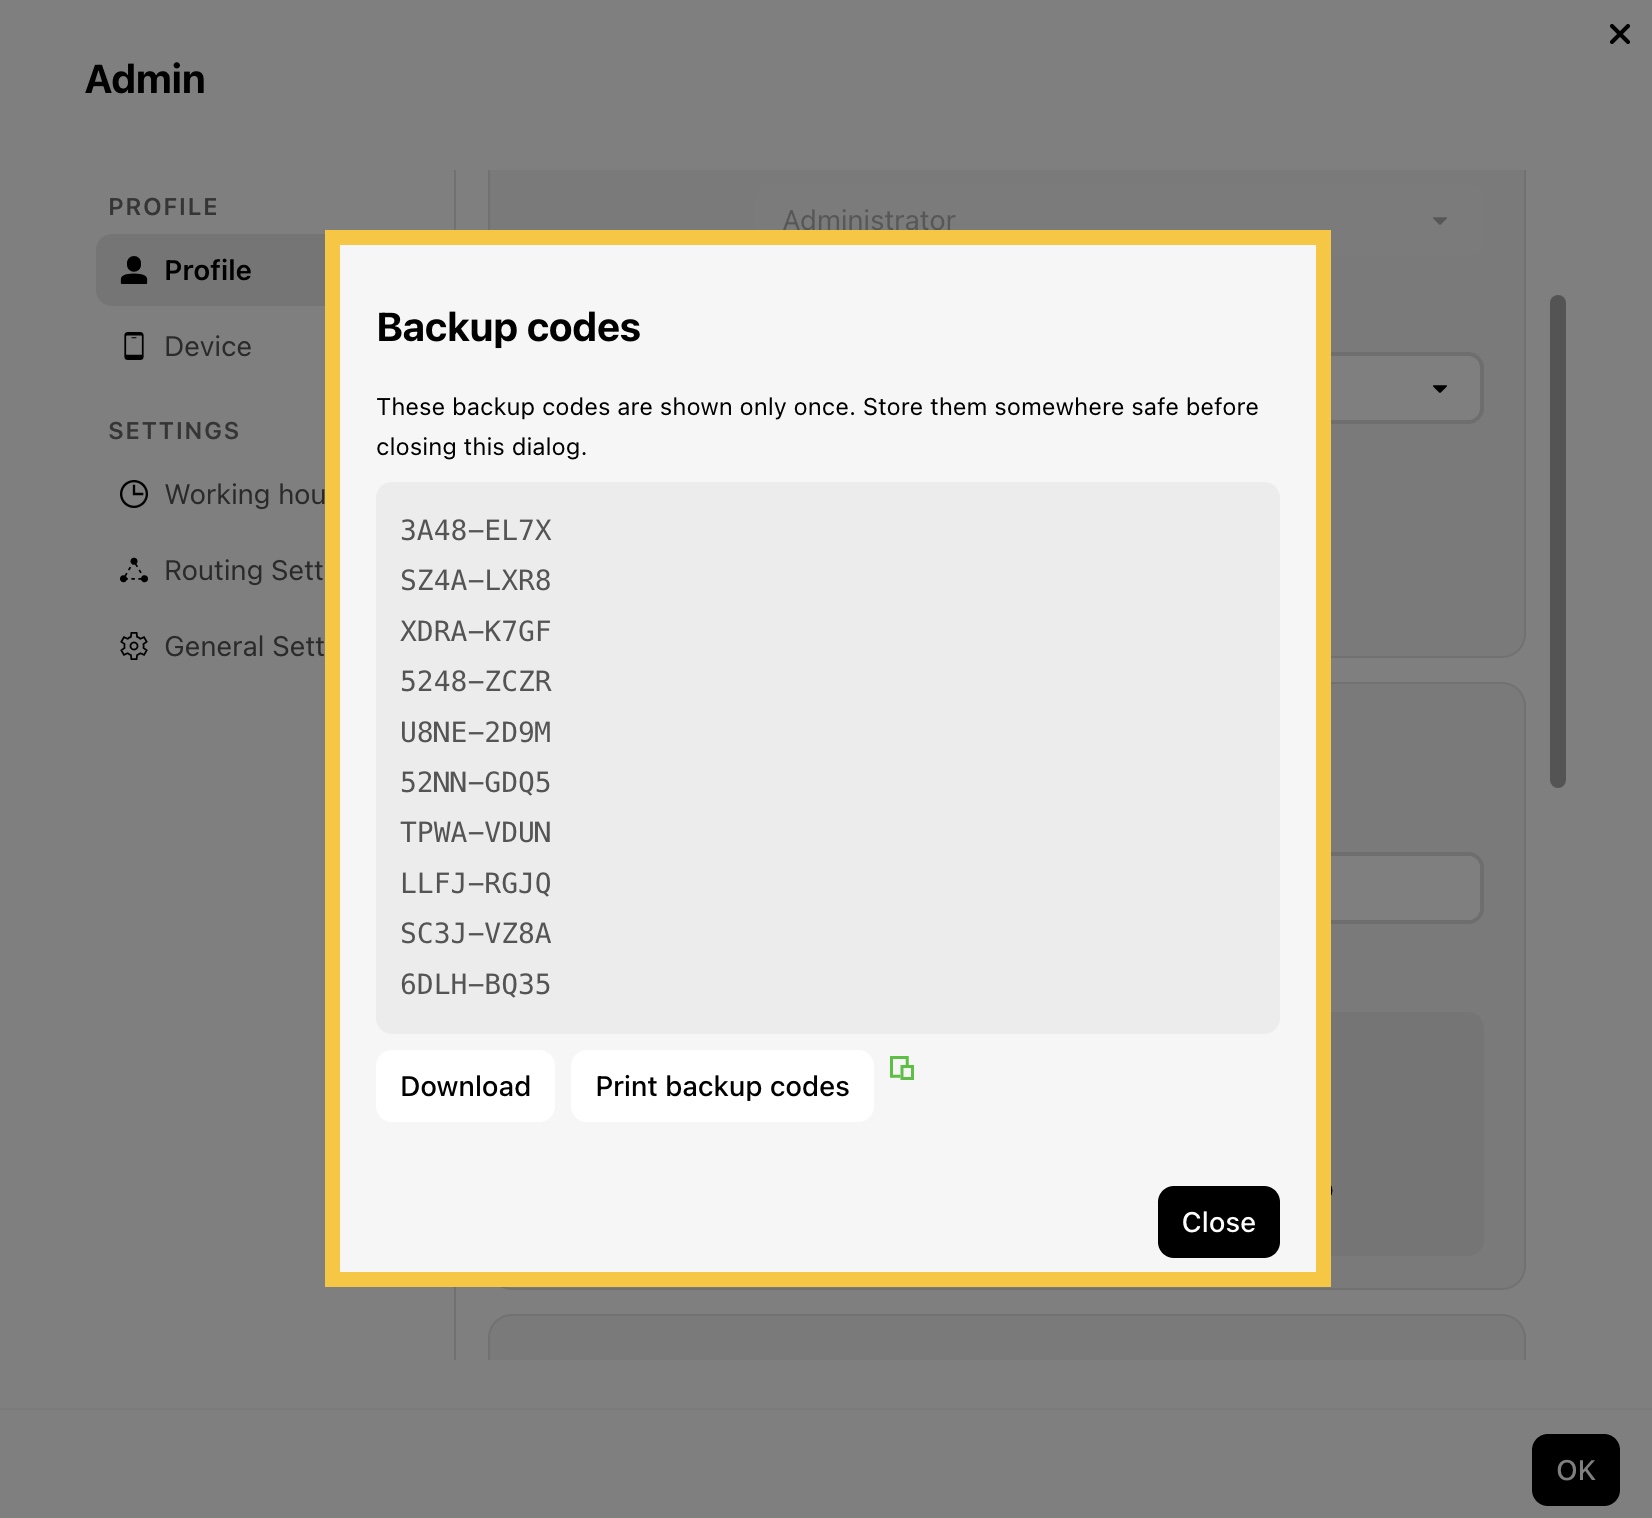
Note: Backup codes can be used to sign in if you don’t have access to your authenticator app. To learn more, click here.
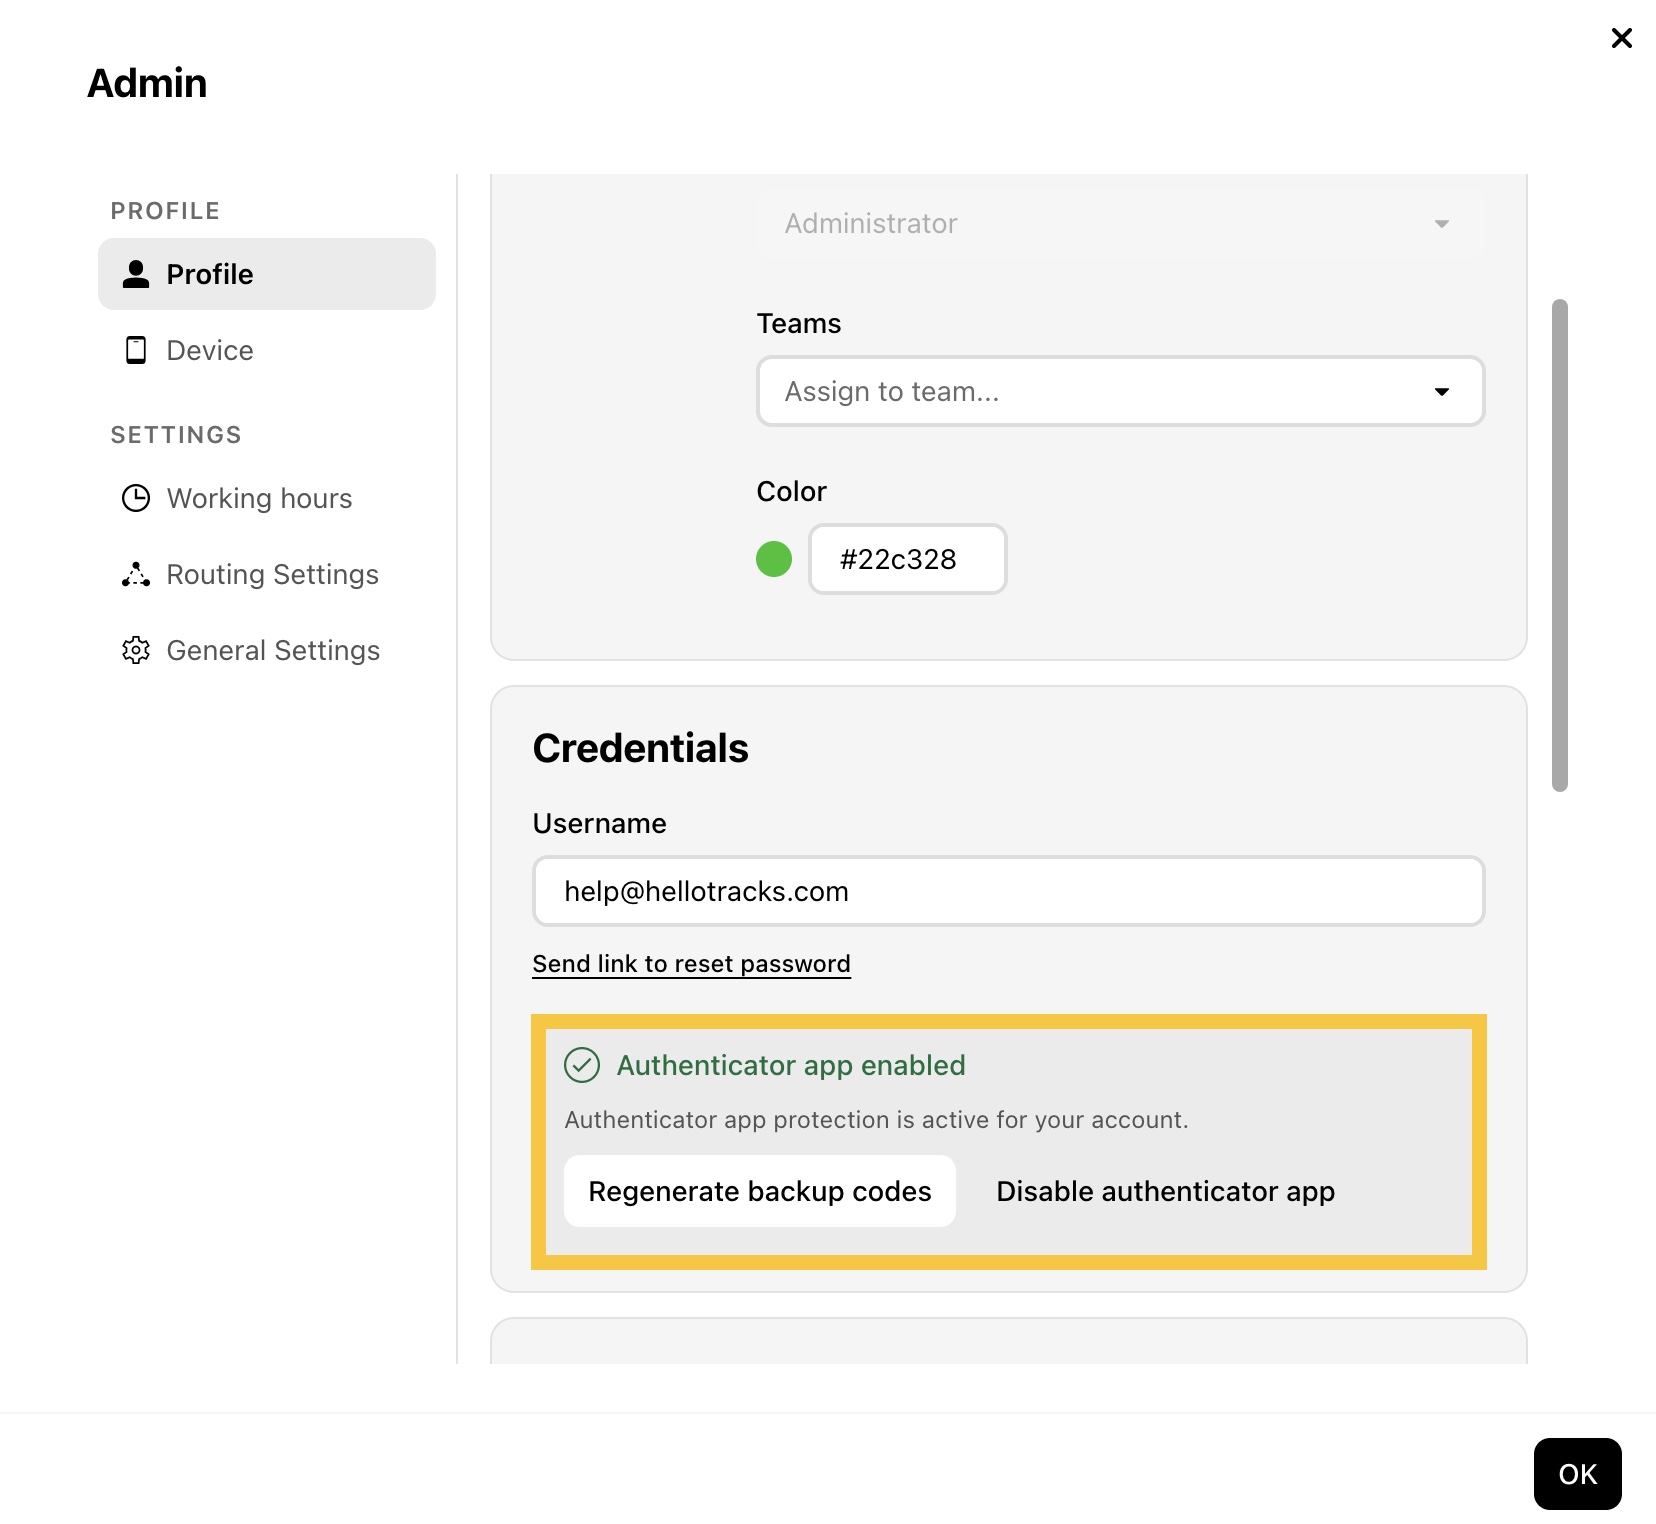
Step 6: Two-factor authentication (2FA) is now enabled for your account. You can regenerate your backup codes or disable the authenticator app at any time from your Profile settings.
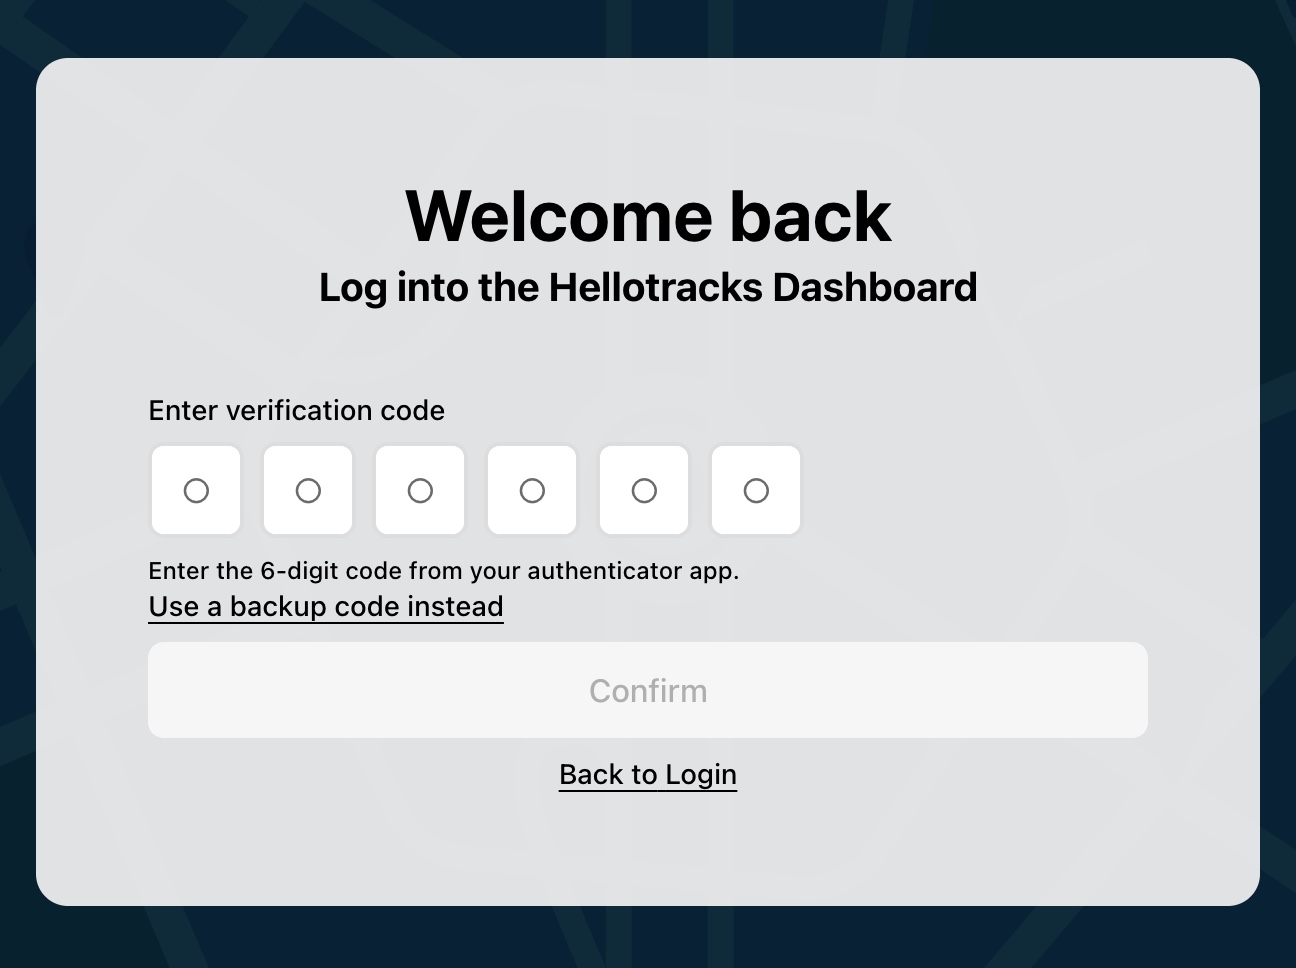
Step 7: The next time you sign in to the Web dashboard, enter the 6-digit verification code from your authenticator app. To use a backup code instead, click Use a backup code instead.