How Do Check-Ins & Check-Outs Work?
When team members arrive at or depart from Places or Jobs, their arrival, departure, and total on-site time are registered.
In Hellotracks Business, check-ins (arrivals) and check-outs (departures) can be registered in two ways:
- Automatic: Enable the automatic check-ins and check-outs at Places or Jobs.
-
Manual: Advise your team to manually check-in and check-out in the mobile app.
In this guide:
1. How to Use Auto Check-Ins & Check-Outs
2. How to Use Manual Check-Ins & Check-Outs from Mobile App
3. How to View Team Check-Ins & Check-Outs in the Web Dashboard
-
How to Use Auto Check-Ins & Check-Outs
Step 1: Click the dropdown menu next to your profile and select Company. Or, go to Settings at the bottom of the main menu and select Company Settings.

Step 2: Select Company Settings.

Step 3: In Auto Check-ins at Places and Jobs, check the box to enable automatic check-ins/outs.
Once enabled, you can adjust:
- Delay: Set a minimum time before an automatic check-in is registered. This helps prevent duplicate or false check-ins when a team member is just passing by a location.
- Area size for check-ins at Jobs: Choose the geofence size to trigger automatic check-ins at Jobs.
For Places, the area size for check-ins uses the Place radius. To adjust the radius, click here.
Then, click Save.

-
How to Use Manual Check-Ins & Check-Outs from Mobile App
Advise your team to follow the steps below in the mobile app.
Places
Step 1: Open the Hellotracks app on your Apple or Android device.
Step 2: Tap on the main menu in the upper left corner.

Step 3: Select My places.

Step 4: From your list, select the Place that you want to check-in/out.

Jobs
Step 1: Open the Hellotracks app on your Apple or Android device.
Step 2: Tap Jobs to see the list of your Jobs for the day.

Step 3: Tap on a Job, then tap More (three dots icon).

Step 4: Select Manual check-in or Manual check-out. Your manual check-in/out will then be recorded and displayed under Manual Checks within the Job.

Note: Make sure your current location corresponds to the specified Job location. Job check-ins require being within the allowed proximity (e.g., 100m or 300m). For Places, proximity depends on the Place radius.
-
How to View Team Check-Ins & Check-Outs in the Web Dashboard
After configuring check-ins and check-outs for your team, go to Location from the main menu and select Location History.
- In the Trips and Stops view, apply the At place, At jobs, or Stationary (outside defined locations) filter to view each member’s check-ins and total on-site time.

- In the Timeline view, all events are displayed in chronological order, including check-ins and check-outs.
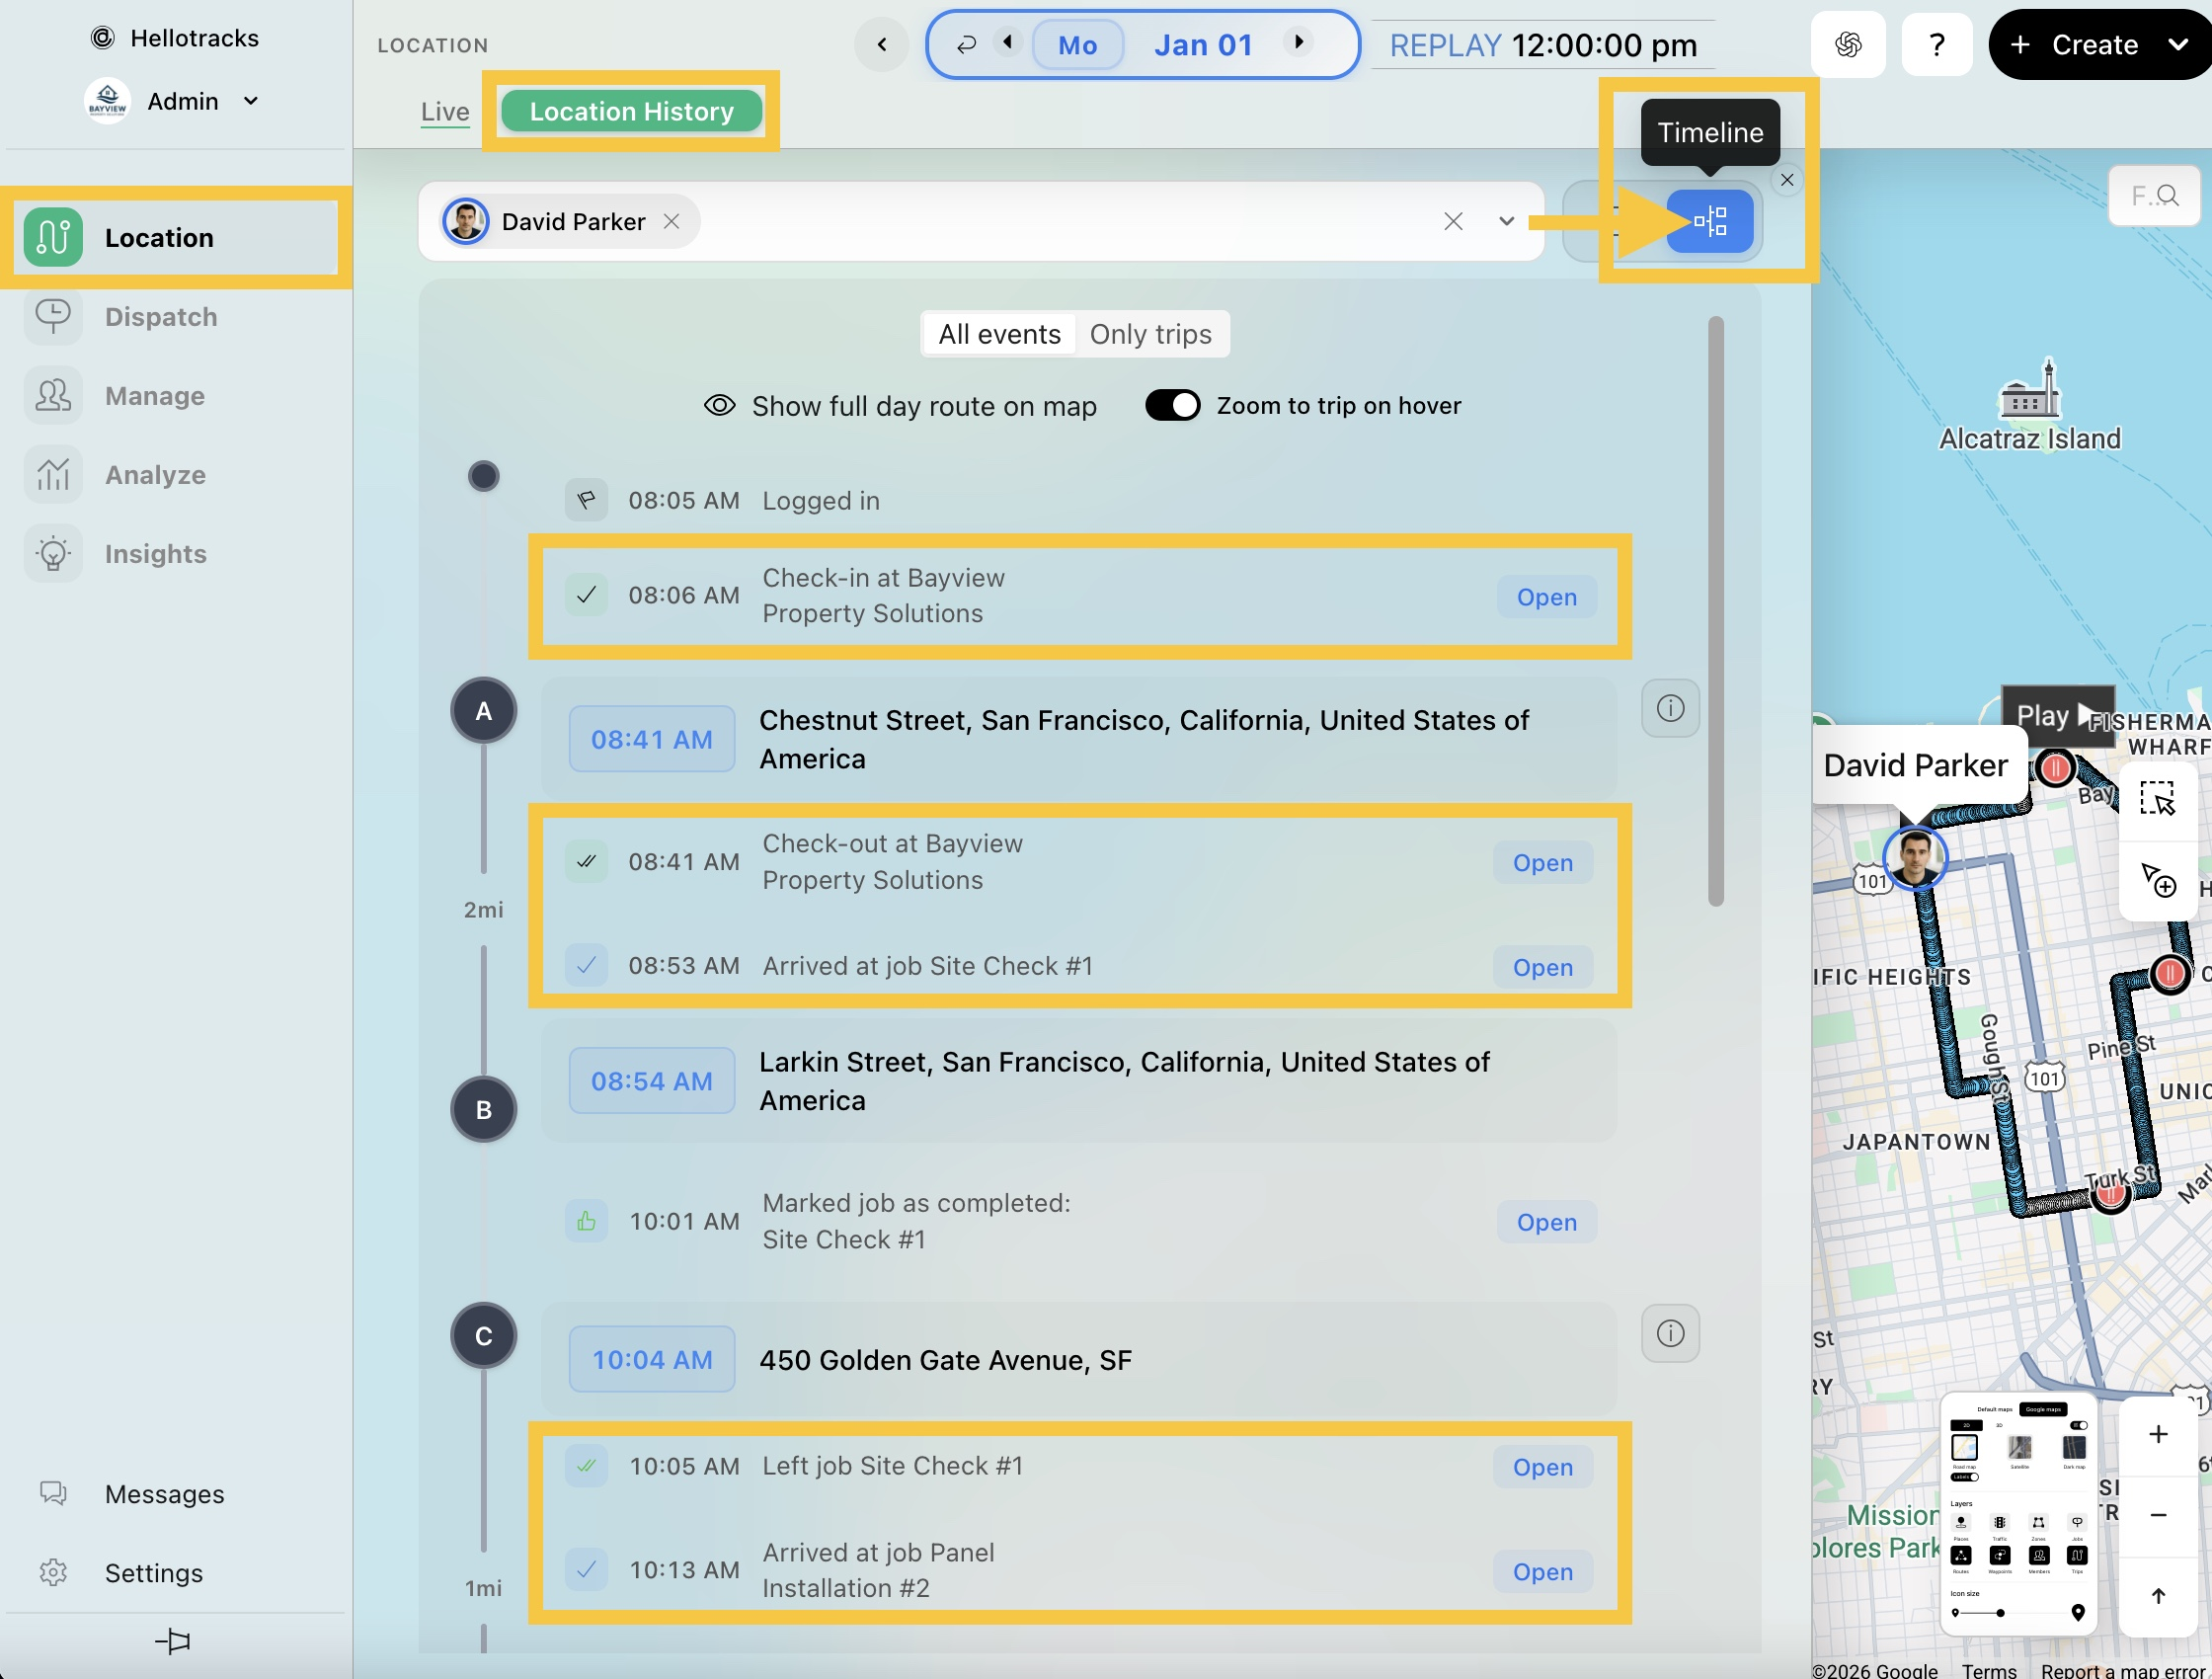
Note: Manual check-ins and check-outs are shown in the Timeline view.